
How to Make Perfect Air Fryer Tuna Patties: Crispy Outside, Tender Inside (2025)

Air fryer tuna patties have become my go-to solution for quick, healthy meals that don’t sacrifice flavor. I can whip up these delicious patties in less than 15 minutes without preheating, making them perfect for busy weeknights when time is limited but we still want something satisfying.
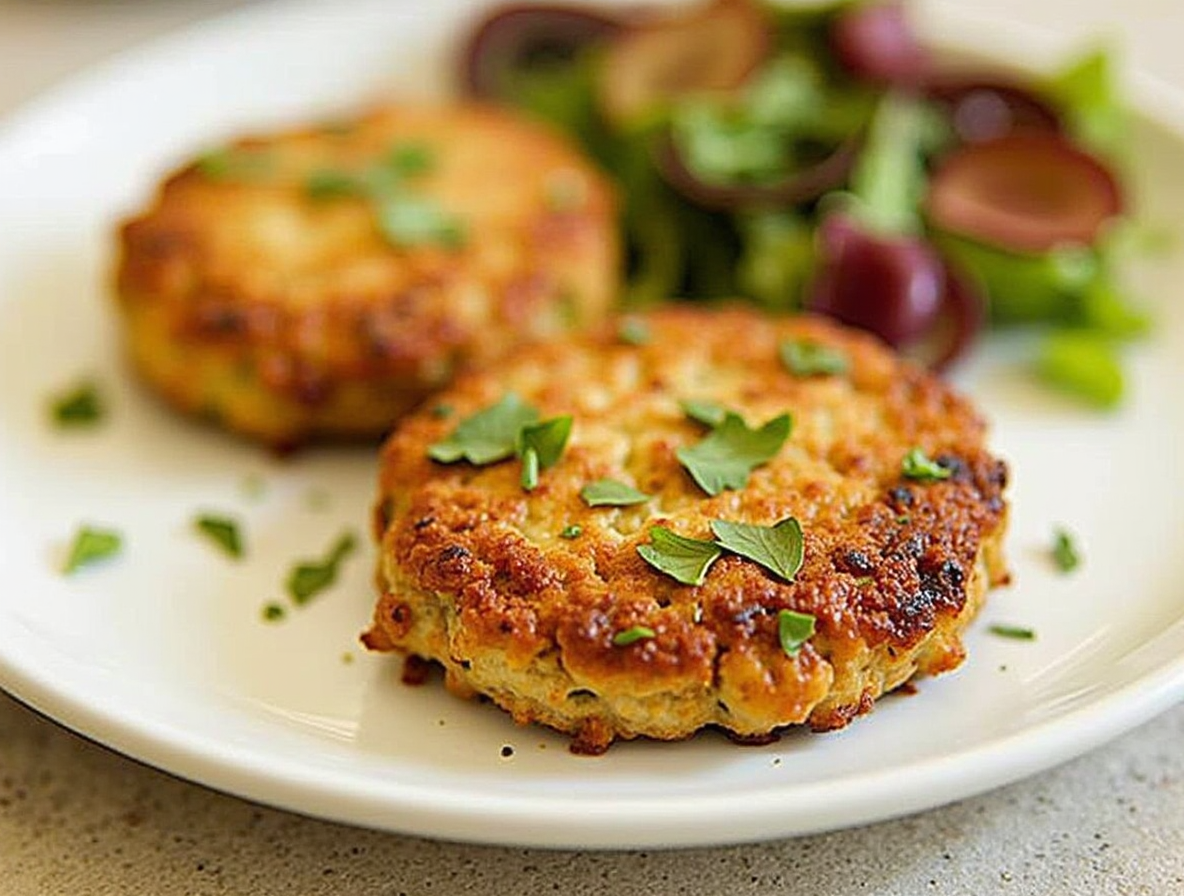
What makes these tuna patties air fryer recipes stand out is the perfect texture—deliciously soft and flavorful inside with a wonderfully crunchy exterior. Additionally, this method uses significantly less oil compared to traditional frying, resulting in healthier patties with approximately 83 calories each. We’ve tested numerous variations to create the best air fryer tuna patties that are not only easy to prepare but also budget-friendly, as tuna is typically an economical protein source.
Throughout this guide, I’ll share my step-by-step process for creating these versatile patties that can be customized with various seasonings. You’ll learn how the air fryer cooks these patties three to five times faster than conventional ovens while eliminating common issues like sticking and overcooking. If meal prep is important to you, these patties can certainly be frozen for up to three months, giving you a convenient option for future meals.
Choosing the Right Ingredients for Tuna Patties
The foundation of perfect air fryer tuna patties begins with selecting quality ingredients. Creating that ideal crispy-outside, tender-inside texture depends on making smart choices for each component.
Best type of canned tuna to use
For superior tuna patties, I recommend using albacore or skipjack tuna packed in water. Albacore offers a milder flavor and firmer texture that holds together well when air fried. Water-packed tuna works better than oil-packed because it’s easier to control moisture in your patties. Furthermore, choosing sustainably sourced tuna from brands like Wild Planet or American Tuna ensures not only environmental benefits but also higher quality product with lower mercury levels.
Breadcrumbs vs. panko vs. almond flour
The binding agent you choose significantly impacts both texture and dietary compatibility. Panko breadcrumbs create exceptionally crispy exteriors when air fried and are ideal for coating the outside of patties. Regular Italian-seasoned breadcrumbs work well mixed into the patty mixture itself, providing structure and flavor.
For those following gluten-free diets, almond flour makes an excellent alternative. It adds structure without breadcrumbs while keeping patties tender. Many recipes successfully use crushed crackers or even coconut flour as substitutes. Notably, for keto or low-carb diets, you can replace panko with parmesan cheese, almond flour, or crushed pork rinds.
Eggs and binders: what works best
Eggs serve as the primary binding agent in tuna patties, helping everything stick together during cooking. Most recipes call for 1-3 eggs depending on the amount of tuna used. Mayo (2-3 tablespoons) adds moisture and richness while helping bind ingredients. Alternatives include Greek yogurt or sour cream if you prefer different flavors.
Properly draining your tuna is essential—excess moisture is the most common reason patties fall apart. If your mixture seems too dry to form patties easily, try adding an additional egg.
Flavor boosters: herbs, spices, and aromatics
The aromatic foundation typically includes onions (red, green, or shallots) and fresh or powdered garlic. Fresh herbs like parsley, dill, or cilantro add brightness.
For seasoning blends, Old Bay is particularly popular, though many home cooks successfully use:
- Creole seasoning for Southern flair
- Lemon pepper for citrus notes
- Curry powder for Indian-inspired patties
A touch of acidity from lemon juice or zest balances flavors beautifully. For heat, consider adding sriracha, red pepper flakes, or finely chopped jalapeños.
Step-by-Step: How to Make Air Fryer Tuna Patties
Creating perfectly crispy tuna patties in an air fryer requires a methodical approach. After years of testing different techniques, I’ve developed this foolproof process that guarantees consistent results every time.
1. Drain and prep the tuna
First, thoroughly drain your canned tuna – this is absolutely essential for proper patty formation. For water-packed tuna, I press it in a fine mesh strainer to remove excess moisture. Once drained, transfer the tuna to a large mixing bowl and break apart any large chunks with a fork until it reaches a consistent texture. For oil-packed tuna, draining well is especially important, although it naturally provides more moisture and flavor to your patties.
2. Mix ingredients and form patties
In your bowl with the flaked tuna, add your binding ingredients – typically eggs, breadcrumbs (or panko/almond flour), and seasonings. Combine everything with a fork until just mixed; overmixing results in dense patties. The mixture should hold together when pressed but still maintain some texture. Form into 3-4 inch patties about ½-inch thick. Most recipes yield 6-8 patties depending on size. If the mixture feels too wet, add more breadcrumbs; if too dry, add a touch more mayo or an extra egg.
3. Chill for better shape retention
Subsequently, refrigerate your formed patties for 10-20 minutes before cooking. This step is technically optional but makes a tremendous difference in helping patties maintain their shape during cooking. For even better results, chill them for 30-60 minutes or overnight if time permits.
4. Air fry at the right temperature and time
Preheat your air fryer to 360-375°F. Lightly spray or brush the patties with oil before placing them in a single layer in your air fryer basket. Never overcrowd the basket – this impedes air circulation and prevents proper crisping. If needed, cook in batches rather than cramming them all in at once.
5. Flip and finish for even crispiness
Halfway through the cooking process (approximately 4-5 minutes in), carefully flip each patty and lightly spray the newly exposed side with oil. Continue cooking for another 4-5 minutes until golden brown and crispy on both sides. Total cooking time typically ranges from 8-12 minutes, depending on your air fryer model and patty thickness.
Tips for Crispy Outside and Tender Inside
The perfect tuna patty achieves that magical contrast between crispy exterior and juicy interior. Through extensive testing, I’ve discovered several key techniques that ensure ideal texture every time.
Use oil spray for golden crust
Lightly spraying both sides of your tuna patties with oil before air frying makes a tremendous difference in achieving that golden-brown crust. I’ve found that a non-stick cooking spray or brushing with olive oil creates that beautifully crisp exterior without the patties absorbing excess oil. The oil helps conduct heat evenly across the surface, promoting uniform browning and that satisfying crunch when you bite in. For an even crispier finish, consider lightly coating the patties in panko or breadcrumbs before applying oil.
Don’t overcrowd the air fryer basket
Proper air circulation is absolutely essential for crispy air fryer tuna patties. Place your patties in a single layer with space between each one. Overcrowding causes the patties to steam rather than crisp, resulting in soggy exteriors instead of that coveted crunch. Working in batches might take slightly longer, yet the improved texture is worth the extra few minutes.
Chilling before cooking helps binding
For patties that hold their shape perfectly, refrigerate them for 15-30 minutes before cooking. This cooling period allows binding ingredients like eggs and breadcrumbs to absorb moisture and solidify, creating a more stable structure. For quick preparation, you can alternatively freeze them for about 5 minutes. This step is particularly important if your patties seem delicate or prone to falling apart.
Use consistent patty size for even cooking
Uniformity in patty thickness and diameter ensures they all finish cooking simultaneously. I typically aim for patties around 3-4 inches in diameter and approximately 3/4-inch thick. This consistency prevents the frustration of having some patties overcooked while others remain underdone. A simple measuring tool like a 1/4 cup measure helps create consistent portions for evenly-sized patties.
Serving, Storing, and Reheating Tuna Patties
Once your air fryer tuna patties are perfectly cooked, serving and storing them correctly maintains their delicious taste and texture.
Best sauces to pair with tuna patties
The right sauce elevates air fryer tuna patties from good to extraordinary. Classic tartar sauce and aioli remain popular choices that complement the seafood flavor. For a spicier kick, sriracha mayo creates a perfect balance of heat and creaminess. Moreover, specialized options like mustard dill sauce, honey mustard, or curried mayonnaise offer distinct flavor profiles. A simple squeeze of fresh lemon juice brightens the patties with minimal effort.
Side dishes that complement well
Air fryer tuna patties pair wonderfully with numerous side dishes:
- Potato options: Mac and cheese, baby potatoes, crispy french fries, or sweet potato fries
- Lighter sides: Avocado salad, cucumber dill salad, or simple green salad
- Vegetables: Steamed broccoli, green beans with bacon, or roasted Brussels sprouts
- Grains: Coconut rice, rice pilaf, or quinoa
Cucumber yogurt salad deserves special mention as its refreshing quality perfectly counters the richness of tuna patties.
How to store leftovers properly
To retain quality, cool tuna patties completely before storing. Refrigerate in airtight containers for 3-5 days. For longer preservation, freeze patties for up to 2-3 months. Indeed, freezing works best when you first freeze patties in a single layer before transferring to freezer bags—this prevents them from sticking together.
Reheating tips for maintaining texture
The air fryer excels at restoring crispiness to leftover tuna patties. Preheat to 350°F and reheat for 3-4 minutes until warmed through. Alternatively, use a conventional oven at 350-400°F for 10-15 minutes. For stovetop reheating, use medium heat with a light spray of oil. In essence, avoid microwaving if possible, as it tends to make patties soggy rather than crispy. Regardless of method, patties should reach an internal temperature of 165°F for food safety.
Conclusion
Air fryer tuna patties have certainly earned their place as a staple in my weekly meal rotation. Throughout this guide, we’ve explored everything from selecting quality ingredients to achieving that perfect crispy-tender texture. Most importantly, these patties offer a practical solution for anyone seeking quick, nutritious meals without sacrificing flavor.
The versatility of these tuna patties stands out as one of their greatest strengths. You can easily customize them with different herbs, spices, and binders to match your dietary preferences or what you have available in your pantry. Additionally, their budget-friendly nature makes them perfect for feeding families without breaking the bank.
Time savings represent another significant advantage of this cooking method. Unlike conventional oven baking, the air fryer eliminates preheating wait times and reduces overall cooking duration by several minutes. This efficiency, coupled with the healthier cooking approach using minimal oil, makes these patties a smart choice for health-conscious individuals.
Storage flexibility adds to their appeal as well. You can prepare a large batch during weekend meal prep, then freeze the extras for up to three months. Consequently, you’ll always have a quick meal option ready when time is limited or cooking feels overwhelming.
After trying this method myself, I’ve found the results consistently impressive—golden and crispy exteriors giving way to flavorful, moist interiors. Whether served with tangy tartar sauce alongside a fresh salad or tucked into a bun for a satisfying sandwich, these air fryer tuna patties deliver restaurant-quality results with home kitchen simplicity.
Why not give these air fryer tuna patties a try tonight? Your family will likely appreciate both the delicious flavor and the extra time you’ll have to spend with them rather than standing over a hot stove. The perfect balance of convenience, nutrition, and taste awaits in your air fryer basket.
FAQs
Q1. How long should I cook tuna patties in an air fryer? Cook tuna patties in an air fryer at 360°F for about 6 minutes per side, or until they’re slightly crisp and heated through. Preheat the air fryer for 15 minutes before cooking for best results.
Q2. What’s the secret to preventing tuna patties from falling apart? To keep tuna patties intact, ensure the tuna is well-drained and use enough breadcrumbs as a binder. Chilling the mixture in the refrigerator for about 30 minutes before cooking also helps firm up the patties.
Q3. Are eggs necessary in tuna patty recipes? Yes, eggs are typically used in tuna patty recipes. They act as a binding agent, helping to hold the ingredients together and create a cohesive patty structure.
Q4. Can I make crispy tuna patties in an air fryer without using oil? While it’s possible to make tuna patties in an air fryer without oil, using a light spray of oil helps achieve a golden, crispy exterior. You can use a non-stick cooking spray or brush with a small amount of olive oil for best results.
Q5. What are some tasty sauces to serve with air fryer tuna patties? Air fryer tuna patties pair well with various sauces. Popular options include classic tartar sauce, aioli, sriracha mayo for a spicy kick, or a simple squeeze of fresh lemon juice. You can also try mustard dill sauce or honey mustard for unique flavor profiles.