
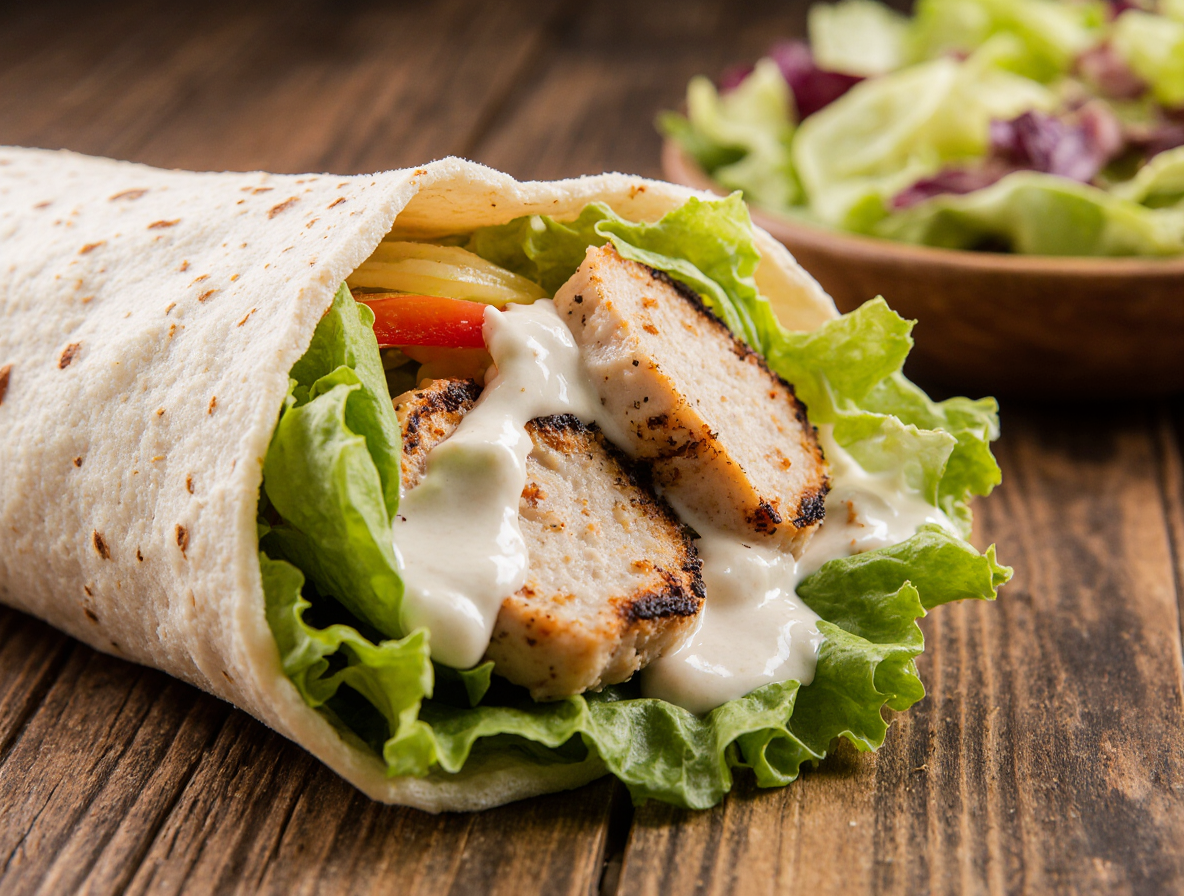
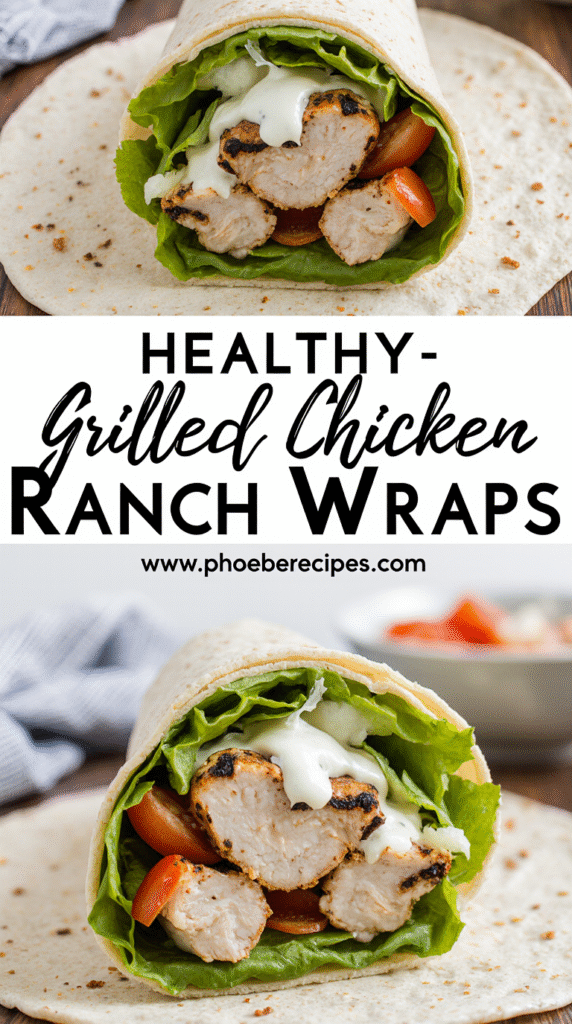
How to Make Perfect Chicken Ranch Wraps (Ready in 20 Minutes)
Chicken ranch wraps are a busy person’s dream meal. These tasty wraps come together in under 15 minutes and make a great lunch or snack at only 255 calories each! When life gets hectic, I find these wraps to be the perfect solution for a quick yet satisfying meal.
Additionally, this recipe makes 6 wraps, so we can store them in the fridge and grab one whenever hunger strikes. Learning how to make chicken ranch wraps at home is incredibly simple, especially if you have leftover chicken in your refrigerator. In fact, homemade chicken ranch wraps can be stored in a sealed container or individually wrapped in foil for up to 3 days in the fridge. Each wrap reheats in about 45 seconds in the microwave, making them perfect for meal prep.
Throughout this guide, I’ll walk you through my easy chicken ranch wraps recipe, from selecting the best ingredients to mastering the assembly process. We’ll also explore tasty variations and storage tips to help you enjoy these wraps throughout the week.
Essential Ingredients for Chicken Ranch Wraps
Creating perfect chicken ranch wraps starts with gathering the right ingredients. The quality of your components will determine the flavor, texture, and overall satisfaction of your final creation.
Choosing the right chicken: grilled, rotisserie, or leftover
The protein base offers flexibility based on your time constraints and taste preferences. Grilled chicken provides a smoky, charred flavor and drier texture that holds up well in wraps. It’s typically leaner since the fat drips away during cooking.
Rotisserie chicken offers a juicier, more tender option with golden-brown skin and flavorful meat. This pre-cooked option saves considerable time while delivering consistent results. Moreover, rotisserie chicken contains lower calories due to being oven-roasted compared to other cooking methods.
Leftover chicken works wonderfully too! Whether from yesterday’s dinner or meal prep session, repurposing chicken creates zero waste and speeds up wrap assembly. Specifically, thinly sliced chicken breast or shredded chicken both work perfectly.
Best tortillas to use
The wrap itself deserves careful consideration. Medium-sized flour tortillas (about 6 inches wide) strike the ideal balance—not too small like taco-sized versions, yet not overwhelmingly large like burrito-sized options.
High-fiber or whole wheat tortillas offer nutritional benefits, while spinach herb or flavored varieties add interesting dimensions to your wraps. Furthermore, warming tortillas before assembly proves essential—30 seconds in the microwave makes them more pliable and prevents tearing during rolling.
Cheese, ranch, and fresh add-ins
Cheese selection significantly impacts your wrap’s flavor profile. Consider these popular options:
- Shredded Monterey Jack melts beautifully and offers mild flavor
- Cheddar provides classic sharp taste
- Pepper jack adds pleasant heat
- Mozzarella creates lovely stretch when melted
Ranch dressing serves as the signature flavor component. Make your own for superior taste or use quality store-bought versions. For variety, mix ranch with hot sauce or honey dijon mustard.
Fresh vegetables add essential crunch and nutrition. Iceberg lettuce provides satisfying texture, while other options include tomatoes, red onions, cucumber slices, bell peppers, or even pickles. Additionally, avocado contributes healthy fats and creamy texture.
Optional flavor boosters include bacon bits, fresh herbs like cilantro, or seasonings such as garlic powder and smoked paprika to elevate your homemade chicken ranch wraps to restaurant quality.
Step-by-Step: How to Make Chicken Ranch Wraps
Mastering the art of perfect chicken ranch wraps requires just a few simple techniques. Once you’ve gathered your ingredients, you’ll be amazed how quickly these delicious wraps come together.
1. Season and cook the chicken
Begin by seasoning your chicken cutlets with a blend of smoked paprika, chili powder, garlic granules, salt, and pepper. Alternatively, use your favorite seasoning mix for a personalized touch. Heat a tablespoon of oil in a grill pan or skillet over medium-high heat. Place the seasoned chicken on the hot surface and cook thoroughly until the internal temperature reaches 165°F (74°C). This typically takes about 4-5 minutes per side, depending on thickness. After cooking, let the chicken rest for 5 minutes before slicing into strips or shredding.
2. Prepare the tortillas and fillings
While your chicken rests, warm your tortillas to make them more pliable. Heat them individually in a dry pan for about 30 seconds per side or microwave them wrapped in a damp paper towel for 20 seconds. Next, prepare your fresh toppings – shred lettuce, dice tomatoes, chop green onions, and slice avocados if using. Have your ranch dressing and shredded cheese ready in bowls for easy assembly.
3. Assemble the wraps
Lay a warmed tortilla flat on your work surface. Initially, spread about 1-2 tablespoons of ranch dressing in the center, leaving room around the edges. Layer with lettuce followed by 2-3 ounces of your prepared chicken. Subsequently, add shredded cheese and any additional toppings like bacon bits or diced vegetables. For best results, keep fillings centered in a rectangular shape rather than scattered throughout.
4. Grill or toast for a crispy finish
To seal your wrap and achieve a crispy exterior, fold the sides of the tortilla inward over the fillings. Then fold the bottom up and over, keeping everything tucked in as you roll upward. Press lightly on the seam to seal. Essentially, you have two options for finishing: either place the wraps seam-side down on a preheated grill pan for 1-2 minutes per side until golden with visible grill marks, or brush lightly with oil and toast in a dry skillet. This final step melts the cheese inside while creating a delightfully crispy exterior.
Tasty Additions and Variations
Personalizing your chicken ranch wraps takes them from ordinary to extraordinary. Beyond the basic recipe, these handy wraps welcome countless delicious modifications to suit any taste preference.
Add bacon, avocado, or tomatoes
Bacon transforms ordinary chicken ranch wraps into irresistible treats. Crispy bacon strips add smoky flavor and satisfying crunch that perfectly complements the tender chicken. My family initially balked at adding “green stuff,” but they quickly professed their “undying love” for these wraps once they tried them.
Avocado contributes creamy richness and healthy fats. Slice it thinly or mash it with lime juice to prevent browning. For meal prep, place diced tomatoes in a fine mesh strainer first to remove excess moisture—this prevents soggy wraps when stored.
Fresh Roma tomatoes provide juicy brightness, particularly when paired with thinly sliced red onions or crisp shredded carrots. These fresh elements balance the richness of the ranch and cheese.
Make it spicy with buffalo sauce
Buffalo sauce delivers bold flavor to chicken ranch wraps. Combine hot sauce with melted butter for authentic buffalo flavor, or simply use bottled buffalo sauce. The spicy heat paired with cool, creamy ranch creates an irresistible contrast.
For buffalo chicken ranch wraps, toss your cooked chicken in buffalo sauce before assembling. Alternatively, drizzle buffalo sauce directly onto your wrap ingredients. For extra dimension, consider substituting blue cheese dressing for ranch—although some devotees insist “never ranch in buffalo”.
Add jalapeños or a few dashes of your favorite hot sauce for additional heat. Chipotle ranch provides another excellent spicy variation.
Low-carb and keto-friendly options
Lettuce wraps offer a refreshing low-carb alternative containing only 1.7-2 net carbs per wrap. Fresh iceberg lettuce provides the best crunch, with romaine a close second. These keto-friendly options still deliver all the flavor without the carbs.
Cheese wraps represent another innovative low-carb solution. To make them, melt cheese until pliable, then use as your wrap base. A single serving (half wrap) provides approximately 450 calories, 30.6g fat, 1.9g carbs, and 42.5g protein.
Low-carb tortillas work exceptionally well for those seeking a more traditional wrap experience while maintaining a keto lifestyle.
Storage, Reheating, and Meal Prep Tips
Make the most of your homemade chicken ranch wraps by mastering these storage and reheating methods. Proper techniques ensure your wraps stay fresh and delicious for days or even months.
How to store wraps in the fridge
For refrigerator storage, first allow your chicken ranch wraps to cool completely. Wrap each wrap individually in plastic wrap or aluminum foil to prevent drying out. Alternatively, place them in an airtight container for up to 3-5 days.
For best results when meal prepping, consider storing components separately—this prevents soggy tortillas. If making wraps ahead for lunches, pack them in a hard container rather than a ziplock bag to prevent crushing. Finally, keep wraps away from moist fruits and vegetables in your lunchbox to maintain their texture.
Freezing instructions for later use
Freezing extends enjoyment of your chicken ranch wraps for weeks. After wraps have cooled completely, wrap tightly in aluminum foil. Place wrapped wraps in a freezer bag and freeze for up to 3 months.
For meal prep convenience, you can freeze assembled wraps before the final heating step. Nevertheless, some sources indicate wraps don’t freeze well, so results may vary based on ingredients used.
Reheating methods: microwave, pan, or air fryer
Each reheating method offers different benefits:
- Microwave: Quickest option at 20-40 seconds on high. For frozen wraps, wrap in a moist paper towel and microwave in 30-60 second increments until heated through.
- Oven: Preheat to 350°F and heat foil-wrapped wraps for 15-20 minutes. For frozen wraps, increase baking time to 25-35 minutes.
- Air fryer: Preheat to 380°F and heat for 1-3 minutes until crispy. This method revitalizes the exterior while keeping the inside warm.
- Stovetop: Heat in a skillet with cooking spray on medium-high for 1-2 minutes per side until golden brown.
How long they stay fresh
Properly stored chicken ranch wraps remain fresh in the refrigerator for 2-3 days, though some sources suggest up to 4-5 days. Frozen wraps maintain quality for 2-3 months.
For maintaining freshness in lunch boxes, use an insulated container with ice packs. Firstly, slice wraps in half just before packing to prevent ingredients from falling out.
Conclusion
Chicken ranch wraps certainly deserve a place in your weekly meal rotation. Throughout this guide, we’ve explored how these versatile wraps come together in just 20 minutes, making them perfect for busy weekdays or quick weekend lunches.
Additionally, the ability to customize these wraps based on personal preferences ensures everyone in your family will find something to love. Whether you prefer the classic combination or crave something spicy with buffalo sauce, these wraps adapt to suit your taste buds perfectly.
Most importantly, their meal-prep friendliness stands out as a major advantage. Simply prepare a batch during your free time, store them properly, and enjoy delicious wraps throughout the week. The various storage methods we discussed ensure your wraps stay fresh, whether refrigerated for a few days or frozen for several months.
Furthermore, the reheating options provide flexibility based on your available time and desired texture. From quick microwave heating to crispy air fryer results, these wraps taste great regardless of how you warm them up.
Lastly, those following special diets need not miss out on this delicious meal. The low-carb and keto-friendly alternatives allow everyone to enjoy the wonderful flavors of chicken ranch wraps without compromising dietary goals.
Chicken ranch wraps have become my go-to solution for hectic days when cooking feels overwhelming. Their simplicity, versatility, and delicious flavor profile make them an unbeatable option for anyone seeking quick yet satisfying meals. Try making them yourself, and you’ll likely discover your new favorite lunch or dinner option!
FAQs
Q1. How can I make a quick and easy chicken ranch wrap? To make a quick chicken ranch wrap, start by laying out a tortilla and adding provolone cheese, lettuce, shredded chicken, sliced tomatoes, and ranch dressing. Roll it up tightly, tucking in the sides as you go. The entire process takes about 20 minutes, making it perfect for busy days.
Q2. What’s the best way to prevent my chicken wrap from becoming soggy? To keep your chicken wrap from getting soggy, lightly toast the tortilla in the oven or warm it in the microwave before assembling. This helps release moisture from the wrap. Additionally, when meal prepping, consider storing wet ingredients separately and assembling just before eating.
Q3. Can you suggest some tasty additions to enhance my chicken ranch wrap? Delicious additions to your chicken ranch wrap include crispy bacon for smokiness, avocado for creaminess, and fresh vegetables like bell peppers or cucumbers for crunch. For a spicy kick, try adding buffalo sauce or jalapeños. These extras can elevate your wrap to restaurant quality.
Q4. How long can I store chicken ranch wraps, and what’s the best way to reheat them? Properly stored chicken ranch wraps can last 3-5 days in the refrigerator or up to 3 months in the freezer. For reheating, you have several options: microwave for 20-40 seconds, bake in the oven at 350°F for 15-20 minutes, or use an air fryer at 380°F for 1-3 minutes for a crispy exterior.
Q5. Are there any low-carb options for chicken ranch wraps? Yes, there are low-carb alternatives for chicken ranch wraps. You can use large lettuce leaves instead of tortillas for a refreshing, keto-friendly option. Another choice is to use cheese wraps, which are made by melting cheese until pliable. Low-carb tortillas are also available for those who prefer a more traditional wrap experience while maintaining a low-carb diet.