
The Easy Guide to Perfect Frozen Fruit Cups [Summer Party Must-Have]
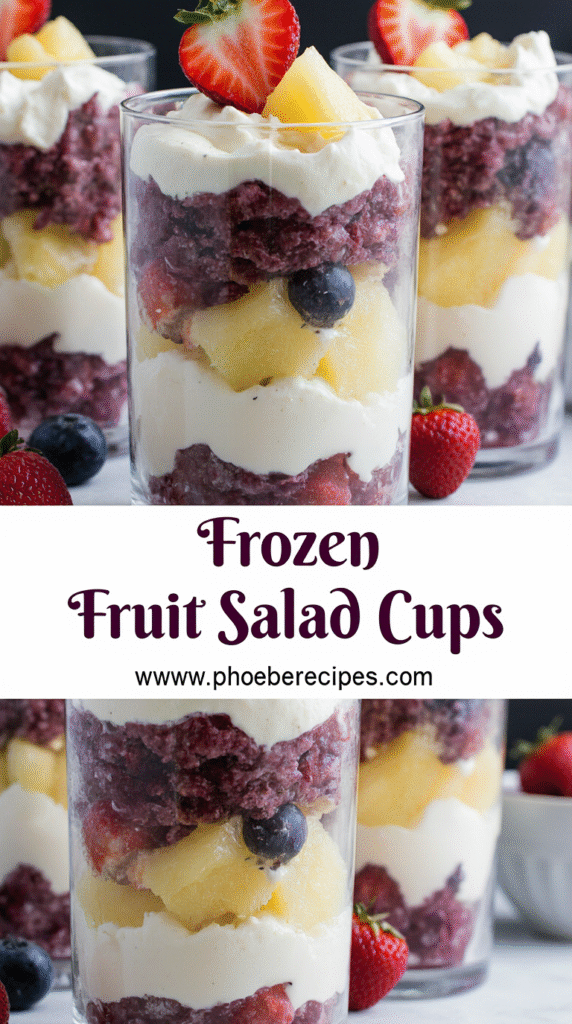
Frozen fruit cups surprisingly take just 10 minutes to prepare but deliver a refreshing summer treat that’s perfect for any occasion. I discovered these delightful snacks years ago at a local ice cream shop and have been making them ever since. These easy-to-freeze fruit cups are not only a delicious brunch option but also make an ideal afternoon snack when you need something sweet yet relatively nutritious.
When it comes to making homemade frozen fruit cups, the process couldn’t be simpler. With only a few ingredients, you can create a frozen fruit salad that’s both nutritious and delicious. The frozen fruit cups recipe yields about 18 servings, with each portion containing approximately 127-161 calories. Additionally, these treats offer nutritional benefits with vitamins and fiber while satisfying your sweet tooth. In this guide, I’ll walk you through everything you need to know to create perfect frozen fruit cups for your next summer gathering or as a cool treat to keep in your freezer.
What You Need to Make Frozen Fruit Cups
Creating perfect frozen fruit cups starts with gathering the right ingredients and tools. The beauty of this recipe lies in its flexibility and customization possibilities, depending on your taste preferences and what’s in season.
Fresh vs. canned fruit options
The foundation of delicious frozen fruit cups is, obviously, the fruit itself. Both fresh and canned fruits work excellently in this recipe, each offering unique benefits. Fresh fruits provide vibrant flavors and textures, particularly when they’re in season. Meanwhile, canned fruits offer year-round convenience and consistent quality. Contrary to common belief, canned fruits can be just as nutritious as fresh since they’re typically preserved immediately after harvesting, sometimes making them fresher than store-bought “fresh” options.
For optimal nutritional value, choose canned fruits packed in water or their own juice rather than heavy syrup. If you do use fruits in light syrup, remember to drain and rinse them before adding to your mixture. Popular canned fruit options include mandarin oranges, crushed pineapple, and fruit cocktail, which appear in many frozen fruit cups recipes.
Choosing the right juice or concentrate
The liquid base of frozen fruit cups typically comes from frozen juice concentrates, which bind the fruit pieces together and add sweetness. Most recipes call for orange juice concentrate (12 oz), though many variations exist. Some recipes combine orange juice with lemonade concentrate for a tangy-sweet profile[71], while others include pineapple juice concentrate for tropical flavor.
For a lighter option, consider adding diet lemon-lime soda to your concentrate mixture. The concentrates should be thawed before mixing with your fruits to ensure even distribution throughout the cups.
Optional add-ins: nuts, marshmallows, whipped topping
Beyond fruits and juices, various add-ins can transform basic frozen fruit cups into more complex desserts. Chopped pecans add delightful crunch and nutty flavor, while mini marshmallows contribute chewy sweetness. For a creamier version, incorporate softened cream cheese (8 oz) with sugar (1/2 cup) or fold in thawed whipped topping (8 oz).
Some recipes include bananas, which add natural creaminess. However, choose yellow but not overly ripe bananas for best results. A splash of lemon juice (1-2 tablespoons) helps prevent browning.
Best containers to use for freezing
The right containers make a significant difference in how well your frozen fruit cups freeze and how easily they can be served. Clear plastic cups (9 oz) work perfectly for individual servings. Alternatively, foil-lined muffin cups create smaller, more portion-controlled servings.
If using silicone trays, note that while they’re excellent for portioning, they typically have less secure seals. For best results with silicone containers, pop the frozen cups out once solid and transfer them to freezer-safe bags to prevent freezer burn.
Remember that smaller containers freeze faster and thaw more quickly when it’s time to serve. Most importantly, check that your containers have airtight seals to maintain freshness and prevent freezer burn for up to six months.
Step-by-Step Frozen Fruit Cups Recipe
The actual making of frozen fruit cups involves straightforward steps that anyone can master. Let me walk you through the process of creating these delightful frozen treats that will impress your guests at any gathering.
1. Prep the fruit and mix-ins
First, wash all fresh fruits thoroughly before handling. For strawberries, remove stems and either slice or dice them depending on your preference. When using bananas, select firm yellow ones that aren’t overly ripe to prevent mushiness. Slice or dice them just before mixing to prevent browning. For canned fruits like pineapple, mandarin oranges, or fruit cocktail, you’ll generally use them undrained unless the recipe specifically calls for draining.
If your recipe includes pecans or other nuts, chop them into small pieces. For cherries, remove stems and either halve them or chop them into smaller pieces based on your preference. Remember that uniformly sized fruit pieces create a more consistent frozen texture.
2. Combine with juice or creamy base
Depending on your recipe choice, you’ll either use a juice concentrate base or a creamy mixture. For juice-based cups, combine thawed juice concentrate (typically orange, pineapple-orange, or lemonade) with the prepared fruits in a large mixing bowl. Stir gently until everything is well incorporated.
For creamy versions, beat cream cheese with sugar until fluffy, or mix sour cream with sugar, lemon juice, and a pinch of salt. Afterward, fold in the prepared fruits and additional ingredients like whipped topping if your recipe calls for it.
3. Portion into cups
Once your mixture is ready, line muffin tins with paper or foil liners for smaller portions, or use individual plastic cups for larger servings. A helpful tip: place all cups on a cookie sheet before filling them – this makes transferring them to the freezer much easier. Pour or spoon the mixture into each cup, filling them about 2/3 full to allow for expansion during freezing.
4. Freeze until solid
Place the filled cups in the freezer until completely set, which generally takes 3-8 hours depending on your freezer and cup size. Once solid, you can transfer them to resealable freezer bags for longer storage. These treats will keep well for several weeks in the freezer.
For the best texture and flavor, remove the cups from the freezer approximately 20-45 minutes before serving. This allows them to soften slightly to a more slushy consistency that’s easier to eat.
Tips for Freezing and Serving
Perfecting the texture and presentation of frozen fruit cups requires attention to a few key details. These practical tips will help you achieve dessert perfection every time.
How long to freeze for best texture
The ideal freezing time for fruit cups varies depending on your container size. Most recipes require a minimum of 3-4 hours to freeze completely, although some may need 6-8 hours. For guaranteed results, I recommend freezing overnight. Once fully frozen, these treats maintain their high quality for 8-12 months when stored at 0°F or below. Notably, unsweetened versions lose quality faster than those containing sugar or syrup.
How to prevent icy texture
To avoid the disappointment of icy fruit cups, focus on proper storage techniques. Always cover your cups well—freezer air blowing directly on fruit causes sticky, gummy textures. Furthermore, sugar content matters significantly; it lowers the freezing point, creating smoother texture. Adding stabilizers like guar gum can furthermore improve consistency. For commercial-style smoothness, consider adding a small amount of alcohol (vodka or fruit liqueur), which lowers the freezing point.
When to remove from freezer before serving
Timing is everything when serving frozen fruit cups. Recommendations range from 10 minutes to as much as 45-60 minutes before serving. For most recipes, 30-45 minutes creates the perfect slushy consistency. Alternatively, microwave a cup for approximately 15 seconds until slightly thawed. Many people prefer eating fruit cups with a few ice crystals remaining—similar to a refreshing slushy.
Serving ideas for brunch, BBQs, and kids’ snacks
Frozen fruit cups versatility makes them perfect for various occasions. For elegant brunches, serve them alongside breakfast sliders or pancakes. At BBQs, they provide a refreshing counterpoint to grilled meats. For added sophistication, drizzle with Limoncello or Grand Marnier just before serving. Kids especially enjoy these as after-school treats or desserts they can eat right from the cup. Present them in colorful paper liners or clear plastic cups for visual appeal.
Fun Variations to Try
One of the best aspects of frozen fruit cups lies in their versatility. Let’s explore some exciting variations that will elevate your summer treats beyond the basic recipe.
Tropical twist: mango, coconut, pineapple
For a taste of the tropics, combine diced mangoes, shredded coconut, and pineapple chunks. This combination creates a refreshing island-inspired treat perfect for hot summer days. You might even consider adding a splash of coconut extract (1 teaspoon) to enhance the tropical flavor profile. The pineapple chunks should be similar in size to tidbits or crushed pineapple for the best texture. For presentation, garnish with fresh mint or sliced pineapple.
Berry blast: strawberries, blueberries, raspberries
A berry-focused variation makes excellent use of summer’s bounty. Consider macerating strawberries with sugar and triple sec for at least two hours—this softens the berries and amplifies their flavor, creating perfect texture when frozen. Moreover, combining wild blueberries, strawberries, and raspberries offers vibrant color and impressive nutritional benefits. In fact, frozen berries often retain more nutrients as they’re typically flash-frozen within 24 hours of being picked.
Creamy frozen fruit salad version
To create a creamier variation, beat 10 ounces of softened cream cheese with powdered sugar (3 tablespoons) and fold in whipped cream that’s been beaten to stiff peaks. Alternatively, combine 8 ounces of cream cheese with 1/2 cup sugar until fluffy. Folding in thawed whipped topping (8 ounces) creates an even lighter texture. For added crunch, consider incorporating chopped pecans or pistachios.
Frozen fruit salad cupcakes
These adorable individual servings make delightful party treats. Line muffin cups with paper or foil liners, fill with your fruit mixture, and garnish each with reserved cherries and orange segments. For a decorative touch, top each cupcake with a dab of whipped cream and a cherry.
Low-sugar or dairy-free options
For health-conscious eaters, create sugar-free versions that are still grandchild-approved. Simply use fruits packed in water or their own juice instead of syrup. For dairy-free alternatives, substitute coconut cream for dairy cream or use plant-based whipped toppings that freeze well.
Conclusion
Frozen fruit cups certainly deserve a place in your summer recipe collection. After all, these refreshing treats combine simplicity, versatility, and deliciousness in one perfect package. Most importantly, their quick 10-minute preparation time makes them ideal for busy hosts or parents looking for healthy snack options.
The customization possibilities seem endless. You can adjust ingredients based on seasonal availability, dietary preferences, or simply what you have on hand. Whether you prefer the tropical combination of mango and coconut or a berry-packed version bursting with antioxidants, these frozen cups adapt to your taste preferences.
Additionally, their make-ahead nature solves the common entertaining dilemma of preparing desserts while hosting. I love making a large batch and keeping them ready in my freezer for unexpected guests or afternoon sweet cravings. The individual portions also eliminate the need for serving utensils, making cleanup significantly easier.
Children particularly enjoy these frozen treats, especially during hot summer months. The fun presentation and naturally sweet flavors often convince even picky eaters to consume more fruit. Therefore, parents can feel good about serving a dessert that contains actual nutritional benefits.
The next time you host a summer gathering, consider preparing these frozen fruit cups. Your guests will undoubtedly appreciate the refreshing contrast to traditional heavy desserts. The beautiful colors and delightful textures will surely impress, while you secretly know how little effort they required. Frozen fruit cups prove that sometimes the simplest recipes yield the most memorable results.
FAQs
Q1. How long do frozen fruit cups need to freeze? Frozen fruit cups typically need 3-8 hours to freeze completely, depending on your freezer and cup size. For best results, freeze them overnight to ensure they’re fully set.
Q2. Can I use both fresh and canned fruits in frozen fruit cups? Yes, you can use both fresh and canned fruits in frozen fruit cups. Fresh fruits provide vibrant flavors, while canned fruits offer convenience and consistent quality. If using canned fruits, choose those packed in water or their own juice for better nutritional value.
Q3. What’s the best way to serve frozen fruit cups? For the ideal consistency, remove frozen fruit cups from the freezer about 30-45 minutes before serving. This allows them to soften to a slushy texture that’s easy to eat. You can also microwave them for about 15 seconds if you’re short on time.
Q4. Are there any dairy-free options for frozen fruit cups? Absolutely! You can create dairy-free frozen fruit cups by using coconut cream instead of dairy cream or opting for plant-based whipped toppings that freeze well. Simply focus on fruit and juice combinations without adding dairy products.
Q5. How can I prevent my frozen fruit cups from becoming too icy? To prevent an icy texture, ensure proper storage by covering the cups well before freezing. Adding sugar or syrup can help lower the freezing point, resulting in a smoother texture. You can also consider adding a small amount of alcohol or using stabilizers like guar gum for a creamier consistency.