
Perfect Mint Chocolate Cups: A Foolproof Guide for Home Bakers
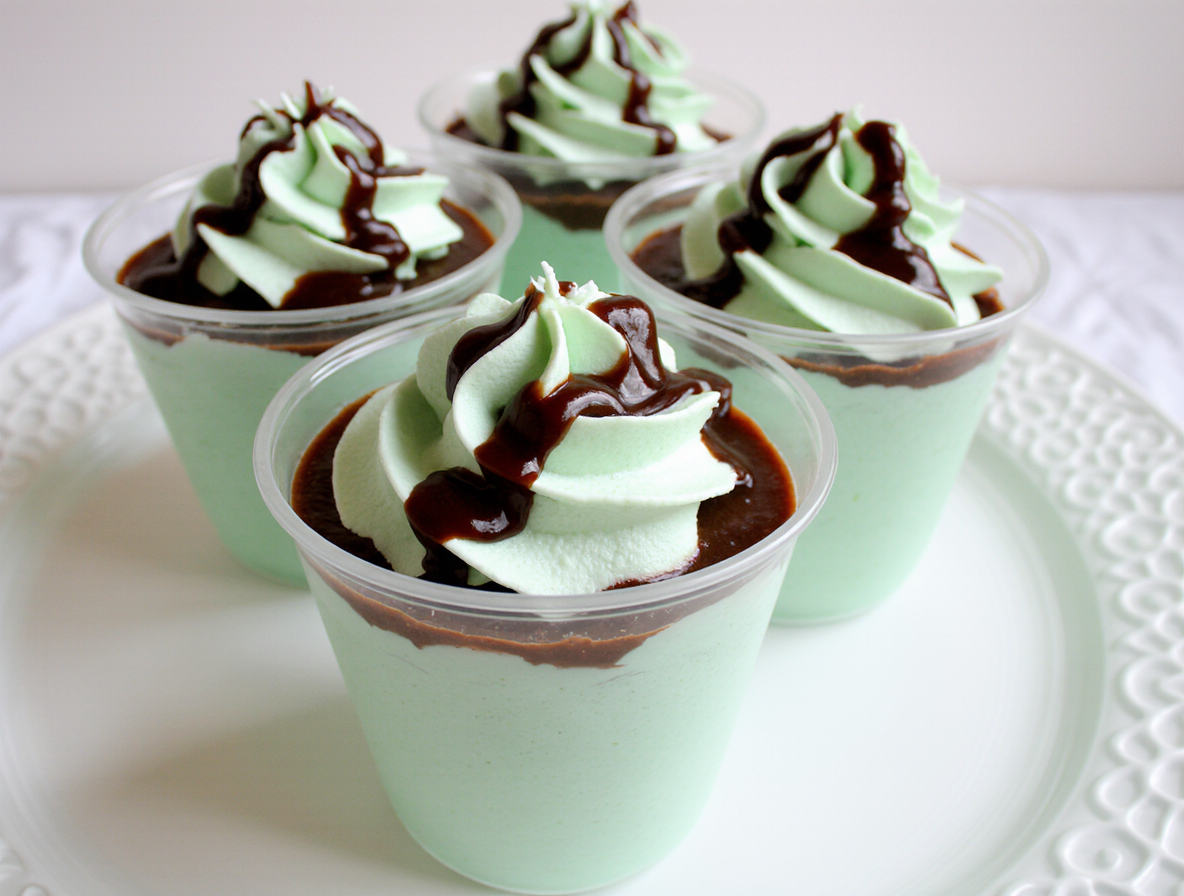
Mint chocolate cups are the perfect blend of refreshing mint and rich chocolate that can satisfy any sweet tooth craving. This delightful recipe yields approximately 28 two-ounce cups that can be served immediately or stored in the refrigerator for 2 to 3 days.
As a home baker, I’ve found that mint chocolate desserts consistently impress guests while being surprisingly simple to prepare. These chocolate mint cups offer the same delicious flavor profile as mint chocolate ice cream, but in an elegant, individual serving format. Additionally, they’re part of a family of 15 easy mint chocolate dessert recipes that combine cool mint and chocolate.
In this guide, I’ll walk you through everything you need to know about creating perfect mint chocolate cups. From selecting the finest ingredients to mastering the preparation technique, you’ll discover how to make this impressive mint chocolate cups recipe with confidence, even if you’re new to candy-making.
Choosing the Right Ingredients for Mint Chocolate Cups
The foundation of exceptional mint chocolate cups lies in selecting quality ingredients that complement each other perfectly. When creating these delightful treats, your choice of chocolate and mint flavoring significantly impacts the final taste.
For the chocolate component, you have several excellent options. Dark chocolate, semisweet, or milk chocolate chips all work wonderfully, depending on your preference for sweetness. High-quality cocoa powder is essential if you’re making chocolate cookie cups from scratch, as it provides the best flavor and texture.
Perhaps the most crucial decision involves selecting the right mint flavoring. There’s an important distinction between peppermint and spearmint extracts that many home bakers overlook. Peppermint contains approximately 40% menthol, creating that intense cooling sensation we associate with mint candies. In contrast, spearmint contains only about 0.5% menthol, resulting in a milder, sweeter flavor.
For traditional mint chocolate cups that pair with chocolate, peppermint extract is generally preferred. Its stronger, more intense flavor creates that classic mint chocolate combination we love in desserts. Spearmint, with its subtler taste, can sometimes evoke a toothpaste-like flavor when combined with chocolate.
The filling for mint chocolate cups typically includes:
- Cream cheese (room temperature for smooth blending)
- Heavy whipping cream (creates light, fluffy texture)
- Powdered sugar (adds sweetness and volume)
- Mint extract (start with less and adjust to taste)
Furthermore, consider adding a drop of green gel food coloring for that classic mint appearance, though this remains optional. Many recipes recommend gel coloring over liquid for achieving a vibrant mint green without affecting consistency.
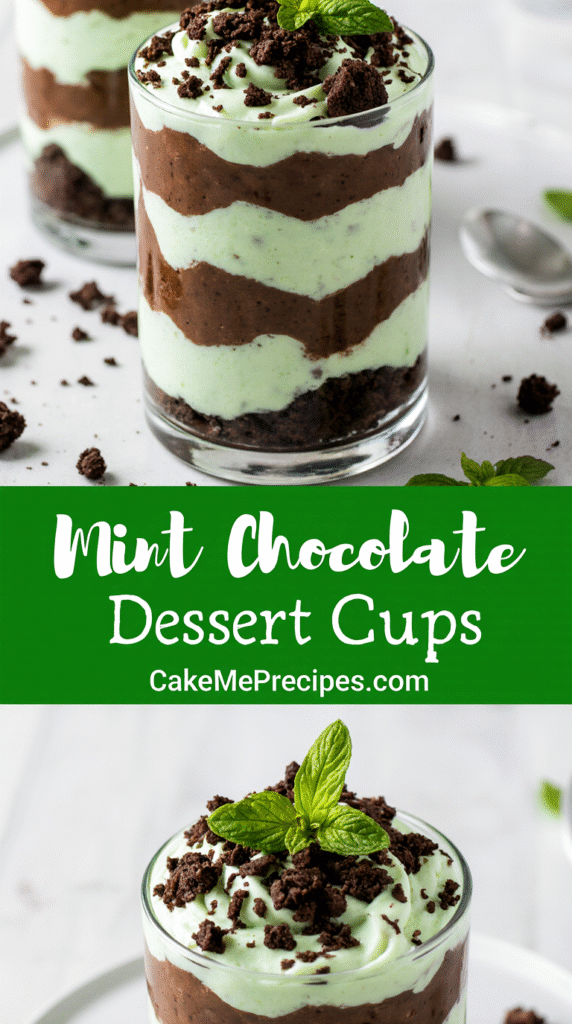
For chocolate sandwich cookies as a base or topping, mint Oreos offer an additional layer of flavor, though regular chocolate cookies work perfectly well. Some recipes incorporate special additions like Andes mints for extra mint chocolate intensity.
Remember that quality matters – especially with chocolate. The richness of your final mint chocolate cups depends primarily on using fresh, high-grade ingredients that bring out the best in this beloved flavor combination.
Step-by-Step Guide to Making Mint Chocolate Cups
Creating these delectable mint chocolate cups involves a straightforward process that anyone can master with the right technique. Let me walk you through each step of crafting these irresistible treats.
First, prepare your workspace by lining mini muffin tins with paper liners for easier removal. Next, melt your chocolate using either a double-boiler method or microwave. For the microwave approach, heat chocolate in 30-second intervals at 50-60% power until just melted, then stir to complete the melting process. Alternatively, combine chocolate chips and heavy cream in a microwave-safe bowl and heat for 30 seconds for a ganache-style base.
Once melted, coat the bottom of each paper liner with approximately one tablespoon of chocolate, using a spoon to push it slightly up the sides to form a shallow cup. Place the tray in the refrigerator for 15-20 minutes to set the chocolate shells.
Meanwhile, prepare your mint filling. In a medium bowl, beat together cream cheese, powdered sugar, and finely chopped mint candies until smooth. In a separate bowl, whip heavy cream with mint extract until soft peaks form. For a more vibrant appearance, add a single drop of green food coloring to your filling.
After the chocolate shells have set, pipe or spoon approximately one teaspoon of the mint filling into each cup. Then refrigerate for another 15 minutes to firm up the filling.
Following this chilling period, cover the filling with another layer of melted chocolate, ensuring it connects with the edges of the first chocolate layer to completely encase the mint filling. Tap the muffin tin gently on the counter to smooth the chocolate over the top.
Finally, before the top chocolate layer completely sets, sprinkle with crushed mint candies or decorative sprinkles if desired. Refrigerate the completed mint chocolate cups for at least 30 minutes until fully set. For optimal texture and flavor, allow them to come to room temperature before serving.
Tips for Perfect Results Every Time
To achieve professional-quality mint chocolate cups that impress both eyes and taste buds, mastering a few expert techniques makes all the difference. After preparing these treats numerous times, I’ve discovered several foolproof strategies worth sharing.
For perfect cookie crumbs as a base, a food processor delivers the most uniform texture. Don’t have one? Place cookies in a zip-top bag and crush with a rolling pin or the bottom of a heavy glass. For the cleanest results, place a dish towel over the bag to prevent tearing while crushing.
When working with ganache, keep a watchful eye as you heat cream—bring it just to a simmer without letting it boil over. Pour hot cream slowly over chocolate chips, then stir until chips begin melting before whisking to combine.
For the mint filling, piping creates the most professional appearance. Fold over the top of the piping bag while filling to keep it clean and provide something to hold onto. Fill the bag only halfway—overfilling makes it difficult to control and causes filling to squish out the top. After filling, twist the top of the bag or secure with a clip or rubber band to maintain control.
When layering ingredients, allow proper setting time. Refrigerate chocolate shells for 15-20 minutes before adding filling, then chill another 15 minutes before adding the top chocolate layer. This patience ensures distinct layers and prevents mixing.
Storage is crucial for mint chocolate dessert cups—refrigerate them for no more than 2-3 days. Many enthusiasts find these treats taste even better after a day or two in the refrigerator. When serving at parties, keep them chilled and don’t leave them out longer than 30 minutes.
To ensure your mint chocolate cups maintain their texture, whip cream to true stiff peaks and gently fold ingredients together to preserve airiness. If piping cream as decoration, release pressure completely between motions to create clean, defined patterns.
Conclusion
Mint chocolate cups truly represent one of the most delightful treats you can create in your home kitchen. Throughout this guide, we’ve explored everything from selecting premium ingredients to mastering the techniques needed for professional-looking results. These delectable desserts strike the perfect balance between refreshing mint and rich chocolate, making them an ideal choice for almost any occasion.
The beauty of these mint chocolate cups lies in their versatility. You can adjust the intensity of mint flavor according to your preference, experiment with different chocolates, or add your own decorative touches. Additionally, their individual serving size makes them perfect for gatherings where guests can simply grab and enjoy without the need for cutting or serving.
Many home bakers shy away from making chocolate confections because they seem complicated. However, as you’ve seen, the process breaks down into straightforward steps anyone can follow. The key points to remember include using quality chocolate, allowing proper setting time between layers, and paying attention to temperature during preparation.
First-time makers often feel surprised by how professional their mint chocolate cups look and taste. Your friends and family will undoubtedly think you spent hours creating these sophisticated treats, though you and I now know the secret to their simplicity.
After making mint chocolate cups several times, I’ve found they become even easier to prepare. The technique becomes second nature, and you’ll likely start developing your own signature variations. Whether you stick to the classic recipe or experiment with additions like crushed candy canes during holidays, these mint chocolate cups will certainly become a staple in your dessert repertoire.
Give yourself permission to enjoy the process. Unlike many baking projects that demand precision, these cups forgive small imperfections, which often add to their homemade charm. Most importantly, these delightful treats bring together the timeless combination of mint and chocolate in a way that satisfies cravings and impresses guests alike.
FAQs
Q1. What makes mint chocolate cups so appealing? Mint chocolate cups offer a perfect balance of refreshing mint and rich chocolate flavors. The combination creates a delightful contrast that satisfies sweet cravings while providing a cool, refreshing sensation. Their individual serving size also makes them ideal for parties and gatherings.
Q2. Can I use different types of chocolate for making mint chocolate cups? Yes, you can use various types of chocolate such as dark, semisweet, or milk chocolate chips depending on your preference for sweetness. The quality of chocolate significantly impacts the final taste, so it’s recommended to use high-quality cocoa powder or chocolate for the best results.
Q3. What’s the difference between using peppermint and spearmint extract in these desserts? Peppermint extract is generally preferred for mint chocolate cups as it contains about 40% menthol, creating a more intense cooling sensation that pairs well with chocolate. Spearmint, with only 0.5% menthol, has a milder, sweeter flavor that might not complement chocolate as effectively.
Q4. How long can I store homemade mint chocolate cups? Mint chocolate cups can be stored in the refrigerator for 2 to 3 days. Many people find that these treats taste even better after a day or two in the fridge. When serving at parties, it’s best to keep them chilled and not leave them out for more than 30 minutes.
Q5. What are some tips for achieving professional-looking mint chocolate cups? For professional-looking results, use a piping bag for clean layers, allow proper setting time between layers, and pay attention to temperature during preparation. Crushing cookies in a food processor (or using a rolling pin if you don’t have one) ensures a uniform texture for the base. Also, whip cream to stiff peaks and gently fold ingredients to maintain airiness in the filling.