
How to Make Homemade Nesquik Powder (Tastes Better Than Original!)
Homemade nesquik powder costs significantly less than the store-bought version and tastes even better! A 10-ounce container of Nesquik typically costs around $3, while making your own with basic cocoa powder and sugar can cost less than half that amount. Actually, I discovered that using discounted cocoa powder (around $1) and a bag of sugar on sale makes this DIY version incredibly economical.
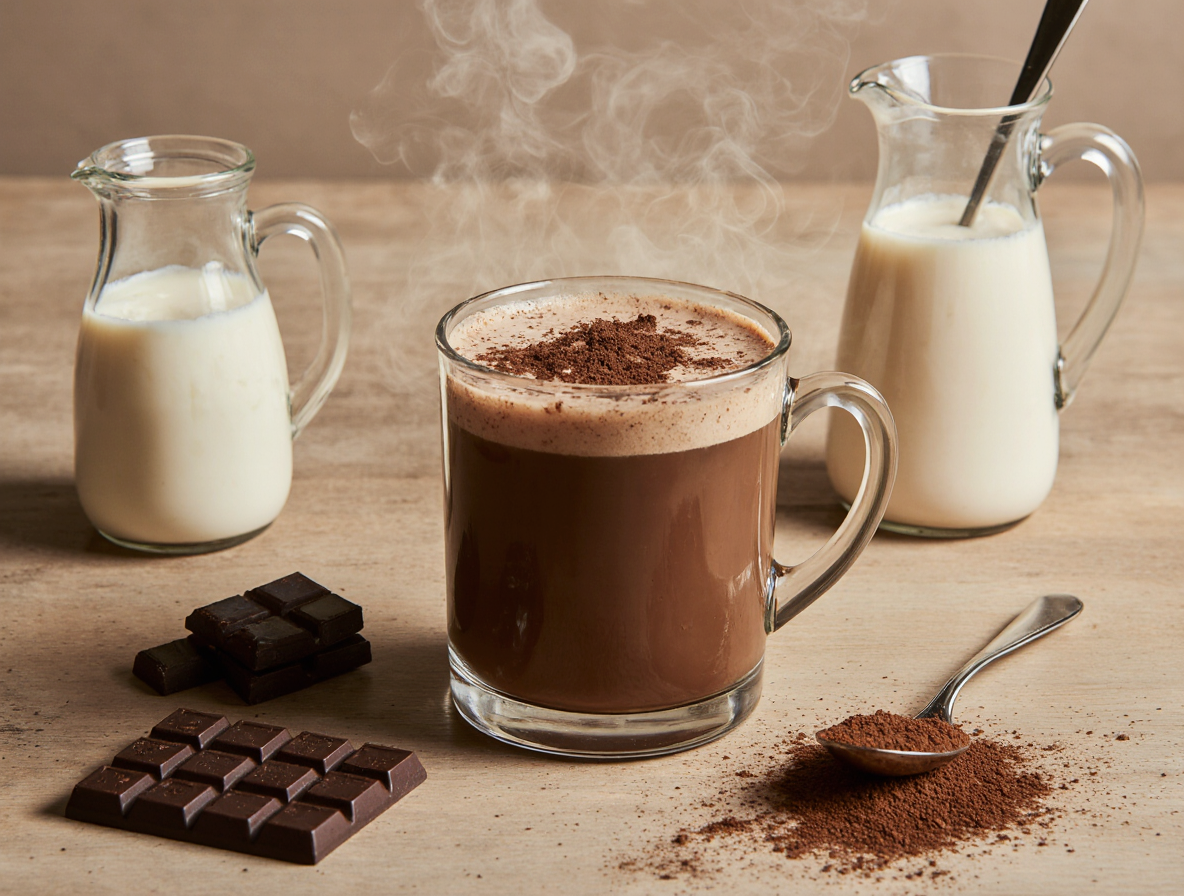
Surprisingly, this homemade chocolate milk powder recipe requires just two simple ingredients – cocoa and sugar. No preservatives, no additives, just pure ingredients you can pronounce. Additionally, your homemade chocolate milk powder can be stored in an airtight container at room temperature for up to 2-3 months. Chocolate milk remains one of the most beloved beverages among both children and adults, and creating your own mix gives you complete control over the ingredients while saving money. To enjoy it, simply add 1-2 tablespoons of your homemade mix to a 12-ounce glass of milk – it works perfectly for both cold and hot chocolate milk!
Why Make Homemade Nesquik Powder
When I first considered making homemade Nesquik powder, I was skeptical. However, after trying it, I discovered numerous compelling reasons to ditch the store-bought version.
Fewer ingredients, more control
First of all, let’s compare ingredients. Store-bought Nesquik contains “SUGAR, COCOA PROCESSED WITH ALKALI, SOY LECITHIN, CARRAGEENAN, SALT, NATURAL FLAVOR, SPICE”. In contrast, my homemade version requires just cocoa powder, sugar, and a pinch of salt. This simplicity gives me complete control over what goes into my family’s chocolate milk.
Moreover, when making homemade chocolate milk powder, I can adjust the sweetness level precisely to our preferences. Some recipes suggest equal parts cocoa and sugar, while others recommend a 1:2 ratio of cocoa to sugar. Either way, I decide what works best for us.
For those concerned about sugar intake, homemade chocolate milk powder can be customized with alternative sweeteners. As one parent noted, “I think I’m going to try this with Splenda instead of sugar. I can’t have a lot of sugar and the sugar-free chocolate milk is so hard to find”.
Cost savings over store-bought
The financial benefits are substantial. A 10-ounce container of Nesquik typically costs around $3.00. In comparison, a container of cocoa powder (especially when on sale) combined with sugar can cost significantly less. One frugal shopper found cocoa powder for just $1.00 and a 4-pound bag of sugar for another $1.00. Even using entire containers of both ingredients (which you won’t need to), the homemade version costs less than store-bought Nesquik.
No preservatives or additives
Perhaps most importantly, homemade chocolate milk powder eliminates unnecessary additives. Commercial products often contain preservatives and ingredients that are difficult to pronounce. As one parent expressed, “There are a ton of ingredients in Nesquick that are primarily used as preservatives that I don’t really want in my kiddos little systems”.
Furthermore, unlike powdered mixes “filled with preservatives and hard-to-pronounce ingredients,” homemade chocolate milk gives you “total control over what goes into your milk”. This peace of mind is particularly valuable for parents concerned about what their children consume.
Consequently, creating your own chocolate milk powder means enjoying a delicious treat without worrying about unnecessary additives. The homemade version is healthier, more cost-effective, and offers the flexibility to adjust ingredients according to your personal preferences.
Ingredients and Tools You’ll Need
Getting ready to make homemade Nesquik powder is refreshingly simple. The beauty of this DIY approach lies in its simplicity—just a few quality ingredients and basic kitchen tools are all you need.
Cocoa powder: choosing the right one
The foundation of any good homemade chocolate milk powder is high-quality cocoa. I prefer Dutch-processed cocoa for its smoother flavor and darker color, though natural cocoa works fine too. Dutch-processed cocoa undergoes alkalization, which reduces acidity and creates a richer chocolate flavor. For a truly premium homemade Nesquik powder, consider investing in a high-quality brand like Ghirardelli or Valrhona. These brands cost a bit more but deliver exceptional flavor that makes your homemade version stand out.
Sugar options: white, unrefined, or alternatives
Regular granulated white sugar works perfectly, but don’t hesitate to experiment. Brown sugar adds a subtle molasses flavor, while coconut sugar provides caramel notes. Powdered sugar dissolves more readily but contains cornstarch. If you’re watching your sugar intake, consider alternatives like stevia, monk fruit sweetener, or erythritol—just remember these substitutes have different sweetness levels, so adjust quantities accordingly. The standard ratio I use is 1:2 cocoa to sugar, but you can customize this based on your sweetness preference.
Optional: pinch of salt for flavor balance
A tiny pinch of salt might seem strange in a sweet mix, but it’s actually crucial. Salt enhances the chocolate flavor and balances the sweetness. I recommend using fine sea salt or table salt rather than coarse varieties to ensure it blends evenly throughout your mixture. Just a small pinch per cup of mixture is sufficient—you shouldn’t taste saltiness, only enhanced chocolate flavor.
Tools: jar, blender, or whisk
Finally, you’ll need something to mix and store your homemade Nesquik powder. A mason jar with a tight-fitting lid serves both purposes perfectly. Simply add ingredients and shake vigorously. Alternatively, a blender creates an ultra-fine powder that dissolves easily. For smaller batches, a simple whisk in a bowl works too. Whatever container you choose for storage, ensure it’s airtight to maintain freshness for up to three months.
How to Make Homemade Nesquik Powder
Creating your own homemade Nesquik powder is remarkably straightforward. Once you’ve gathered your ingredients, the actual preparation takes just minutes.
Step 1: Measure your ingredients
The perfect ratio for homemade chocolate milk powder typically follows a simple formula. For a basic batch, mix:
- 1/3 cup unsweetened cocoa powder
- 2/3 cup granulated sugar
- A pinch of salt (optional but recommended)
This 1:2 ratio of cocoa to sugar creates a balanced flavor profile similar to commercial Nesquik. For those who prefer a more intense chocolate taste, you can adjust to equal parts cocoa and sugar. Undoubtedly, the beauty of making your own mix is the ability to customize according to your preference.
Initially, precise measurements matter, but after making it once, you’ll likely eyeball the ingredients based on your taste preferences.
Step 2: Blend or shake until smooth
There are several effective methods to combine your ingredients:
- Jar method: Place all measured ingredients in a mason jar with a tight-fitting lid. Secure the lid and shake vigorously until everything is well combined. This method works perfectly for smaller batches and requires no special equipment.
- Blender method: For ultra-fine powder that dissolves more readily, combine ingredients in a food processor or blender. Pulse for about 10 seconds until thoroughly mixed.
- Whisk method: Simply place ingredients in a bowl and whisk until combined. This works well but may not achieve the same smoothness as the other methods.
Essentially, regardless of which mixing method you choose, ensure all ingredients are thoroughly incorporated with no visible clumps of cocoa powder.
Step 3: Store in an airtight container
Proper storage is crucial for maintaining freshness:
- Transfer your homemade Nesquik powder to an airtight container. Mason jars work exceptionally well.
- Store in a cool, dry place at room temperature. The mixture will stay fresh for 2-3 months when properly stored.
- For those in humid climates, refrigeration might be beneficial to prevent clumping.
Primarily, ensuring the container is truly airtight will maximize shelf life and prevent moisture from causing the powder to harden. Subsequently, always use a dry spoon when scooping out the mixture to prevent introducing moisture that could cause clumping.
How to Use Your Homemade Chocolate Milk Powder
Now that you’ve prepared your homemade Nesquik powder, it’s time to enjoy it in various delicious ways. With this versatile mix, you can create everything from refreshing cold drinks to comforting hot beverages.
Making cold chocolate milk
The simplest way to enjoy your homemade chocolate milk powder is in a cold, refreshing glass of milk. For the best results, I recommend using one of these methods:
For a smooth, clump-free drink, add 1-2 tablespoons of your homemade Nesquik powder to a couple tablespoons of warm water first. Stir until completely dissolved, then add one cup of cold milk and mix well. This prevents the cocoa particles from floating to the top.
Alternatively, use a blender for perfectly mixed chocolate milk. Add 1-2 tablespoons of powder per cup of milk, blend on high for about 30 seconds, and enjoy! For an extra cold treat, add an ice cube to the blender. The blender method truly makes the smoothest chocolate milk.
Making hot chocolate
Your homemade Nesquik powder makes wonderful hot chocolate, perfect for chilly evenings. Simply add 1-2 tablespoons of your chocolate milk powder to a cup of heated milk. Stir until completely dissolved.
For a richer hot chocolate, warm about ¼ cup of milk until steaming, then add your powder and stir vigorously before adding the rest of your milk. This helps the cocoa dissolve more thoroughly.
Using in smoothies or shakes
Beyond basic chocolate milk, your homemade Nesquik powder works wonderfully in smoothies and shakes. Try adding 2-3 tablespoons to a blender with cold milk and a ripe banana for a delicious chocolate banana shake.
For a refreshing iced chocolate treat, blend 3 cups of milk with ½ cup of your homemade Nesquik powder and 2 cups of ice cubes until smooth. This makes a wonderfully frosty summer drink.
Tips for dissolving the powder properly
Cocoa powder can be stubborn to dissolve, especially in cold liquids. Firstly, the warm water trick is crucial – mix your powder with a small amount of hot water before adding milk. This “blooms” the cocoa and prevents chalkiness.
Another effective technique is to add the powder to a small amount of heated milk, stir vigorously, then add the remaining milk. This creates a smooth consistency without lumps.
For the absolute best texture, allow your chocolate milk to “bloom” in the refrigerator for a few hours. This ensures the ingredients fully dissolve and bond, eliminating any chalky aftertaste.
Conclusion
Making your own Nesquik powder at home transforms an everyday treat into something special. Throughout this article, we’ve seen how homemade chocolate milk powder delivers superior taste while cutting costs significantly. This DIY approach certainly gives you complete control over what goes into your family’s beverages.
The simplicity of this recipe—just cocoa, sugar, and optionally salt—stands in stark contrast to the lengthy ingredient list found on store-bought containers. Your homemade version eliminates preservatives and mysterious additives altogether, allowing you to enjoy chocolate milk without unnecessary chemicals.
Customization remains one of the greatest advantages of making Nesquik powder yourself. You can adjust the sweetness level, experiment with different cocoa types, or substitute alternative sweeteners based on your family’s preferences. This flexibility proves especially valuable for parents concerned about their children’s nutrition.
The versatility of homemade chocolate milk powder extends beyond just cold milk. As demonstrated earlier, this powder works wonderfully in hot chocolate, smoothies, and shakes. The mixing techniques we’ve explored help ensure a smooth, clump-free experience regardless of how you choose to enjoy it.
Most importantly, this homemade version brings joy without compromise. You’ll save money, avoid questionable ingredients, and still delight in that classic chocolate milk taste everyone loves. After making this simple recipe once, you might find yourself wondering why you ever purchased the commercial version in the first place!
So grab your cocoa, measure your sugar, and start shaking. Your perfect cup of chocolate milk awaits—purer, tastier, and undoubtedly more satisfying than anything from the store.
FAQs
Q1. What are the main ingredients needed to make homemade Nesquik powder? The basic ingredients for homemade Nesquik powder are unsweetened cocoa powder and granulated sugar. Optionally, you can add a pinch of salt to enhance the flavor.
Q2. How does homemade Nesquik powder compare to store-bought in terms of cost? Homemade Nesquik powder is significantly more cost-effective. It can cost less than half the price of store-bought versions, especially when using discounted cocoa powder and sugar on sale.
Q3. Can I adjust the sweetness of homemade chocolate milk powder? Yes, you can easily customize the sweetness level. The standard ratio is 1:2 cocoa to sugar, but you can adjust this based on your preference. You can also experiment with alternative sweeteners like stevia or monk fruit.
Q4. How long can I store homemade Nesquik powder? When stored in an airtight container at room temperature, homemade chocolate milk powder can last for 2-3 months. Ensure you use a dry spoon when scooping to prevent moisture from causing clumping.
Q5. What’s the best way to mix homemade Nesquik powder for a smooth drink? For the smoothest result, mix 1-2 tablespoons of the powder with a small amount of warm water first. Stir until completely dissolved, then add cold milk and mix well. Alternatively, you can use a blender for perfectly mixed chocolate milk.