
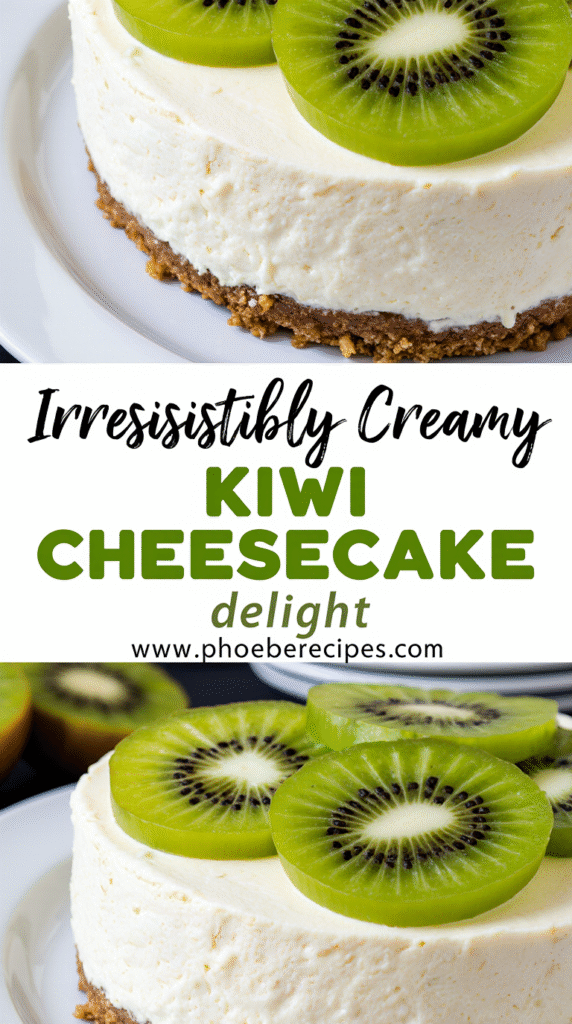
How to Make the Perfect Kiwi Cheesecake: Foolproof Recipe Guide
Kiwi cheesecake combines the nutritional powerhouse of kiwi fruit with the indulgent creaminess of a classic dessert. Packed with vitamins C, E, K, potassium, and folate, kiwis are truly a superfood that also tastes amazing. We’ve found that this vibrant, tangy-sweet fruit shines particularly well when featured in a luscious cheesecake setting.
Besides being visually stunning, a well-made kiwi cheesecake offers the perfect contrast between a buttery graham cracker crust and smooth, creamy filling. Whether you’re looking for a no-bake kiwi cheesecake that’s easy to make in advance or a traditional baked version, we’ve got you covered with this foolproof recipe guide. Additionally, kiwi dessert recipes like this one are ideal for celebrating warm weather while still enjoying the health benefits this fruit offers, including support for digestion and weight management. In this comprehensive guide, we’ll walk you through every step of creating the perfect kiwi cheesecake recipe that will impress your family and friends.
Choosing the Right Ingredients for Kiwi Cheesecake
Selecting premium ingredients forms the foundation of any exceptional kiwi cheesecake. The quality and type of each component significantly influence the final texture, flavor, and appearance of your dessert.
Best type of kiwi to use
For a stunning kiwi cheesecake, you have two excellent options. Traditional green kiwis offer that classic tangy flavor that contrasts beautifully with the rich filling. However, if you prefer a sweeter profile, golden kiwis (also called yellow kiwis) provide a more mellow sweetness and vibrant color. These golden varieties contain three times more vitamin C than oranges, making them a nutritious choice.
Ripeness matters tremendously when selecting kiwis. For the topping or sauce, choose soft, fully ripened fruits that mesh easily. Nevertheless, for decorative slices, slightly firmer kiwis will hold their shape better. When preparing kiwi for your cheesecake, be sure to remove the white central part as it can impart a bitter taste to your jelly or topping.
Cream cheese vs. alternatives
The foundation of any cheesecake is, naturally, the cheese component. Traditional cream cheese creates that signature rich, velvety texture we all love. However, several alternatives work surprisingly well:
- Mascarpone: Provides an ultra-rich texture (containing up to 75% fat!) with a slightly sweeter flavor
- Greek yogurt: Offers a protein-rich alternative with similar tanginess
- Neufchâtel: Contains 1/3 less fat than regular cream cheese
- Fresh goat cheese: Creates a unique flavor profile when paired with crème fraîche
For vegan kiwi cheesecakes, cashew cheese or silken tofu can substitute admirably.
Sweeteners and thickeners
Most kiwi cheesecake recipes call for granulated sugar in both the filling and topping. For the kiwi topping, approximately ½ cup sugar per 4 kiwis creates the perfect balance. Powdered sugar works better for the cheese filling, typically requiring about ½ cup.
For thickening agents, several options exist:
- Agar agar powder: Essential for setting kiwi toppings (1 teaspoon per 4 kiwis)
- Gelatin sheets or powder: Works well for most toppings
- Cornflour: Can be used (about 2 tablespoons) mixed with water
Interestingly, kiwi contains an enzyme that breaks down gelatin, which can prevent proper setting. Therefore, cooking the kiwi mixture first is crucial when using gelatin.
Optional flavor enhancers
To elevate your kiwi cheesecake, consider incorporating complementary flavor enhancers. Vanilla extract (1 teaspoon) adds depth to the filling. Furthermore, lemon juice brightens the kiwi flavor and helps balance sweetness. For a truly sophisticated twist, lime zest pairs exceptionally well with kiwi.
More adventurous bakers might experiment with ginger, which surprisingly complements kiwi beautifully. For a savory-sweet variation, finely chopped chives can be whisked into the cream cheese mixture.
Step-by-Step: Making the Crust, Filling, and Topping
Creating the perfect kiwi cheesecake involves three critical components that must be prepared separately before coming together as a harmonious dessert. Let’s break down each step of the process.
1. Preparing the biscuit or graham cracker crust
To create a sturdy foundation, begin by crushing graham crackers or digestive biscuits until they form fine, sandy crumbs. For a standard 9-inch pan, you’ll need about 1½ cups (180g) of crumbs. Combine these with ¼ cup sugar and 5-6 tablespoons of melted butter until the mixture resembles wet sand.
Press this mixture firmly into your springform pan. Firstly, use your hands to distribute it evenly, subsequently employ the bottom of a measuring cup to compact it tightly. For best results, create a slightly rounded edge where the sides meet the bottom rather than a sharp angle. Chill the crust in the freezer for 10-20 minutes or bake at 350°F (175°C) for 10 minutes until lightly golden.
2. Mixing the creamy cheesecake filling
For a classic filling, beat 24 ounces of room temperature cream cheese with granulated sugar until perfectly smooth. Afterward, incorporate confectioners’ sugar, sour cream, lemon juice, and vanilla. Beat for 2-3 minutes until no lumps remain.
Meanwhile, in a separate bowl, whip heavy cream into stiff peaks. Gently fold this into your cream cheese mixture, being careful not to deflate the air incorporated during whipping. This folding technique creates that signature light yet rich texture.
3. Creating the kiwi topping or sauce
To prepare the kiwi topping, puree peeled kiwi fruit in a food processor until smooth. In a saucepan, combine the kiwi puree with water, lemon juice, sugar, and your chosen setting agent (gelatin powder or agar agar). Let this mixture sit for a minute prior to heating.
Cook over low heat while stirring constantly until the mixture thickens and becomes translucent. Remove from heat and allow to cool slightly—but not completely, as it needs to remain pourable.
4. Assembling the layers
Pour your prepared filling over the cooled crust, using an offset spatula to create a smooth surface. Refrigerate until set (approximately 4-6 hours for no-bake versions).
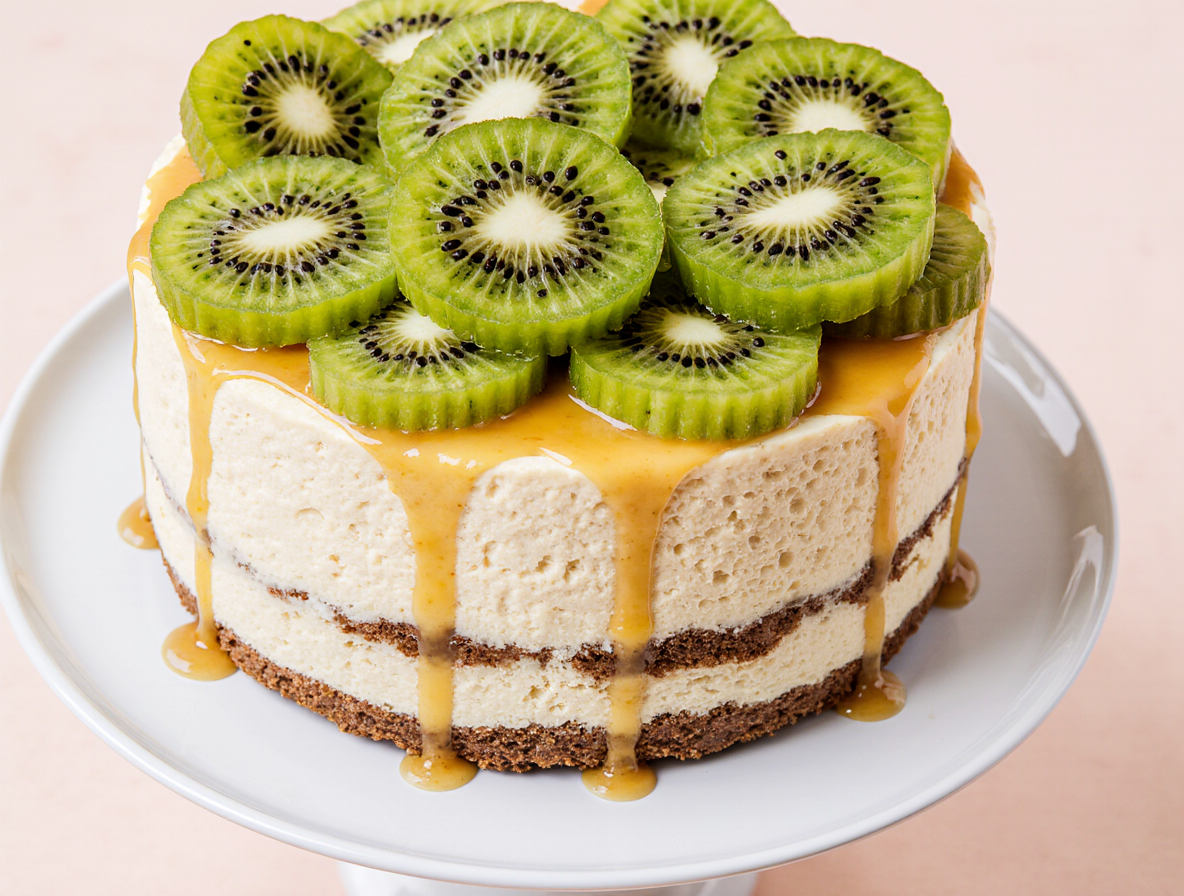
Once the filling has set, gently pour the slightly cooled kiwi topping over it. Return to the refrigerator for at least 2 hours to allow the topping to set completely. Before serving, decorate with fresh kiwi slices arranged in a concentric pattern for a professional finish.
No-Bake vs. Baked Kiwi Cheesecake: Which One to Choose?
Deciding between a no-bake and baked version of kiwi cheesecake depends on several factors including your skill level, available time, and desired texture. Both styles have distinct advantages that make them suitable for different occasions.
When to go no-bake
No-bake kiwi cheesecake shines as the perfect option for hot summer days when turning on the oven seems unbearable. This refreshing version is generally faster to prepare with minimal active time, although it requires several hours of chilling. Specifically, no-bake varieties excel for beginners since they involve less technical skill and virtually no risk of failure.
Moreover, if you’re looking for an egg-free dessert option or need to prepare something quickly for unexpected guests, the no-bake route offers simplicity without sacrificing visual appeal. These versions typically use condensed milk and cream instead of traditional cream cheese, creating a lighter dessert.
Benefits of baking
Traditional baked kiwi cheesecake delivers a more authentic texture with depth of flavor that many dessert enthusiasts prefer. The baking process wonderfully enriches and melds the flavors throughout the cheesecake. Comparatively, these versions maintain their structure better at room temperature, making them ideal for buffets or outdoor gatherings.
Additionally, baked cheesecakes generally have a longer shelf life, lasting up to seven days in the refrigerator versus the 36-hour peak freshness window for no-bake versions. They also stand up better to heavier toppings and decorations, including elaborate kiwi arrangements.
Texture and flavor differences
The primary distinction between these two styles lies in their texture. Baked kiwi cheesecake offers a dense, spongy consistency with a smooth, velvety mouthfeel. In contrast, no-bake versions deliver a lighter, almost mousse-like texture that’s airy and fluffy.
Flavor-wise, baked cheesecakes typically feature a fuller, more well-rounded taste profile due to the eggs in the mixture and the caramelization that occurs during baking. No-bake versions tend toward a brighter, fresher flavor that pairs especially well with the tanginess of kiwi.
Time and equipment needed
Regarding time investment, no-bake kiwi cheesecake requires approximately 5 minutes of hands-on preparation plus several hours of refrigeration. Alternatively, baked versions demand more complex techniques, including water baths to prevent cracking, plus roughly one hour of baking followed by cooling and refrigeration.
Equipment needs differ as well. While both styles traditionally use springform pans, no-bake versions can easily adapt to pie plates or even individual serving dishes. Baked cheesecakes essentially require proper baking equipment plus items for water baths if following traditional methods.
Tips for Perfect Results Every Time
Mastering the art of kiwi cheesecake requires attention to crucial details that can make or break your dessert. By following these expert tips, you’ll achieve perfect results every time.
How to avoid a runny filling
The key to a perfectly set kiwi cheesecake lies in using full-fat ingredients. Low-fat cream cheese or sour cream contains higher moisture content that prevents proper setting. Indeed, this is often the primary cause of runny cheesecake fillings. Additionally, room temperature ingredients are essential—cold ingredients require longer mixing, which incorporates too much air and leads to a sunken middle.
For no-bake varieties, ensure your cream cheese is cold, not room temperature, as this keeps the heavy cream from warming up and failing to whip properly. Should your mixture become runny despite your best efforts, a small amount of gelatin (2½ teaspoons) mixed with 4 tablespoons of heavy cream can rescue it.
Chilling and setting time explained
Patience proves absolutely crucial for perfect kiwi cheesecake. Most recipes require a minimum of 4-6 hours in the refrigerator, with overnight chilling (12 hours) delivering optimal results. For no-bake versions specifically, allow at least 6-8 hours of refrigeration.
Never rush the cooling process. After baking, let the cheesecake cool gradually—first in the turned-off oven with the door slightly open for about an hour, then at room temperature until no longer hot to touch, finally followed by refrigeration.
Decorating with fresh kiwi slices
For striking presentation, prepare kiwi decorations several hours before serving. Peel kiwis completely and slice into rounds or half-rounds. Arrange slices in patterns atop your chilled cheesecake.
For professional-looking results, brush a little melted orange marmalade over the kiwi slices to create an attractive glaze that makes them shine.
Storage and make-ahead tips
Kiwi cheesecake can be made up to two days in advance when stored properly. Cover tightly with plastic wrap or aluminum foil to prevent it from drying out or absorbing refrigerator odors.
For longer storage, cheesecake freezes remarkably well for up to 3 months. Wrap it thoroughly in plastic wrap and then foil to prevent freezer burn. Thaw overnight in the refrigerator with wrapping intact—never at room temperature, as this causes condensation that could make the crust soggy.
Conclusion
Kiwi cheesecake truly stands as a dessert that balances indulgence with nutritional benefits. Throughout this guide, we’ve explored everything from selecting the perfect kiwis to mastering both no-bake and traditional baked versions. Therefore, you now have all the knowledge needed to create this stunning treat with confidence.
Remember that patience plays a crucial role when making cheesecake. The waiting time during chilling might seem long, but this essential step ensures your dessert sets properly. Additionally, paying attention to ingredient temperatures and quality will significantly impact your final results.
Whether you choose the refreshing simplicity of a no-bake version or the rich depth of a traditional baked cheesecake, both options offer their unique advantages. The no-bake variety shines during hot summer days, while the baked version delivers that classic texture many dessert lovers crave.
We hope this foolproof guide inspires you to try creating your own kiwi cheesecake. The vibrant green slices atop creamy filling not only taste amazing but also create a visually stunning centerpiece for any occasion. Your friends and family will undoubtedly be impressed by this perfect balance of tangy kiwi and velvety cheesecake.
So grab some fresh kiwis, quality cream cheese, and get started! After all, the best way to master this recipe is through practice – and the delicious results make every minute worthwhile.
FAQs
Q1. What’s the key to achieving a creamy kiwi cheesecake texture? The secret to a creamy kiwi cheesecake lies in using full-fat ingredients and slightly underbaking the cheesecake. Bake it until the edges are set but the middle is still jiggly, then allow it to cool gradually for the perfect texture.
Q2. How long should I chill my kiwi cheesecake before serving? For optimal results, chill your kiwi cheesecake for at least 4-6 hours, but preferably overnight (12 hours). This extended chilling time ensures proper setting and enhances the flavor.
Q3. Can I make a no-bake version of kiwi cheesecake? Yes, you can make a no-bake kiwi cheesecake. It’s perfect for hot summer days and requires less technical skill. No-bake versions typically use condensed milk and cream instead of traditional cream cheese, resulting in a lighter dessert.
Q4. What’s the best way to decorate a kiwi cheesecake? For an attractive presentation, decorate your kiwi cheesecake with fresh kiwi slices arranged in a pattern on top. For a professional look, brush the kiwi slices with melted orange marmalade to create a glossy finish.
Q5. How far in advance can I prepare a kiwi cheesecake? You can make a kiwi cheesecake up to two days in advance when stored properly in the refrigerator. For longer storage, you can freeze it for up to 3 months. Just be sure to wrap it tightly to prevent freezer burn and thaw it overnight in the refrigerator before serving.