
Perfect Garlic Knots Recipe: Tested 23 Times for Best Results
Our garlic knots recipe has been tested 23 times to ensure you get perfect results every single time. After all that testing, we’ve discovered these delicious bites can be prepared in less than 20 minutes using refrigerated biscuits or just over an hour when made from scratch.
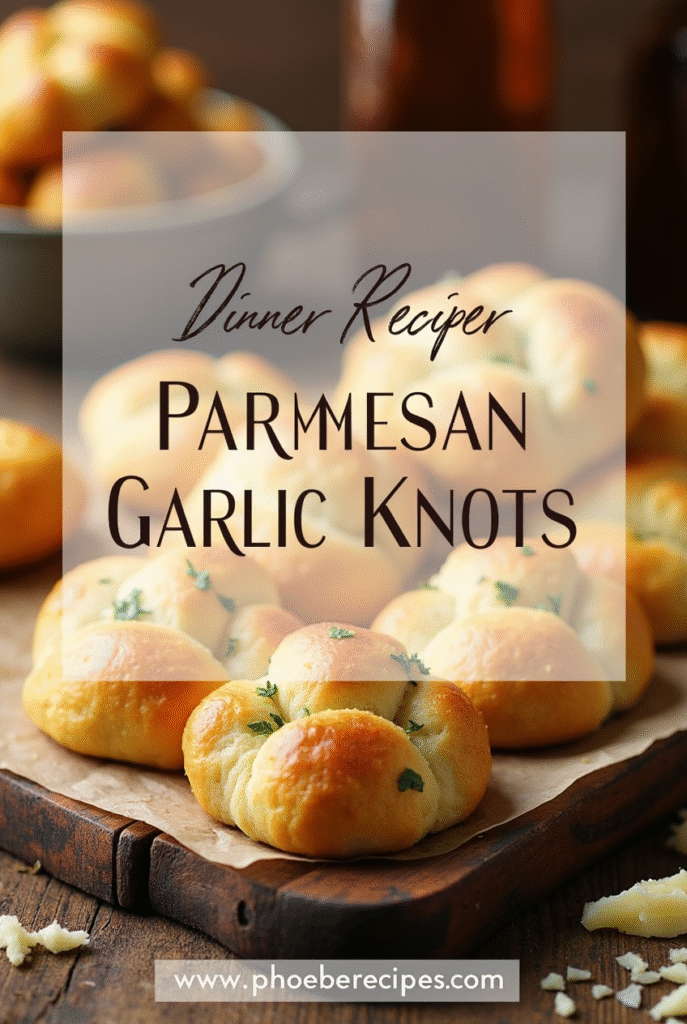
Whether you prefer a homemade garlic knots recipe or need a quick version using store-bought dough, this guide has you covered. In fact, the process is surprisingly simple – if you can tie a knot, you can make these! Additionally, our best garlic knots recipe includes tips for creating that soft garlic knots texture everyone loves, with detailed instructions for brushing garlic butter before and after baking. We’ll also show you how to transform basic knots into garlic parmesan knots recipe variations using fresh herbs and cheese for maximum flavor.
Choosing the Right Dough for Garlic Knots
The foundation of exceptional garlic knots begins with selecting the perfect dough. Making this choice correctly can be the difference between mediocre bread bites and restaurant-quality treats that leave everyone asking for your recipe.
Store-bought vs homemade dough
While store-bought pizza dough offers undeniable convenience, it typically lacks the robust flavor profile of homemade dough. Nevertheless, garlic knots are somewhat unique because their intense garlic butter coating and cheese toppings can effectively mask the blandness of pre-made dough. This makes garlic knots one of the rare cases where using store-bought dough won’t significantly compromise your final results.
Homemade dough requires just a handful of basic ingredients—flour, yeast, sugar, water, salt, and olive oil—but demands 60-90 minutes of rise time. The extra effort pays off with better-developed flavor and texture. Furthermore, creating dough from scratch allows you to control the seasoning levels and customize the texture to your preference.
Best flour types for texture
Bread flour stands as the undisputed champion for making the best garlic knots. Unlike all-purpose flour, bread flour contains higher protein content that develops more gluten, creating that desirable chewy texture we associate with professional pizzeria garlic knots.
What makes bread flour special? It contains a small amount of barley flour and vitamin C, which serve important functions. The barley flour activates the yeast more effectively, while the vitamin C increases gluten elasticity and its ability to retain gas during rising and baking. This combination produces a noticeably superior result compared to all-purpose flour, which tends to yield knots that are disappointingly tough and dry.
Though bread flour creates a slightly crisper exterior with a wonderfully chewy interior, all-purpose flour produces softer, fluffier knots. Your choice ultimately depends on whether you prefer authentic pizzeria-style chewiness or pillowy softness.
How yeast affects the rise and flavor
The type of yeast you select impacts both the preparation process and the final flavor of your garlic knots. Active dry yeast requires proofing—combining it with warm water and a pinch of sugar until it foams, confirming it’s alive and ready to work. Instant yeast (also called rapid-rise or quick-rise) can be added directly to your dry ingredients, streamlining the process.
Though often overlooked, sugar plays a crucial role even in savory dough. Beyond adding subtle sweetness, it activates the yeast, tenderizes the dough, and contributes to a softer, more flavorful result. For deeper flavor development, consider allowing your dough to rise slowly in the refrigerator overnight instead of a quick rise at room temperature.
Most importantly, always check your yeast’s expiration date before beginning. Expired yeast is the most common reason dough fails to rise properly, resulting in dense, disappointing knots.
Step-by-Step: How to Make Garlic Knots from Scratch
Creating perfect garlic knots from scratch requires careful attention to technique. Let me walk you through each essential step I’ve mastered after numerous test batches.
1. Preparing the dough
The journey begins with proofing your yeast. In a large bowl, combine warm water (100-110°F), active dry yeast, and a teaspoon of sugar. Allow this mixture to rest for 5-10 minutes until foamy, confirming your yeast is alive and active. Subsequently, add 2 tablespoons olive oil, 2 teaspoons sugar, and 1 teaspoon kosher salt before whisking everything together.
Next, gradually incorporate your flour. For a basic recipe, add about 1¾ cups all-purpose flour and stir until a sticky, uniform dough forms. Alternatively, use a stand mixer with a dough hook for approximately 8 minutes until the dough comes away from the bowl sides while remaining slightly sticky. Resist adding too much flour—a somewhat sticky dough produces softer knots.
2. Letting the dough rise
Place your dough in a lightly oiled bowl, turning once to coat all surfaces. Cover with plastic wrap or a damp kitchen towel. Position the bowl in a warm spot and allow the dough to rise until doubled in size, typically 60-90 minutes. For enhanced flavor development, consider refrigerating overnight or up to 24 hours.
How do you know when it’s ready? Gently poke the dough with your finger—if the indentation rebounds slowly, your dough has risen sufficiently.
3. Shaping the knots
Once risen, gently punch down the dough to release trapped air. On a lightly floured surface, shape it into a log approximately 16 inches long. Using a sharp knife or pizza cutter, divide into 12-16 equal pieces.
Roll each piece into a rope about 8 inches long and ½ inch thick. To form the knot, simply tie each rope as you would a shoelace. You can either tuck the ends underneath or leave them exposed based on your preference.
4. Second rise before baking
Arrange your shaped knots on parchment-lined baking sheets, spacing them evenly. Loosely cover with plastic wrap and allow them to rest for 30-45 minutes until slightly puffed. This second rise is crucial—it develops that signature soft texture we all crave in the best garlic knots.
The knots are ready for baking when they appear puffy and a gentle finger press leaves a small indentation that doesn’t spring back completely. Meanwhile, preheat your oven to 425°F with racks positioned to divide the oven into thirds.
The Garlic Butter Topping That Makes It Perfect
The signature flavor that transforms plain bread into mouthwatering garlic knots comes from a perfectly crafted garlic butter topping. Indeed, this aromatic mixture is what gives these twisted treats their irresistible appeal and memorable taste.
Classic garlic butter ingredients
The foundation of any garlic knots recipe begins with a simple yet flavorful butter mixture. At its most basic, you’ll need:
- Melted unsalted butter (typically 4 tablespoons)
- Fresh minced garlic (about 3 cloves or 1½ tablespoons)
- Salt (¼ teaspoon)
Beyond these essentials, many variations exist. For herb-infused flavor, incorporate Italian seasoning or a combination of dried oregano, basil, and parsley. Generally, using fresh minced garlic provides the most robust flavor, although garlic powder (¾ teaspoon) offers convenience and consistent results.
First thing to remember: cooking the garlic in butter over medium-low heat for 1-2 minutes until fragrant creates a deeper, less raw garlic flavor. This small extra step makes a substantial difference in the final taste profile of your best garlic knots recipe.
When to apply the butter
The timing of butter application represents one of the most crucial decisions for perfect garlic knots. As a result of extensive testing, two primary approaches stand out:
Single application: Brush knots with all the garlic butter after baking, allowing the warm bread to absorb the mixture effectively.
Double application: For maximum flavor infusion, apply half the garlic butter before baking and the remaining half immediately after removing from the oven. This method, particularly favored by professional bakers, ensures the garlic flavor permeates throughout each bite.
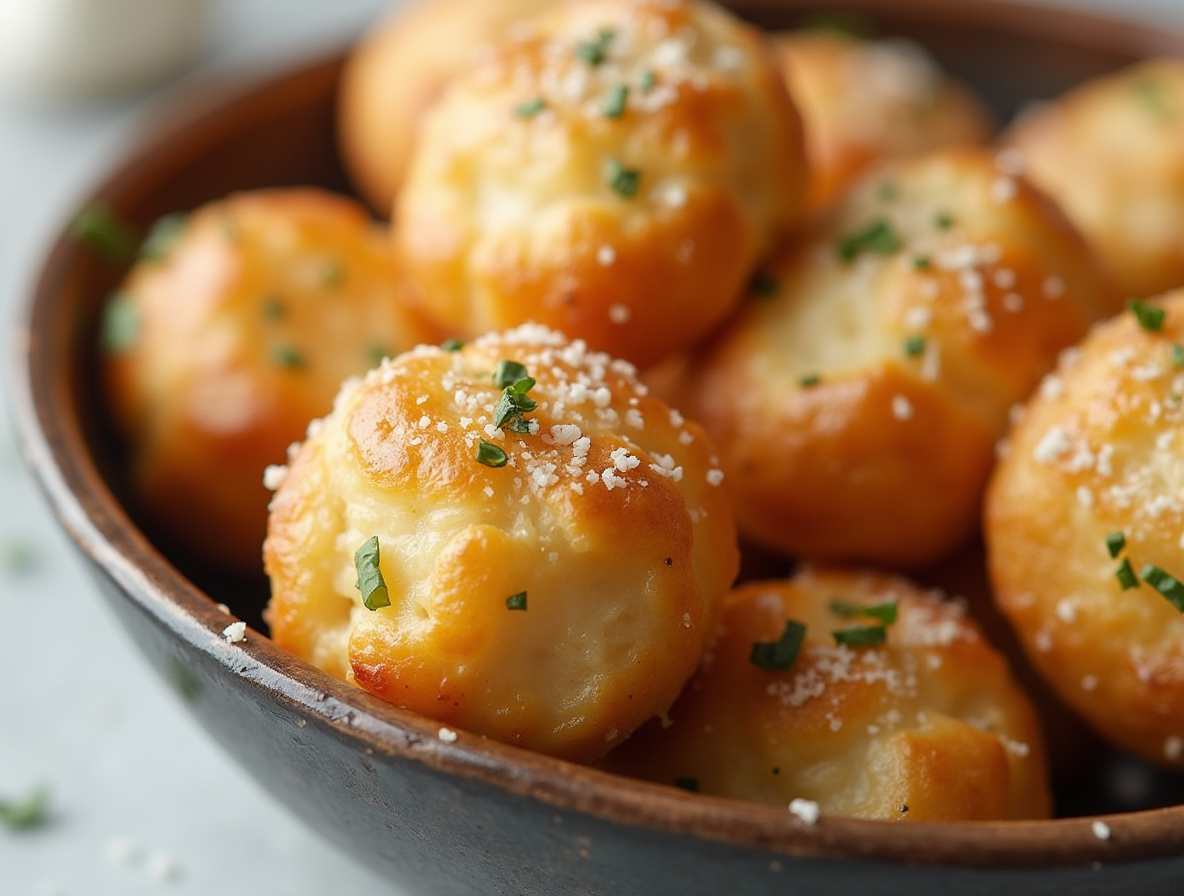
Optional toppings: parmesan, parsley, sea salt
To elevate your homemade garlic knots recipe, consider these finishing touches:
Freshly grated Parmesan cheese sprinkled over warm, buttered knots adds a salty, nutty dimension. Fresh chopped parsley or chives provide bright color contrast and herbaceous notes. For texture and flavor enhancement, a light sprinkle of flaky sea salt works wonders on garlic parmesan knots recipe variations.
In essence, these final garnishes transform basic garlic knots into restaurant-quality treats that disappear quickly from any table.
Baking, Storing, and Reheating Tips
Mastering the final stages of your garlic knots recipe ensures they turn out perfectly golden and stay delicious even days later. Let’s explore how to properly bake, store, and reheat these savory treats.
Baking time and temperature
For perfectly baked garlic knots, preheat your oven to 350-400°F (175-205°C). Most recipes recommend 350°F as the ideal temperature to achieve proper browning without burning. Baking times typically range from 15-25 minutes depending on your oven and the size of your knots.
Properly baked garlic knots should have a golden-brown exterior while maintaining a soft interior. For precision bakers, the internal temperature should register around 195°F (90°C) when fully baked.
Interestingly, allowing the shaped knots to rest for about 15 minutes before baking gives the dough time to relax, resulting in better texture once baked.
How to store leftovers
Properly stored garlic knots can retain their quality for several days. Initially, allow them to cool completely before transferring to an airtight container. At room temperature, they’ll remain fresh for 2-3 days. Alternatively, refrigerated knots can last up to a week.
For optimal freshness with leftover knots, consider this strategy: if you aren’t planning to eat all your knots immediately, hold back some of the garlic butter. Then, apply fresh butter when serving the stored knots.
Freezing and reheating instructions
Fortunately, garlic knots freeze exceptionally well, with two primary methods available:
Freezing after baking: Cool completely, then place in freezer-safe bags for up to 2-3 months. This method allows for quick reheating when needed.
Freezing unbaked knots: After shaping, freeze knots uncovered for 1-2 hours until solid. Subsequently, transfer to freezer containers for up to 3 months. When ready to bake, thaw in the refrigerator overnight or at room temperature for about 2 hours before baking.
Regarding reheating, the oven method yields superior results. Wrap knots in aluminum foil and heat at 200-350°F for 5-10 minutes. Specifically, for room temperature knots, 10 minutes at 350°F works well, while refrigerated knots may require 15 minutes.
Essentially, avoid microwaving when possible, as it often results in tough, uneven texture. However, if using a microwave, wrap knots in a damp paper towel and heat in 10-30 second intervals.
Conclusion
After countless hours of testing and perfecting this recipe, we can confidently say these garlic knots rival any you’d find at your favorite pizzeria. Whether you choose the quick 20-minute version with store-bought dough or dedicate an hour to create them from scratch, the results will undoubtedly impress anyone lucky enough to taste them.
The beauty of garlic knots lies in their versatility. You can customize every aspect – from the type of flour used to achieve your preferred texture, to the application timing of that aromatic garlic butter that makes them irresistible. Most importantly, these delicious treats remain accessible to bakers of all skill levels. Anyone who can tie a simple knot can create these flavorful bites.
Though seemingly straightforward, our testing revealed several key factors that transform good garlic knots into exceptional ones. The double application of garlic butter stands out as perhaps the most significant discovery. This technique ensures maximum flavor infusion throughout each bite. Additionally, paying attention to proper rising times and baking temperatures guarantees that perfect balance between a golden exterior and soft, pillowy interior.
Freezing options provide wonderful flexibility for busy households. You can prepare a large batch during weekend baking sessions, then enjoy freshly reheated knots throughout the week. This approach saves time without sacrificing quality.
We hope this comprehensive guide helps you create perfect garlic knots every time. The combination of simple ingredients, straightforward techniques, and our tested tips ensures success regardless of your baking experience. These garlic knots will surely become a requested favorite at your dinner table – just as they have at ours!
FAQs
Q1. How long should I bake garlic knots? Bake garlic knots at 350-400°F (175-205°C) for 15-25 minutes, depending on your oven and the size of the knots. They’re done when golden-brown on the outside and have an internal temperature of about 195°F (90°C).
Q2. Can I use store-bought pizza dough for garlic knots? Yes, you can use store-bought pizza dough to make garlic knots. While homemade dough offers better flavor, the intense garlic butter coating can effectively mask any blandness in pre-made dough, making it a convenient option.
Q3. What’s the best way to apply garlic butter to the knots? For maximum flavor, use a double application method: brush half the garlic butter before baking and the remaining half immediately after removing from the oven. This ensures the garlic flavor permeates throughout each bite.
Q4. How should I store leftover garlic knots? Allow garlic knots to cool completely, then store them in an airtight container. They’ll stay fresh at room temperature for 2-3 days or up to a week in the refrigerator. For longer storage, you can freeze them for up to 2-3 months.
Q5. What’s the best method for reheating garlic knots? For the best texture, reheat garlic knots in the oven. Wrap them in aluminum foil and heat at 350°F for about 10 minutes if at room temperature, or 15 minutes if refrigerated. Avoid microwaving when possible, as it can result in a tough, uneven texture.