
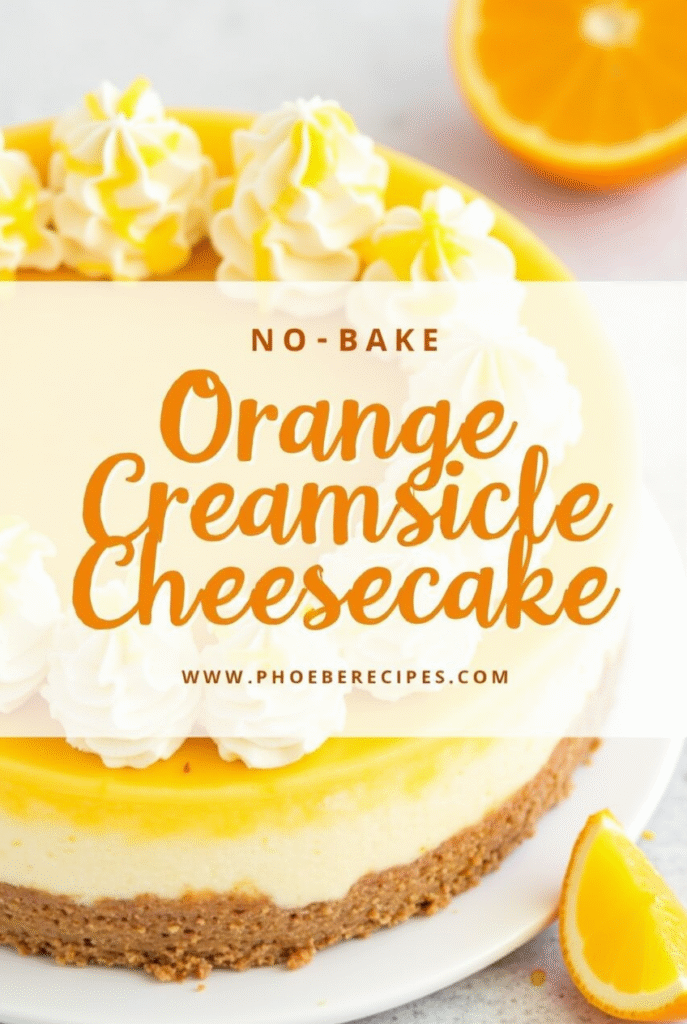
The Foolproof Guide to No-Bake Orange Creamsicle Cheesecake (Tested Recipe)
No-bake orange creamsicle cheesecake brings back the nostalgic flavors of childhood ice cream treats in a creamy, sophisticated dessert form. I’ve perfected this recipe that combines the bright citrus notes of orange with silky cream cheese, creating a show-stopping dessert that requires just 20 minutes of preparation time.
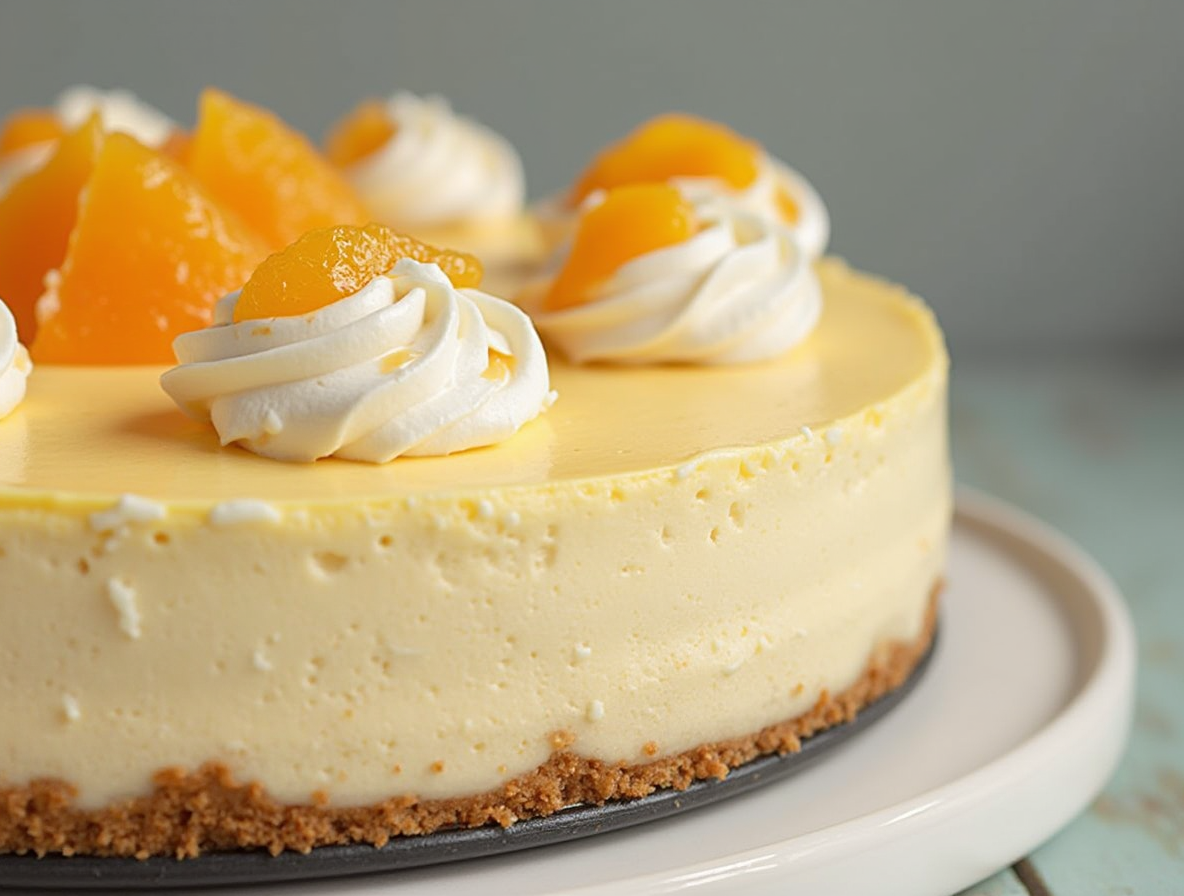
This orange creamsicle cheesecake recipe no bake wonder is incredibly versatile, perfect for any season – not just summer gatherings. With its visually appealing layered and swirled effect from the orange gelatin and whipped cream combination, it certainly impresses guests while serving up to 12 people. Additionally, the graham cracker crust provides the ideal foundation for the citrusy filling, enhanced by fresh orange zest for an aromatic punch. The best part? You can make this no bake orange creamsicle cheesecake recipe ahead of time and store it in the refrigerator for up to 5 days, though you’ll need at least 4 hours of chill time (I recommend 6-8 hours or overnight for optimal results).
Choosing the Right Ingredients for Success
The success of your no-bake orange creamsicle cheesecake depends largely on selecting the right ingredients. Using high-quality components makes all the difference between a mediocre dessert and a spectacular one that your guests will rave about.
Cream cheese: block vs. spreadable
For making no-bake orange creamsicle cheesecake, always reach for block cream cheese rather than the spreadable kind that comes in tubs. Block cream cheese contains higher fat content and fewer additives, creating a more stable and richer cheesecake. The manufacturing process for tub cream cheese incorporates air and additional ingredients like whey protein and guar gum, which can affect the texture of your final dessert. Furthermore, block-style cream cheese softens quickly and evenly, making it easier to measure and blend smoothly. I recommend using full-fat Philadelphia brand for consistent results, as other brands may not have the same fat content or stabilizers.
Best crust options: graham crackers, Oreos, or wafers
The foundation of your no-bake orange creamsicle cheesecake deserves careful consideration. Graham crackers provide a classic base with their nutty, complex flavor that balances the creamy filling. However, Biscoff cookies offer deeper caramel notes and stronger spices that elevate the overall flavor profile. Oreos make an excellent alternative, requiring just 22 regular cookies (not Double Stuf, which contain too much cream) and 5 tablespoons of melted butter. No matter which option you choose, press the crumbs firmly with a flat-bottomed glass or measuring cup to create a compact layer that won’t crumble when served.
Why orange gelatin is key
Orange gelatin serves as the secret ingredient that gives your no-bake orange creamsicle cheesecake its distinctive flavor and structure. The gelatin not only contributes that nostalgic orange creamsicle taste but also helps the cheesecake maintain its shape without baking. For best results, prepare the orange gelatin according to package directions and allow it to cool slightly before incorporating it into your cream cheese mixture. This cooling step prevents the gelatin from setting too quickly or melting the other ingredients.
Heavy cream vs. whipped topping
When deciding between heavy cream and pre-made whipped topping, consider both texture and stability. Heavy cream (sometimes labeled heavy whipping cream) contains at least 36% milk fat, giving your no-bake orange creamsicle cheesecake a luxurious texture that holds its shape longer. In contrast, regular whipping cream has 30-36% milk fat and produces a lighter, softer result that deflates more quickly. If you opt for whipped topping instead, you’ll get more stability but less authentic flavor. Should you choose to whip your own cream, be careful not to overmix—stop at stiff peaks to avoid curdling.
Step-by-Step: Making the No-Bake Orange Creamsicle Cheesecake
Creating this heavenly no-bake orange creamsicle cheesecake requires just a few simple steps, with each one building toward a dreamy dessert that balances tangy cream cheese with sweet orange flavors. Let me guide you through the process I’ve perfected after many test batches in my kitchen.
1. Prepare the crust and chill
First, combine graham cracker crumbs with melted butter and a touch of sugar in a bowl until every crumb is coated – this ensures your crust sticks together perfectly. Press this mixture firmly into the bottom of a 9-inch springform pan, using the bottom of a measuring cup to create crisp edges. For optimal texture, the crust must be thoroughly compressed. Subsequently, place your crust in the freezer for at least 30 minutes to set while you prepare the filling. This chilling time is essential as it allows the butter to solidify, creating a sturdy base for your orange creamsicle cheesecake recipe.
2. Mix the cream cheese layer
Next, grab your softened cream cheese blocks (remember, not the spreadable kind) and beat them with granulated sugar until completely smooth and fluffy. This typically takes about one minute with an electric mixer. Essentially, scraping the bowl’s sides ensures no lumps remain – a crucial step for silky texture. Then, incorporate vanilla extract for depth of flavor. Set this mixture aside as you prepare the next component.
3. Make the orange gelatin layer
For the signature orange layer, whisk orange jello powder with boiling water until completely dissolved. Let this mixture cool at room temperature for approximately 30 minutes – a vital waiting period that prevents the warm gelatin from melting your cream cheese or deflating your whipped cream. Moreover, consider adding fresh orange zest to enhance the citrus flavor profile of your no bake orange creamsicle cheesecake recipe.
4. Fold in whipped cream to both layers
In a separate bowl, whip heavy cream until stiff peaks form – this usually takes 5-7 minutes on high speed. Thereafter, divide this whipped cream into two equal portions. Gently fold one half into your cream cheese mixture and the other half into your cooled orange gelatin. The folding technique matters significantly here – use a spatula and cut down through the center, then sweep up along the side in a J-motion to maintain airiness.
5. Layer and swirl the mixtures
Finally, begin assembling your no-bake creamsicle cheesecake by pouring half the cream cheese mixture into your chilled crust. Top with half the orange mixture, then repeat these layers. For a beautiful marbled effect, insert a knife or skewer and create figure-eight motions throughout. Cover your masterpiece with plastic wrap and refrigerate for at least 4 hours, although overnight chilling yields the most perfect slices and fully developed flavors.
Tips to Get the Perfect Texture and Flavor
Mastering the technical aspects of your no-bake orange creamsicle cheesecake can mean the difference between a good dessert and an exceptional one. These specific techniques will help you achieve that perfect texture and flavor every time.
Let the gelatin cool before mixing
Never add hot gelatin directly to your cream cheese mixture or whipped cream. After dissolving the orange gelatin in boiling water, allow it to cool for about 5 minutes before incorporating it into your filling. This cooling period is critical because hot gelatin can melt cream cheese or deflate whipped cream, ruining your no-bake orange creamsicle cheesecake’s structure. However, don’t wait until the gelatin solidifies either—it should remain in liquid form when added to your mixture. If it starts to set, gently reheat it until just melted again.
How to avoid lumps in the cream cheese
The secret to a silky-smooth no bake orange creamsicle cheesecake starts with room temperature cream cheese. Remove it from the refrigerator at least one hour before mixing. When beating, start with cream cheese alone until completely smooth before adding other ingredients. Additionally, scrape the bowl’s sides and bottom frequently—this is where unmixed cream cheese often hides. For stubborn lumps, press the mixture through a fine mesh strainer or use a rubber spatula to squash them against the bowl’s side. Remember to add ingredients gradually, especially eggs and sugar, to maintain a uniform consistency.
Folding vs. mixing: why it matters
With no bake creamsicle cheesecake, the folding technique preserves air bubbles that provide structure. Unlike mixing (which deflates), folding gently combines ingredients while maintaining volume. To fold properly, use a silicone spatula and cut through the center of the mixture, then sweep up along the sides in a J-motion. For orange creamsicle cheesecake recipe success, first fold about 1/4 of the whipped cream into your cream cheese mixture to lighten it before adding the remainder. This prevents excessive air loss and maintains that perfect mousse-like texture.
Chill time: minimum vs. ideal
Patience pays off with no-bake orange creamsicle cheesecake recipe results. While you need at minimum 4-6 hours of refrigeration, overnight chilling (12 hours) delivers significantly better texture and flavor development. During refrigeration, the filling transforms from soft and mousse-like to firm and cheesecake-dense. This extended chilling time also allows moisture to stabilize throughout the dessert, particularly benefiting the crust, which becomes less crumbly and more cohesive. For special occasions, consider making your cheesecake a day ahead—the flavor actually improves within the first 36 hours.
Serving, Garnishing, and Flavor Variations
The presentation of your no-bake orange creamsicle cheesecake elevates it from simply delicious to truly memorable. With the right finishing touches and storage techniques, you can maximize both visual appeal and flavor.
Garnish ideas: whipped cream, zest, orange slices
Fresh garnishes add vibrant color and complementary flavors to your no-bake orange creamsicle cheesecake. Top your creation with freshly whipped cream dollops and orange segments to amplify the citrus profile. Additionally, mint leaves provide a pop of green color contrast against the orange. For those seeking extra indulgence, one baker suggests adding candied orange slices as an elegant finishing touch. Throughout my testing, I’ve found that these garnishes not only enhance flavor but also cleverly mask any imperfections from plastic wrap during storage.
Serving tips for clean slices
First of all, a well-chilled cheesecake (straight from the refrigerator) slices much more cleanly than one at room temperature. For perfect presentation:
- Fill a tall container with hot water
- Dip your sharp chef’s knife into the water before each cut
- Quickly dry the blade with a clean towel
- Make confident, single-motion cuts
For 12 even slices, cut the cake into quarters, then cut each quarter into thirds. Meanwhile, for 16 slices, cut into quarters, then halve each section twice. To easily remove slices, slide a knife between the crust and cake board before lifting.
Flavor swaps: lemon, raspberry, or lime
Your no-bake creamsicle cheesecake recipe can be wonderfully versatile. Substitute lemon or lime juice instead of orange for a different citrus experience. Furthermore, one tester noted that adding 1 teaspoon of orange extract significantly enhanced the orange flavor when desired. Indeed, another baker recommends adding 4 tablespoons of sour cream to the cheesecake mixture alongside Mexican vanilla for a richer flavor profile.
Can you freeze it? Yes, here’s how
Undoubtedly, this no-bake orange creamsicle cheesecake freezes beautifully for up to three months. Wrap the entire cake in storage wrap followed by aluminum foil, or freeze individual slices for convenient portions. To defrost, place slices in the refrigerator overnight or at room temperature for 20-45 minutes. Alongside thawing, consider adding fresh toppings as frozen garnishes (especially fruit) can look wilted after defrosting.
Conclusion
Creating this no-bake orange creamsicle cheesecake brings together the best of both worlds – nostalgic flavor and sophisticated presentation without the hassle of baking. Throughout this guide, I’ve shared my tested techniques for achieving that perfect balance of tangy cream cheese and sweet orange notes that will transport you back to childhood ice cream treats.
After all, the small details truly matter when crafting this dessert. Using block cream cheese rather than spreadable varieties, selecting the right crust base, properly cooling your orange gelatin, and mastering the gentle folding technique all contribute to that dreamy, mousse-like texture we’re aiming for.
Additionally, patience plays a vital role in this recipe. While you might feel tempted to serve your creation after the minimum 4-hour chill time, allowing it to set overnight undoubtedly yields the best texture and flavor development. This waiting period transforms your dessert from good to exceptional.
Most importantly, this versatile recipe welcomes customization. Whether you stick with the classic orange flavor or experiment with lemon, lime, or raspberry variations, the fundamental techniques remain the same. Likewise, your garnishing choices – from whipped cream dollops to fresh orange slices or mint leaves – offer endless opportunities for personalization.
Finally, remember that this make-ahead dessert stores beautifully. You can refrigerate it for up to five days or freeze it for three months, making it perfect for busy hosts who want to prepare impressive desserts in advance.
Therefore, armed with these tips and techniques, you’re now ready to create a show-stopping no-bake orange creamsicle cheesecake that will have your guests asking for the recipe. The combination of simplicity, stunning presentation, and nostalgic flavor makes this dessert a true winner for any occasion, regardless of season.
FAQs
Q1. How can I prevent my no-bake orange creamsicle cheesecake from becoming soggy? To avoid a soggy texture, ensure all ingredients are properly chilled before mixing. If the filling still seems too soft, you can add a small amount of gelatin to help it set firmly in the refrigerator.
Q2. Can I make this no-bake orange creamsicle cheesecake ahead of time? Yes, you can prepare this cheesecake up to 5 days in advance. Store it covered in the refrigerator for the best results. The flavors actually improve within the first 36 hours of chilling.
Q3. What’s the secret to achieving the perfect texture in a no-bake cheesecake? The key to perfect texture lies in using room temperature cream cheese, properly cooling the gelatin before mixing, and gently folding in the whipped cream. Also, allow sufficient chilling time – ideally overnight – for the best consistency.
Q4. How can I create clean slices when serving the cheesecake? For clean slices, ensure the cheesecake is well-chilled. Use a sharp knife dipped in hot water and dried before each cut. Make confident, single-motion cuts for the best presentation.
Q5. Are there any flavor variations I can try with this recipe? Absolutely! While orange creates a classic creamsicle flavor, you can experiment with other citrus fruits like lemon or lime. You could also try adding raspberry for a different twist. Just substitute the orange gelatin with your preferred flavor.