
The Foolproof No-Bake Banana Pudding Cheesecake Recipe (15-Minute Prep)
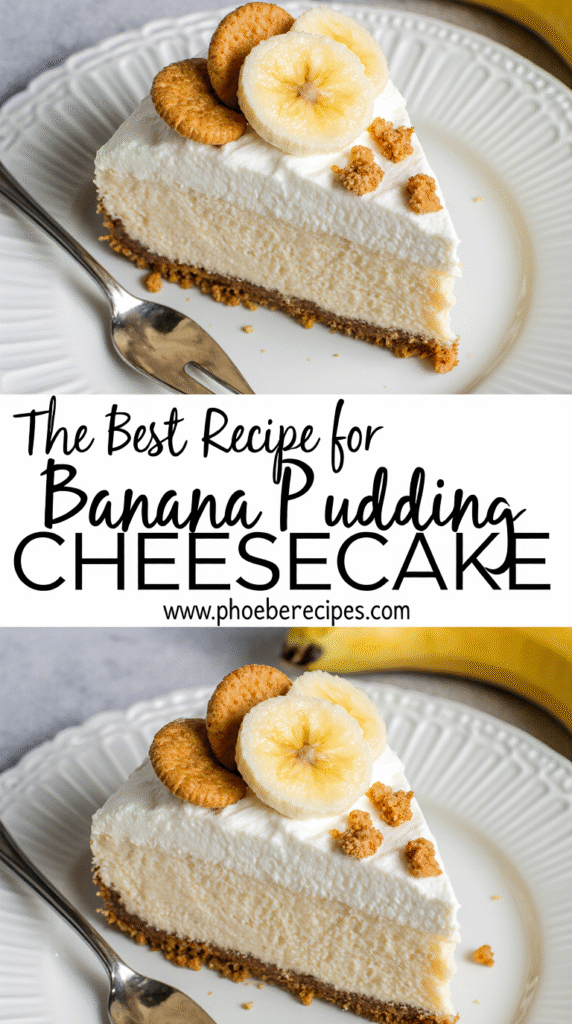
No bake banana pudding cheesecake perfectly combines two beloved desserts into one irresistible treat. With over 30 years of developing no-bake treats, I’ve created this foolproof recipe that brings together the creamy texture of cheesecake with the classic flavor of banana pudding.
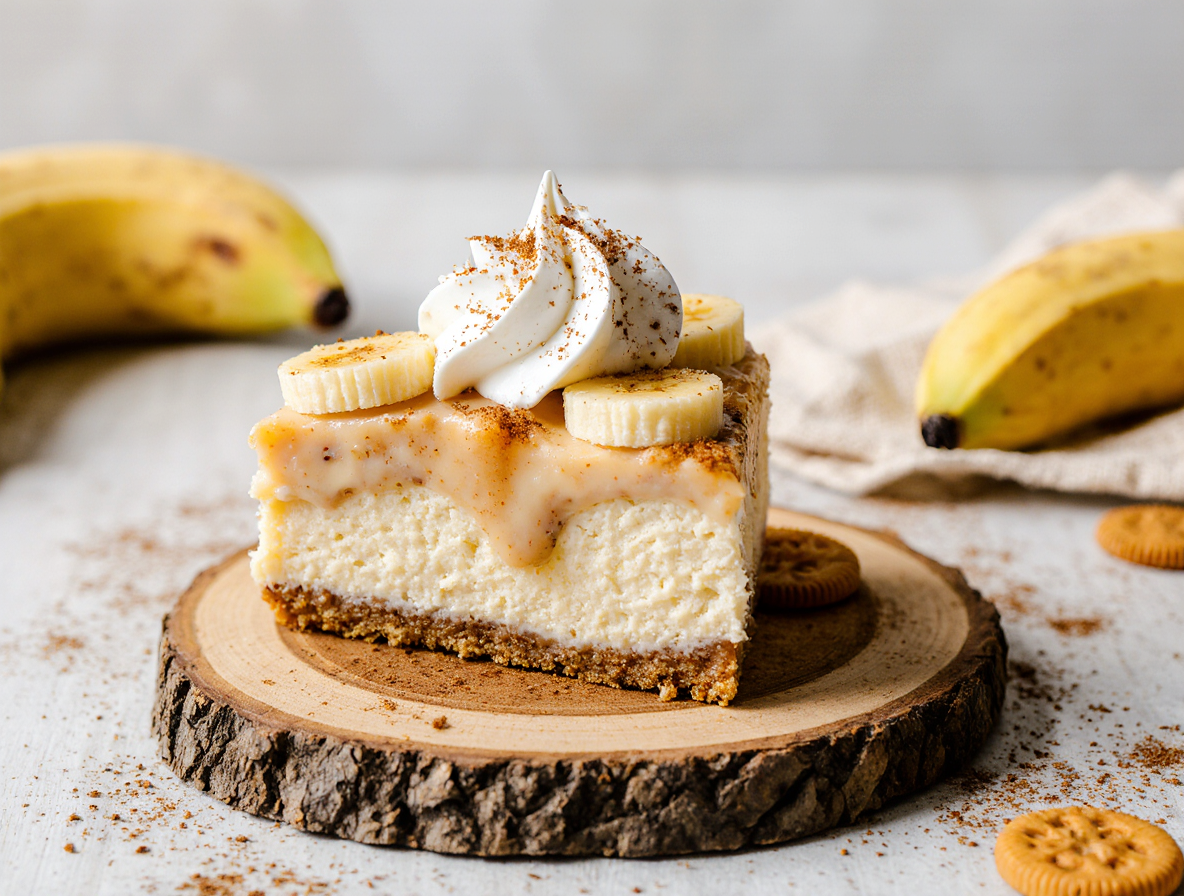
This banana pudding no bake cheesecake has become a family favorite in our home, much like those fancy slices from Cheesecake Factory. Actually, what makes this easy no bake banana pudding cheesecake so special is its delicious layers of vanilla wafer crust, custard pudding, and creamy cheesecake. The best part? You can prepare it in just 15 minutes without turning on your oven—making it ideal for warm weather or whenever you need an impressive dessert without the fuss.
Throughout this article, I’ll show you exactly how to make no bake banana pudding cheesecake with simple, step-by-step instructions. From the buttery vanilla wafer crust to the perfect banana cream filling, you’ll learn all my secrets for creating this show-stopping dessert that everyone will love.
Ingredients for the No-Bake Banana Pudding Cheesecake
Getting the right ingredients makes all the difference in creating a perfect no bake banana pudding cheesecake. First of all, I’ve found that using quality ingredients ensures that delicious banana flavor comes through in every creamy bite.
Crust ingredients
The foundation of this easy no bake banana pudding cheesecake starts with a cookie crust. While traditional cheesecakes often use graham crackers, I prefer vanilla wafers for an authentic banana pudding flavor. You’ll need:
- 2-3 cups of crushed vanilla wafers (about 50-60 cookies)
- 5-8 tablespoons of melted butter
- 1/4 cup of sugar or brown sugar
Many bakers specifically recommend Nilla wafers rather than generic brands for the best flavor and texture. If vanilla wafers aren’t available, graham crackers make an excellent substitute.
Filling ingredients
The star of this no bake banana pudding cheesecake is the creamy, flavorful filling. Here’s what you’ll need:
- 16-32 ounces cream cheese, softened to room temperature
- 1 box (3.4 oz) instant banana cream pudding mix
- 3/4-1 cup milk (cold works best)
- 1/2-1 cup sugar or powdered sugar
- 1-2 ripe bananas, mashed or pureed
- 8-16 ounces whipped topping or heavy cream
- 1/4-1/2 cup sour cream or Greek yogurt
- 1 teaspoon vanilla extract
Full-fat cream cheese is essential for proper setting and rich flavor. Additionally, be sure to use instant pudding mix rather than the cook-and-serve variety to avoid texture issues.
Topping options
What makes banana pudding cheesecake extra special are the delightful toppings that add both visual appeal and flavor contrast. Consider these options:
- Fresh banana slices (1-2 bananas)
- Additional whipped topping (1-2 cups)
- Whole or crushed vanilla wafers for garnish
- Caramel or chocolate sauce drizzle
- Fresh mint leaves for garnish
- Chopped nuts or toffee bits
When adding banana slices as topping, I recommend adding them just before serving to prevent browning. Furthermore, you can create a beautiful presentation by arranging vanilla wafers around the edge of your cheesecake or crushing them for a decorative sprinkle.
The beauty of this banana pudding no bake cheesecake recipe is its flexibility—you can adjust ingredients to your taste preferences or what you have on hand. For instance, if you can’t find banana cream pudding mix, vanilla pudding works wonderfully as an alternative.
How to Make No-Bake Banana Pudding Cheesecake
Creating this delectable no bake banana pudding cheesecake is surprisingly straightforward. I’ve broken down the process into four simple steps that even novice bakers can follow with confidence.
Step 1: Prepare the crust
The journey begins with a perfect vanilla wafer crust. First, crush approximately 40-60 vanilla wafers until they become fine crumbs—either use a food processor for uniform texture or place them in a ziplock bag and crush with a rolling pin. Next, combine the crumbs with 5-8 tablespoons of melted butter and 1-4 tablespoons of brown sugar until the mixture resembles wet sand. Press this mixture firmly into the bottom and slightly up the sides of a 9-inch springform pan. For extra stability, place the crust in the freezer for about 20 minutes while preparing the filling.
Step 2: Mix the cheesecake filling
In a large mixing bowl, beat the softened cream cheese until completely smooth and fluffy—about 2-3 minutes. Subsequently, add powdered sugar and mix until well incorporated. Add the instant banana pudding mix (without preparing it separately), sour cream, and vanilla extract, then beat for another 1-2 minutes until the mixture thickens. Once combined, gently fold in the whipped topping using a spatula until just blended—overmixing can deflate the airy texture.
Step 3: Layer with bananas and wafers
Remove your chilled crust from the freezer. Pour half of the cheesecake filling over the crust, spreading it evenly with an offset spatula. Arrange banana slices in a circular pattern across this layer—this creates that classic banana pudding flavor in every bite. Some recipes suggest adding a layer of whole vanilla wafers at this point. Finally, spread the remaining cheesecake filling on top, creating a smooth, even surface.
Step 4: Chill and set
Cover your masterpiece with plastic wrap, ensuring it touches the surface to prevent a skin from forming. Refrigerate the cheesecake for at least 3-4 hours, though overnight chilling delivers the best texture. Essentially, proper chilling allows all flavors to meld together perfectly while achieving that ideal sliceable consistency. Prior to serving, you may add additional toppings like fresh banana slices, vanilla wafers, or whipped cream for an impressive presentation.
Tips for the Perfect Texture and Flavor
The success of your no bake banana pudding cheesecake often hinges on technique rather than ingredients. After making countless cheesecakes over the years, I’ve discovered these crucial tips that transform a good dessert into an exceptional one.
Use room temperature cream cheese
Room temperature cream cheese is absolutely imperative for achieving that velvety smooth texture in your no bake banana pudding cheesecake. Cold cream cheese creates a lumpy, curdled-looking filling that’s nearly impossible to fix. Moreover, room temperature dairy products mix more easily and yield the most creamy, smooth result.
Need to soften cream cheese quickly? Try these methods:
- Cut cream cheese into small cubes and let sit for 20-30 minutes
- Place foil-wrapped cream cheese in warm water for about 10 minutes
- Microwave unwrapped cream cheese in 10-second bursts, flipping between each
Fold whipped topping gently
When incorporating whipped topping into your banana pudding cheesecake mixture, use a gentle hand and fold it in slowly. This technique preserves the air bubbles in the whipped cream, consequently creating that perfect fluffy texture. Importantly, never use a mixer for this step—always use a spatula.
Use cold milk for pudding mix
Despite needing room temperature cream cheese, your milk should be cold when mixing with the pudding. Cold milk ensures the pudding thickens quickly and properly. This temperature contrast might seem counterintuitive, yet it’s essential for the right consistency in your no bake banana pudding cheesecake.
Avoid overmixing the filling
Overmixing is perhaps the most common mistake when making banana pudding no bake cheesecake. Particularly with electric mixers, it’s easy to go too far. Extended mixing can break the emulsion in your filling, ultimately resulting in a super-soft cheesecake that won’t set properly. Indeed, you only need to mix until ingredients are fully incorporated—usually just a minute or two.
Certainly, patience plays a key role in perfecting your cheesecake. Instead of rushing the process, allow proper chilling time for each layer to set. Your restraint during mixing and attention to temperature details will be rewarded with the perfect no bake banana pudding cheesecake texture.
Storage, Freezing, and Make-Ahead Tips
Proper storage techniques are crucial for maintaining the quality of your no bake banana pudding cheesecake. These storage strategies will help preserve that perfect texture and flavor for as long as possible.
How to store in the fridge
For optimal freshness, cover your no bake banana pudding cheesecake tightly with plastic wrap or transfer it to an airtight container like a cake carrier. First, make sure the cheesecake has completely set before covering it. Alternatively, you can keep the dessert in the springform pan and simply cover it with foil or plastic wrap to maintain its shape. Above all, ensure the covering is airtight to prevent the cheesecake from absorbing other food odors in your refrigerator.
Can you freeze it?
Yes! Your banana pudding no bake cheesecake freezes wonderfully for up to 3 months. To freeze properly, wrap the whole pan in one layer of plastic wrap followed by a layer of aluminum foil. For individual servings, slice the cheesecake first, then wrap each piece tightly before placing in a freezer bag. When ready to enjoy, thaw in the refrigerator for about 8 hours or overnight. Naturally, the texture may change slightly after freezing due to the dairy content.
Best time to add toppings
In reality, toppings like fresh banana slices, whipped cream, and vanilla wafers are best added just before serving. This prevents soggy wafers and browning bananas. For bananas specifically, you can toss slices in lemon juice to slow oxidation. To prepare ahead without compromising quality, consider making stabilized whipped cream by adding 1 oz cream cheese per cup of heavy cream.
How long it lasts
Refrigerated no bake banana pudding cheesecake lasts anywhere from 2-5 days, depending on various factors. Higher quality sources suggest a safe storage period of 3-4 days for optimal flavor and texture. For the purpose of food safety, never leave your cheesecake at room temperature for more than 2 hours as this affects both taste and structure. Together with proper storage techniques, these time guidelines ensure your dessert remains delicious from first bite to last.
Conclusion
This no-bake banana pudding cheesecake truly represents the best of both dessert worlds. Throughout my years of baking, few treats have garnered as many compliments as this creamy, banana-infused masterpiece. My family requests it for almost every gathering, and guests always ask for the recipe afterward.
Preparation simplicity stands as one of this dessert’s greatest advantages. Unlike traditional cheesecakes that require water baths and precise oven temperatures, this no-bake version eliminates those worries entirely. You’ll spend just 15 minutes actively preparing it, then let your refrigerator handle the rest of the work.
Additionally, the versatility of this recipe allows you to customize it based on your preferences or available ingredients. Whether you choose to add extra banana slices, drizzle with caramel sauce, or sprinkle with crushed vanilla wafers, each variation offers its own delightful experience.
Remember, success hinges on following those key techniques we discussed – room temperature cream cheese, gentle folding, cold milk for the pudding, and avoiding overmixing. These small details make the difference between a good cheesecake and an exceptional one.
Last but certainly not least, this dessert works perfectly for make-ahead situations. You can prepare it the day before your event, and it will taste even better after the flavors have had time to meld together. During summer months especially, this cool, refreshing treat provides a welcome alternative to turning on your oven.
Give this no-bake banana pudding cheesecake a try next time you need an impressive dessert without the fuss. Before long, it might become your signature dish too!
FAQs
Q1. How long does it take to prepare this no-bake banana pudding cheesecake? The active preparation time for this dessert is only about 15 minutes. However, it needs to chill in the refrigerator for at least 3-4 hours, or preferably overnight, to set properly.
Q2. Can I use graham crackers instead of vanilla wafers for the crust? Yes, you can substitute graham crackers for vanilla wafers in the crust. While vanilla wafers provide a more authentic banana pudding flavor, graham crackers make an excellent alternative if vanilla wafers aren’t available.
Q3. Is it possible to freeze this cheesecake? Absolutely! This no-bake banana pudding cheesecake can be frozen for up to 3 months. Wrap it tightly in plastic wrap and aluminum foil before freezing. When ready to eat, thaw it in the refrigerator for about 8 hours or overnight.
Q4. What’s the secret to achieving a smooth, creamy texture in the cheesecake filling? The key to a smooth filling is using room temperature cream cheese and avoiding overmixing. Room temperature cream cheese blends more easily, preventing lumps. Also, gently fold in the whipped topping to maintain a light, airy texture.
Q5. How long can I store this cheesecake in the refrigerator? When properly stored in an airtight container or tightly wrapped, this no-bake banana pudding cheesecake can last in the refrigerator for 3-4 days while maintaining optimal flavor and texture. Always ensure it’s refrigerated and not left at room temperature for more than 2 hours.