
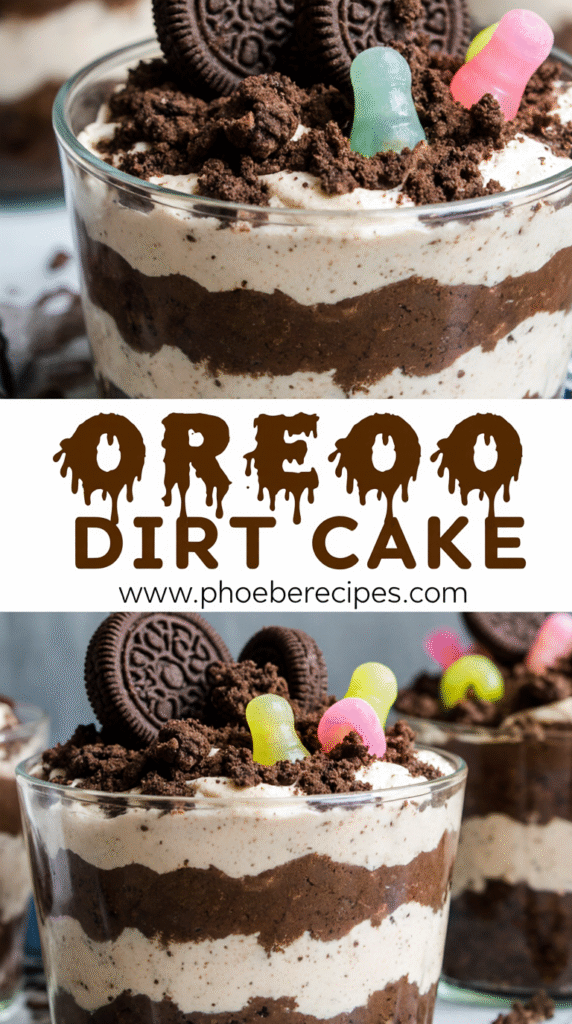
The No-Fail Oreo Dirt Cake Recipe: A Step-by-Step Guide
Oreo dirt cake recipe is one of our favorite no-bake desserts that brings pure joy to any gathering. This whimsical treat not only delights children but also satisfies adults with its creamy, decadent layers of crushed cookies and sweet pudding mixture.
Whether you call it dirt cake, dirt pudding, or even dirt and worms, this classic childhood dessert combines sweet indulgence with playful presentation. The easy oreo dirt cake recipe is especially perfect for summer gatherings, though it’s definitely a crowd-pleaser year-round. I love that it serves 16-20 people, making it ideal for family parties and potlucks where it’s consistently a winner. For the best flavor experience, you can even prepare this no-bake oreo dirt cake recipe one to two days in advance. Plus, you can get creative with presentation – serving it in a trifle dish, individual cups, or even a flower pot for that authentic garden look [-3]!
Gathering Your Ingredients
Before diving into making the perfect oreo dirt cake recipe, gathering all your ingredients ensures a smooth preparation process. Let’s explore what you’ll need for this delightful no-bake treat!
Oreo cookies: types and quantity
The foundation of any authentic dirt cake is, of course, the Oreos! Most recipes call for 1-2 packages of regular Oreos, with quantities ranging from 32-46 cookies. While the classic Oreo works wonderfully, you can experiment with variations. Golden Oreos create a “sand” appearance instead of dirt. Furthermore, if you’re short on time, pre-crushed Oreo crumbs are available in stores.
It’s worth noting that package sizes have changed over the years – traditional Oreos now come in 18oz “family size” packages, while gluten-free Oreos are sold in 12oz packages. Nevertheless, any amount between 12-20 ounces will work perfectly for your dirt cake.
Pudding mix: vanilla vs. French vanilla
The pudding layer is crucial for texture and flavor. Most recipes call for instant vanilla pudding mix – typically two 3.4oz packages. The key word here is “instant” – never use “cook & serve” pudding as it won’t set properly without heating.
While regular vanilla pudding works well, French vanilla pudding adds a richer, more complex flavor profile that many consider the secret to the best dirt cake. Additionally, some creative variations include chocolate pudding (for darker “dirt”), cheesecake pudding, or even banana pudding.
Cream cheese, butter, and Cool Whip
The creamy base requires:
- Cream cheese: One 8oz block, softened to room temperature[91]
- Butter: Usually 1/2 cup (1 stick), also softened[91]
- Cool Whip: A 12-16oz container, thoroughly thawed[91]
Room temperature cream cheese and butter are absolutely essential – cold ingredients will create lumps that you’ll never be able to whip out. As for the whipped topping, while Cool Whip is traditional, you can substitute Truwhip for a healthier alternative or even use homemade whipped cream.
Optional add-ins: gummy worms, candy decorations
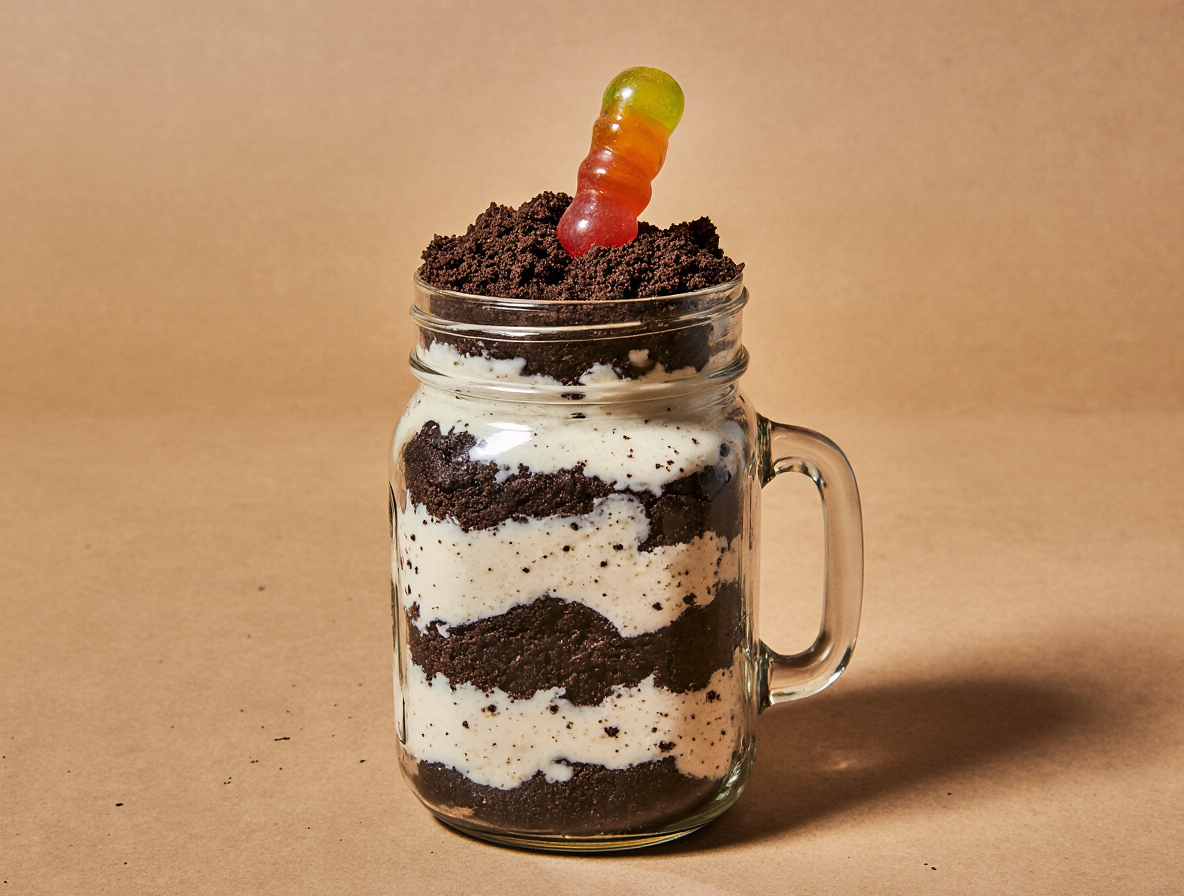
What makes dirt cake especially fun are the decorative elements. Gummy worms are the classic choice, creating the illusion of worms crawling through dirt. You can place them on top, mix them into layers, or serve extras on the side.
Beyond worms, seasonal variations include:
- Halloween: Candy pumpkins, spiders, or gummy eyeballs[52]
- Easter: Peeps and candy eggs
- Beach theme: Golden Oreos as “sand”
For added whimsy, small plastic shovels or flowers (edible or faux) can transform your dirt cake into a garden scene[52].
Step-by-Step Instructions for the No-Fail Oreo Dirt Cake
Now that you’ve assembled all your ingredients, let’s dive into making this crowd-pleasing oreo dirt cake step by step. This simple process yields impressive results even for novice bakers!
1. Crush the Oreos
Initially, separate about eight Oreos from your package and chop them into ¼” to ½” pieces. These larger chunks create special texture pockets that become deliciously soft after chilling. For the remaining cookies, use a food processor with an “S” blade to crush them into fine “dirt”. Alternatively, place them in a large resealable plastic bag and crush them with a rolling pin. Aim for a fine powder resembling actual dirt for authentic presentation.
2. Prepare the pudding mixture
In a medium bowl, combine your instant pudding mix with milk and whisk vigorously for about two minutes until it starts thickening. Remember, instant pudding is essential—never substitute with “cook & serve” varieties. Subsequently, set this mixture aside to continue setting while you prepare other components.
3. Mix the cream cheese and butter
In a separate large bowl, beat together the softened cream cheese and butter until smooth and creamy. Room temperature ingredients are crucial here to prevent lumps. Then, add powdered sugar and beat until the mixture becomes light and fluffy. For best results, use an electric mixer at high speed for approximately one minute.
4. Combine all components
Fold the pudding mixture into your cream cheese blend, mixing at low speed until fully incorporated. Next, gently fold in the Cool Whip using a spatula rather than beating it. Continue folding until the mixture becomes completely homogenous with no white streaks visible.
5. Layer the cake properly
Start by spreading half of your crushed Oreos in an even layer at the bottom of your serving dish. Carefully spoon the pudding mixture over this base, taking care not to disturb the Oreo layer. Smooth the top with a spatula, creating an even surface. Finally, sprinkle the remaining Oreo crumbs evenly across the top.
6. Chill before serving
Covering your creation with plastic wrap and refrigerating overnight is critical for optimal flavor and texture. During this time, the pudding and Oreos meld together beautifully. Although four hours minimum chilling time works in a pinch, the flavors truly develop after a full overnight rest.
Tips for Perfect Texture and Flavor
The difference between a good oreo dirt cake recipe and an exceptional one lies in mastering a few critical techniques. Creating the perfect texture and flavor profile requires attention to specific details that many recipes overlook.
Use softened cream cheese and butter
The foundation of a silky-smooth oreo dirt cake begins with properly softened ingredients. I always bring cream cheese and butter to room temperature before starting. This crucial step prevents lumps that become impossible to remove once incorporated. For best results, set these ingredients out about an hour before mixing. Fully softened cream cheese blends seamlessly, creating that luxurious, velvety texture everyone loves. Moreover, when beating these two ingredients together, aim for a perfectly smooth, creamy consistency before adding any other components.
Why instant pudding is a must
Despite what some might suggest, instant pudding is non-negotiable for this recipe. Certainly, cook-and-serve pudding will never set properly without heating. In fact, the entire texture of your dirt cake depends on using the correct pudding type. Additionally, when preparing the pudding, ignore the box directions completely—they often call for different milk amounts than what works best in this recipe. As a result, following the specific recipe instructions ensures the perfect pudding consistency every time.
How long to chill for best results
Patience truly pays off with oreo dirt cake. At minimum, refrigerate for 2-4 hours before serving. However, the magic happens during overnight chilling when flavors fully develop and textures reach perfection. Even more impressive, after about 20 hours of refrigeration, the dessert transforms completely as the Oreos soften and meld with the creamy layers. Throughout my testing, I’ve found 12-24 hours delivers the absolute best texture and flavor profile.
Avoiding a soupy consistency
Nothing ruins an oreo dirt cake faster than a runny texture. To prevent this disappointment, use whole milk for the creamiest, most stable consistency. In conjunction with proper technique, fold (don’t beat) the Cool Whip into other ingredients. Besides proper folding, chilled metal bowls help maintain texture when mixing ingredients. Furthermore, never substitute low-fat cream cheese, as it creates a runny mixture that won’t set properly.
Serving, Storing, and Making Ahead
First and foremost, the presentation of your oreo dirt cake recipe can elevate this simple dessert into something spectacular! Let me share some creative ideas and practical tips for serving, storing, and preparing this beloved treat ahead of time.
Creative ways to serve: trifle, cups, pots
The serving vessel can transform your oreo dirt cake recipe into a conversation piece. A glass trifle dish creates an elegant presentation that showcases the beautiful layers. For added whimsy, consider these fun alternatives:
- Flower pots: Serve in clean flower pots with artificial flowers for an authentic garden look
- Mini buckets or sand pails: Perfect for construction or beach-themed parties
- Individual cups: Clear plastic cups make for easy individual servings
- Mason jars: Creates a charming, rustic presentation
- Toy dump trucks: Particularly delightful for children’s parties
Undeniably, the trifle bowl remains a classic choice for displaying multiple layers, particularly effective for potlucks and family gatherings.
How to store in fridge or freezer
Proper storage ensures your dirt cake maintains its delicious texture. Wrap the dessert tightly with plastic wrap and refrigerate for up to 4-5 days. Accordingly, always keep the cake chilled when not serving.
For freezing, store in an airtight container for up to 1 month. Just be aware that once thawed, the texture of the filling might change slightly.
Make-ahead tips for parties
This no-bake dessert is genuinely ideal for advance preparation. For instance, you can fully assemble it 24 hours ahead of your event. For optimal flavor development, chill for at least 12 hours before serving.
When planning further ahead, consider preparing components separately—crush the Oreos and store in a resealable bag, then make the filling and refrigerate in an airtight container.
When to add gummy worms or toppings
For best results, add gummy worms just before serving since they harden in the refrigerator. If you prefer a crunchy Oreo topping, sprinkle the final layer right before serving.
Seasonal decorations make this versatile dessert perfect year-round—try candy pumpkins for Halloween, Peeps for Easter, or sprinkles for birthdays.
Conclusion
Oreo dirt cake stands out as one of the most versatile and crowd-pleasing desserts you can add to your recipe collection. This delightful treat combines simplicity with impressive results, making it perfect for beginners and experienced bakers alike. After following this guide, you’ll undoubtedly create a dessert that brings smiles to faces young and old.
The beauty of this recipe lies not only in its ease of preparation but also in its adaptability. Certainly, you can customize it for any occasion through creative serving methods and seasonal decorations. The humble Oreo transforms into a masterpiece when paired with creamy pudding and fluffy whipped topping.
Remember that patience rewards you richly with this dessert. Though tempting to serve immediately, allowing proper chilling time dramatically enhances both texture and flavor. Your guests will definitely appreciate the extra hours of refrigeration when they taste the perfectly melded layers.
This recipe has become my go-to for potlucks, family gatherings, and children’s parties primarily because it never disappoints. Everyone loves the playful presentation combined with the irresistible taste. Additionally, the make-ahead nature of Oreo dirt cake reduces party-day stress significantly.
Whether served in an elegant trifle dish, whimsical flower pot, or individual cups, your Oreo dirt cake will quickly disappear as guests return for seconds. The next time you need a foolproof dessert that satisfies both kids and adults, this no-fail recipe awaits—just don’t forget those gummy worms!
FAQs
Q1. What are the key ingredients for a classic Oreo dirt cake? The main ingredients include Oreo cookies, instant vanilla pudding mix, milk, cream cheese, butter, powdered sugar, and whipped topping. Optional add-ins like gummy worms can be included for decoration.
Q2. How long should I chill the Oreo dirt cake before serving? For the best flavor and texture, chill the Oreo dirt cake for at least 4 hours. However, overnight refrigeration (12-24 hours) is ideal as it allows the flavors to fully develop and the textures to meld perfectly.
Q3. Can I make Oreo dirt cake ahead of time for a party? Yes, Oreo dirt cake is perfect for making ahead. You can fully assemble it up to 24 hours before your event. For optimal flavor, chill for at least 12 hours before serving. You can also prepare components separately and assemble later if planning further in advance.
Q4. What are some creative ways to serve Oreo dirt cake? Oreo dirt cake can be served in various fun ways, including in a trifle dish, flower pots, mini buckets, individual cups, mason jars, or even toy dump trucks for children’s parties. The presentation can be tailored to fit the theme of your event.
Q5. How can I prevent my Oreo dirt cake from becoming soupy? To avoid a runny consistency, use whole milk, fold (don’t beat) the whipped topping into other ingredients, use chilled metal bowls when mixing, and never substitute low-fat cream cheese. Also, ensure you’re using instant pudding mix, not the cook-and-serve variety.