
The Perfect Ham and Cheese Sliders Recipe: Tested Party-Favorite on Hawaiian Rolls

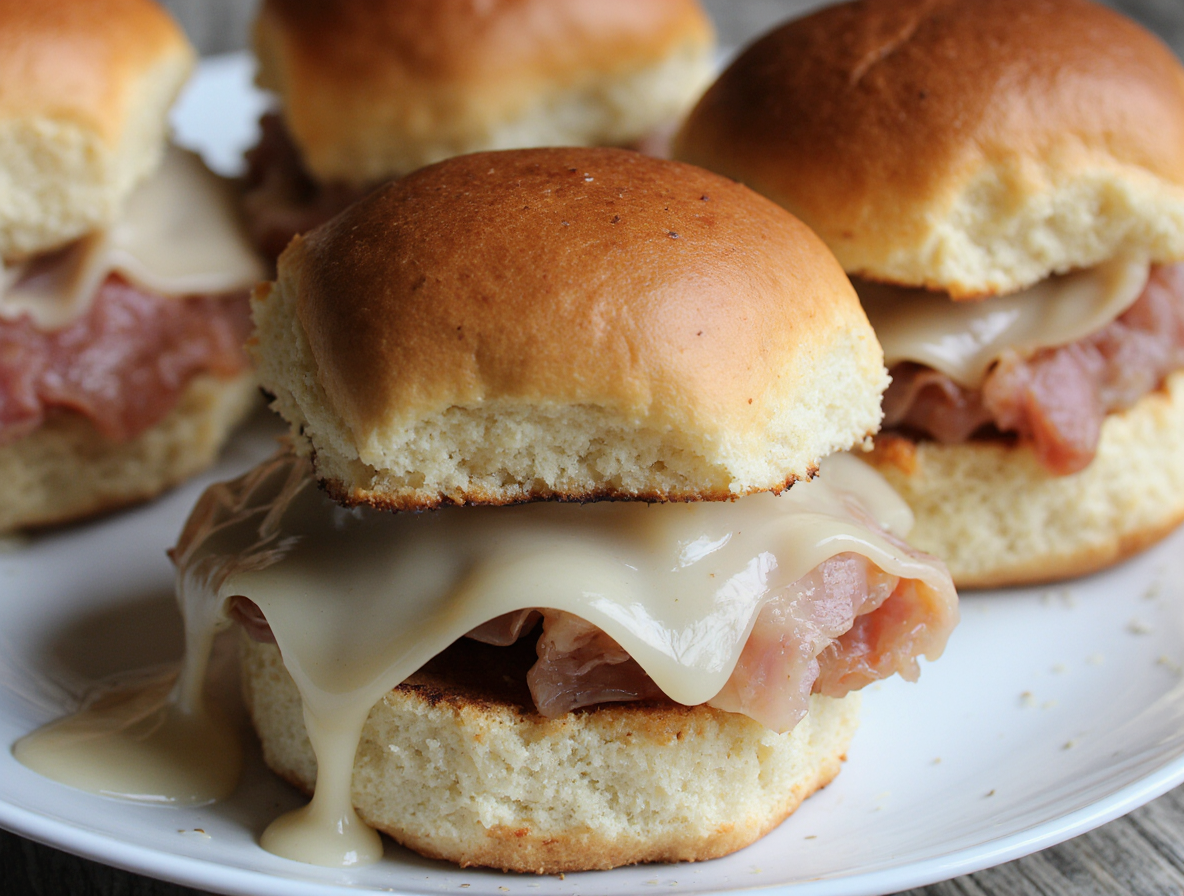
This ham and cheese sliders recipe has become our go-to party food whenever we need to win over a crowd. These irresistible bites not only take just 10 minutes to prep, but also deliver that perfect combination of savory ham, melty Swiss cheese, and slightly sweet Hawaiian rolls that guests can’t resist.
We’ve found that Hawaiian roll sliders are particularly crowd-pleasing because of their soft, buttery texture and hint of sweetness. The baked ham and cheese sliders nestled in these rolls get an extra flavor boost from a buttery Dijon, onion, and poppy seed topping. Additionally, these hot ham and cheese sliders are incredibly versatile – they can be made ahead and frozen for up to 6 months, making them perfect for last-minute entertaining. Furthermore, if you’re serving ham and cheese sliders on Hawaiian rolls at a party with other dishes, you’ll typically need just 1-2 sliders per person, though we’ve found they disappear quickly!
Key Ingredients for Hawaiian Roll Ham and Cheese Sliders
The secret to making exceptional Hawaiian roll ham and cheese sliders lies in selecting quality ingredients that work harmoniously together. Let me share what makes each component special in this crowd-pleasing recipe.
Ham: Best types to use
When it comes to ham, you have several excellent options. Thinly sliced deli ham works perfectly in these sliders, creating neat layers that heat evenly. I’ve found that honey ham adds a subtle sweetness that pairs wonderfully with the rolls, while Black Forest ham offers a deeper, smokier flavor profile. For a truly impressive slider, try using leftover holiday ham sliced thin—it brings an extra dimension of home-cooked flavor. Essentially, the key is using quality ham that’s sliced thin enough to fold easily within the small rolls.
Cheese: Why Swiss works best
Swiss cheese is the classic choice for these sliders—and for good reason. Its mild, slightly nutty flavor complements the ham without overpowering it, and it melts beautifully to create that irresistible gooey texture. The slight tanginess of Swiss also balances the sweetness of the Hawaiian rolls. Nevertheless, you can experiment with alternatives like provolone, cheddar, or even pepper jack for a spicier kick. For an extra-cheesy version, try using two layers of cheese—one below and one above the ham.
Hawaiian rolls: Sweetness and texture
The foundation of these sliders is undoubtedly the Hawaiian sweet rolls. These soft, fluffy rolls have a distinct subtle sweetness that creates the perfect contrast with the savory fillings. Their connected structure makes them particularly practical—you can slice the entire pack horizontally at once, assemble your sliders, and then separate them after baking. The texture of these rolls is uniquely tender yet sturdy enough to hold all the ingredients without falling apart.
The buttery topping: What goes in it
The magic truly happens with the buttery topping that gets brushed over these sliders. This mixture typically combines melted butter, Dijon mustard, Worcestershire sauce, and dried minced onion or onion powder. Some recipes include a touch of brown sugar for additional sweetness. Once baked, this topping creates a gloriously golden, slightly crisp top that seals in all the flavors beneath.
Optional add-ons: Poppy seeds, onions, and more
Poppy seeds sprinkled on top aren’t just decorative—they add a subtle crunch and nutty flavor that elevates the entire slider. Moreover, caramelized onions make an excellent addition between the ham and cheese layers. For more adventurous variations, consider adding fig jam for sweetness, spicy mustard for heat, or even a layer of thinly sliced pickles for acidity. Some recipes incorporate sesame seeds or everything bagel seasoning as alternatives to poppy seeds.
Step-by-Step Guide to Assembling the Sliders
Assembling these delectable Hawaiian roll ham and cheese sliders requires a simple yet methodical approach for best results. I’ve perfected this process after making countless batches for parties and gatherings.
1. Slice the rolls evenly
First, keep the entire package of Hawaiian rolls connected as one unit. Using a large serrated knife, place one hand firmly on top of the rolls and slice horizontally through the middle to create two separate “slabs” – a top and bottom half. This technique ensures even cuts across all rolls simultaneously rather than cutting each roll individually. A sharp bread knife works best for this task, allowing you to maintain control throughout the cutting process.
2. Layer ham and cheese properly
Once cut, place the bottom slab of rolls into a greased baking dish (9×13-inch works perfectly). For optimal flavor distribution, start by layering half of your ham across the bottom rolls. Next, arrange all of your Swiss cheese slices, slightly overlapping to ensure complete coverage. Finally, add the remaining ham as the top layer. This ham-cheese-ham arrangement creates the perfect balance of flavors in every bite.
3. Add the top layer of rolls
Subsequently, take the top slab of rolls and place it carefully over your layered ingredients, aligning the edges as best you can with the bottom portion. Pressing down gently helps compact the ingredients without crushing the rolls. This creates a secure sandwich structure that will hold together nicely after baking.
4. Pour the butter mixture evenly
Prior to baking, prepare your butter mixture by combining melted butter with seasonings. Using a pastry brush, apply this mixture generously over the tops and sides of the rolls, allowing it to drip down into the crevices. This technique ensures the flavor penetrates throughout the rolls, creating those irresistibly crispy edges once baked.
5. Let it rest before baking
Afterward, allow your assembled sliders to rest uncovered for 5-10 minutes before baking. This crucial step gives the butter mixture time to soak into the bread, enhancing both flavor and texture. For make-ahead preparation, you can cover and refrigerate the assembled sliders for up to 1-2 days before baking.
Baking Tips for Perfect Hot Ham and Cheese Sliders
Baking is where the magic happens with this ham and cheese sliders recipe. After assembling your sliders, the right baking technique transforms them from good to unforgettable.
Covering with foil: Why it matters
Initially, covering your hawaiian roll ham and cheese sliders with foil is crucial for even heating. This technique allows the cheese to melt thoroughly without burning the tops of your rolls. To prevent the foil from sticking to your sliders, try placing a few toothpicks into the tops of the rolls to create a small gap between the foil and bread surface.
Uncovering for crisp tops
After the initial covered baking period, removing the foil is essential for achieving those perfectly golden, crispy tops everyone loves. This uncovered baking phase allows excess moisture to evaporate and the buttery topping to caramelize. Typically, you’ll want to bake uncovered for an additional 2-10 minutes until the tops become beautifully golden brown.
How long to bake for melty cheese
For perfectly melty cheese, the timing is everything. Start by baking covered at 350°F for about 15-20 minutes, which allows the cheese to fully melt without drying out the rolls. Some recipes suggest a slightly higher temperature of 375-400°F with shorter baking times. In fact, the total baking time generally ranges from 20-30 minutes, depending on your oven and preferred level of crispiness.
Avoiding soggy bottoms
Nobody wants soggy-bottomed hot ham and cheese sliders! To combat this common problem, try pre-toasting the bottom buns for 3-5 minutes before adding fillings. This creates a barrier against moisture. Additionally, ensure proper butter distribution—too much pooling in one area can create sogginess. For this reason, some bakers recommend poking a few holes where butter pools to encourage even absorption.
Above all, proper foil management is key—cover to retain heat for cheese melting, then uncover to let moisture escape. This dual approach ensures your baked ham and cheese sliders will have perfectly crisp tops and bottoms with gloriously melty centers.
Make-Ahead, Storage, and Reheating Tips
One major advantage of this ham and cheese sliders recipe is its versatility for advance preparation. These tasty treats can save you precious time when entertaining guests or planning family meals.
How to prep sliders in advance
For next-day serving, these hawaiian roll ham and cheese sliders can be prepped up to 24 hours ahead of time. Assemble the sliders following the previous steps, yet hold off on adding the butter mixture until just before baking. Store them covered tightly in the refrigerator, then let them sit at room temperature for about 15 minutes before adding the topping and baking.
Best way to store leftovers
Leftover hot ham and cheese sliders stay fresh in an airtight container in the refrigerator for up to 2-4 days. For even better results, place a paper towel underneath the sliders in the container or bag to absorb any excess moisture. This simple trick helps maintain their texture and prevents sogginess.
Reheating without drying out
To reheat these baked ham and cheese sliders without drying them out, you have two excellent options. For oven reheating, cover the sliders with foil and warm at 300°F for 7-10 minutes. Alternatively, microwave individual sliders for about 15-30 seconds, then at 5-second intervals as needed until warmed through. The foil covering is especially important to retain moisture during reheating.
Can you freeze baked ham and cheese sliders?
Surprisingly, these hawaiian roll ham and cheese sliders freeze remarkably well! You can freeze them for up to 3-6 months. For best results, assemble the sliders but save the butter mixture for later. Wrap the dish tightly with plastic wrap followed by foil for proper freezer protection. When ready to enjoy, thaw completely in the refrigerator overnight, then apply the butter mixture and bake according to the original instructions, adding 5-10 extra minutes to account for the colder starting temperature.
Conclusion
These Hawaiian roll ham and cheese sliders truly deserve their reputation as the ultimate crowd-pleasing party food. Throughout this article, we’ve covered everything you need to create this irresistible treat. Undoubtedly, the magic lies in the perfect combination of quality ingredients – thinly sliced ham, melty Swiss cheese, and those distinctively sweet Hawaiian rolls topped with a savory butter mixture.
After testing this recipe countless times, I can confidently say these sliders work wonderfully for almost any gathering. The assembly process remains straightforward yet methodical, allowing you to prepare them efficiently even when entertaining large groups. Additionally, the baking technique – starting covered then finishing uncovered – ensures that perfect balance between melty interiors and crispy tops that everyone loves.
Perhaps most importantly, these sliders offer remarkable flexibility. You can make them hours or even days ahead, freeze them for future use, and reheat them without sacrificing quality. This versatility makes them my go-to option whether hosting planned events or handling unexpected guests.
Next time you need a guaranteed hit for your gathering, remember this tested ham and cheese sliders recipe. The minimal prep time combined with maximum flavor impact makes these little sandwiches a smart choice for any host. Your guests will certainly ask for the recipe – just be prepared to share!
FAQs
Q1. What type of cheese works best for Hawaiian roll ham and cheese sliders? Swiss cheese is the classic choice for these sliders. Its mild, nutty flavor complements the ham without overpowering it, and it melts beautifully to create that irresistible gooey texture. The slight tanginess of Swiss also balances the sweetness of the Hawaiian rolls.
Q2. How can I prevent my sliders from getting soggy? To avoid soggy sliders, try pre-toasting the bottom buns for 3-5 minutes before adding fillings. This creates a barrier against moisture. Also, ensure proper butter distribution and consider poking a few holes where butter pools to encourage even absorption. Proper foil management during baking is also key.
Q3. What goes into the buttery topping for ham and cheese sliders? The buttery topping typically combines melted butter, Dijon mustard, Worcestershire sauce, and dried minced onion or onion powder. Some recipes include a touch of brown sugar for additional sweetness. This mixture creates a gloriously golden, slightly crisp top when baked.
Q4. Can I prepare ham and cheese sliders in advance? Yes, you can prep these sliders up to 24 hours ahead of time. Assemble the sliders but hold off on adding the butter mixture until just before baking. Store them covered tightly in the refrigerator, then let them sit at room temperature for about 15 minutes before adding the topping and baking.
Q5. How long should I bake ham and cheese sliders for the perfect melt? For perfectly melty cheese, bake covered at 350°F for about 15-20 minutes, then uncover and bake for an additional 2-10 minutes until the tops become beautifully golden brown. The total baking time generally ranges from 20-30 minutes, depending on your oven and preferred level of crispiness.