
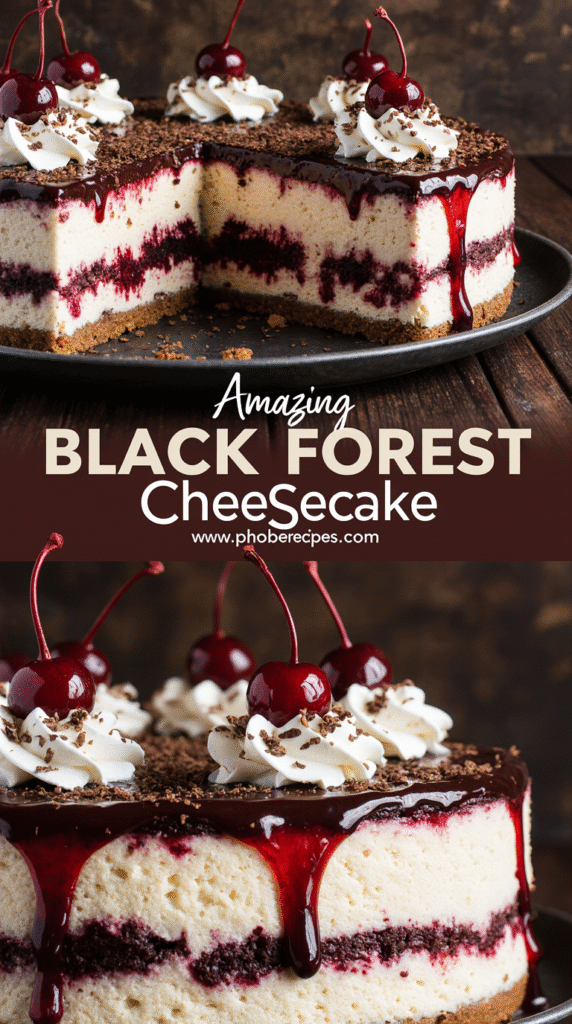
The Secret to Perfect Black Forest Cheesecake: Chef-Tested Recipe [Printable PDF]
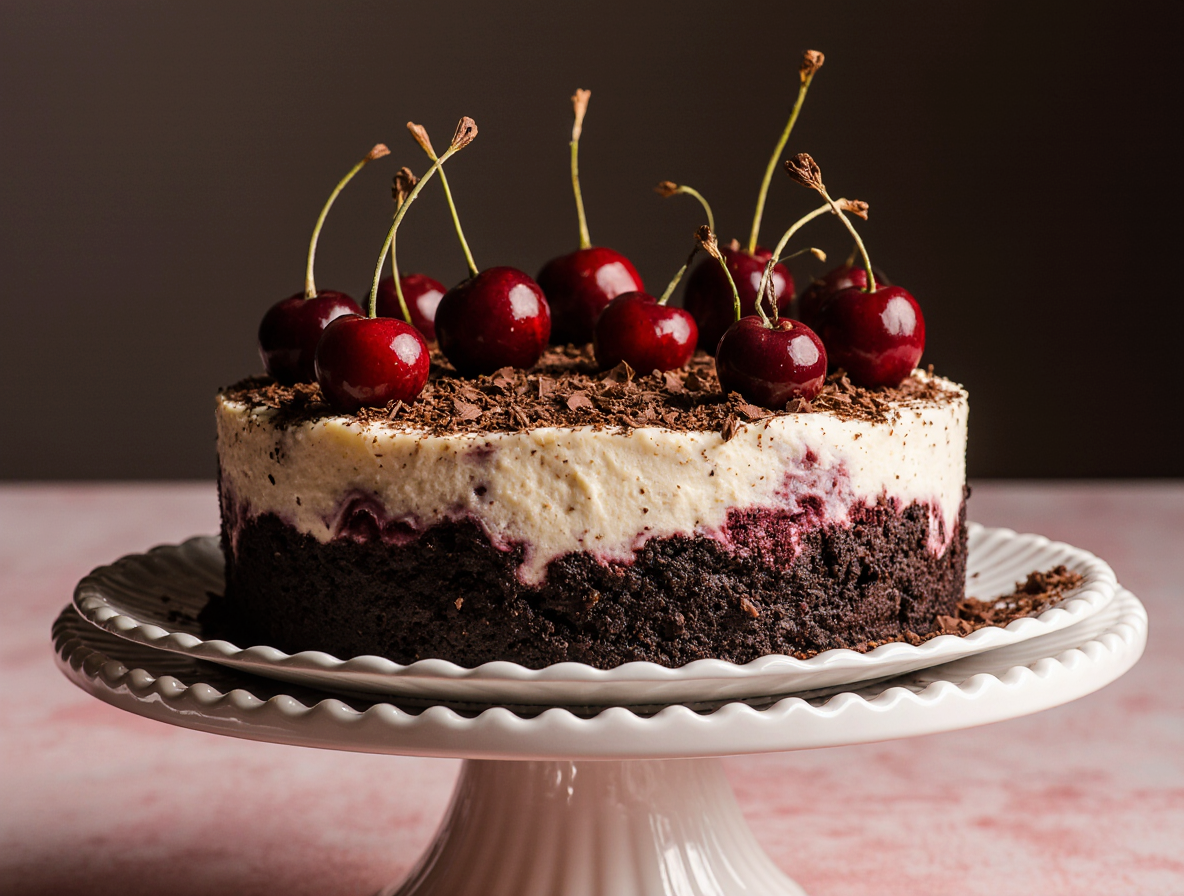
Black forest cheesecake combines the richness of chocolate with the tartness of cherries in one decadent dessert that never fails to impress. This ultra-creamy chocolate cheesecake, nestled on a crisp Oreo crust with ripples of cherry sauce, originates from the Black Forest region of Germany. I’ve perfected this recipe through countless tests in my kitchen, and now I’m sharing all my secrets with you.
When developing this recipe, I discovered that balance is everything. The cream cheese perfectly complements the rich chocolate, while the sweet cherry topping adds that extra level of indulgence. Furthermore, you can use fresh or frozen cherries (5¼ cups or 744 grams) or simply opt for canned cherry pie filling for convenience. Although this gorgeous cheesecake does require some patience—it needs to chill for at least 6 hours or overnight—it can be made up to two days in advance.
Throughout this guide, I’ll walk you through each step of creating this showstopper dessert. From selecting the right ingredients to mastering the baking technique (the center should still be a bit jiggly when done), you’ll learn everything needed to create a black forest cheesecake worthy of any special occasion. Best of all, I’ve included a printable PDF so you can keep this chef-tested recipe on hand whenever the craving strikes.
Ingredient Breakdown for the Best Black Forest Cheesecake
The perfect black forest cheesecake starts with carefully selected ingredients that work together to create that classic chocolate-cherry magic. Let’s break down each component to ensure your dessert turns out perfectly every time.
Crust: Choosing the right chocolate base
The foundation of any great black forest cheesecake is a chocolate crust that provides the perfect contrast to the creamy filling. Most recipes call for 20-32 Oreo cookies (about 1½-2 cups of crumbs) mixed with 3-6 tablespoons of melted butter. No need to remove the cream filling—use the whole cookie when processing. Alternatively, chocolate graham crackers, chocolate wafers, or even chocolate animal crackers make excellent substitutes. For a less sweet base, skip adding extra sugar to the crust, as the cookies provide enough sweetness on their own.
Filling: Cream cheese, chocolate, and eggs
The star of the show requires full-fat brick-style cream cheese—typically 24-32 ounces (3-4 packages)—brought to room temperature for proper mixing. This creamy foundation is enhanced with 1 cup of granulated sugar and ¼-½ cup of cocoa powder (Dutch-processed preferred for smoother flavor). Most recipes incorporate 3-5 eggs to set the cheesecake, along with 8-10 ounces of melted semisweet chocolate chips for richness. Additionally, 1 cup of sour cream adds tanginess that balances the sweetness. For an authentic Black Forest touch, consider adding 1-3 tablespoons of kirsch (cherry brandy).
Cherry layer: Fresh, frozen, or canned options
Traditional Black Forest desserts feature sour or tart cherries rather than sweet varieties. You’ll need approximately 5¼ cups of cherries if using fresh or frozen. Nonetheless, canned cherry pie filling (about 21 ounces) offers a convenient alternative. If making your own cherry topping, simmer cherries with sugar and thicken with cornstarch. For authentic flavor, add kirsch to the cherry mixture.
Toppings: Whipped cream and chocolate shavings
Complete your masterpiece with freshly whipped cream—typically made from 1 cup heavy cream, ⅓ cup powdered sugar, and 2 teaspoons vanilla extract. Pipe decorative swirls around the edge of the cheesecake using a star tip. Chocolate shavings or curls create that classic Black Forest appearance—simply use a vegetable peeler on a chocolate bar for elegant curls.
Step-by-Step Guide to Making the Cheesecake
Creating the perfect black forest cheesecake involves a series of careful steps that build on each other for stunning results. Let me guide you through each critical stage of the process to ensure your dessert turns out flawlessly every time.
1. Make the cherry compote or filling
Begin by combining fresh pitted cherries (or thawed frozen ones), sugar, water, and lemon juice in a medium saucepan over medium heat. Bring this mixture to a simmer, stirring occasionally, and let it bubble for 10 minutes until the cherries soften and release their juices. Meanwhile, prepare a cornstarch slurry by mixing cornstarch with a small amount of water or kirsch in a separate bowl. Once the cherry mixture has simmered, gradually whisk in the slurry, stirring constantly to prevent lumps. Continue cooking just until the mixture thickens to a jelly-like consistency. Remove from heat and allow to cool completely before using.
2. Prepare and bake the crust
Preheat your oven to 350°F (180°C). Place whole Oreo cookies (cream filling included) in a food processor and pulse until you have fine crumbs. Mix the crumbs with melted butter until every crumb is coated. Press this mixture firmly into the bottom of a 9-inch springform pan, creating an even layer and bringing the crust slightly up the sides. Use the bottom of a measuring cup to pack it down tightly. Bake for 8-10 minutes, then set aside to cool.
3. Mix the chocolate cheesecake batter
First, ensure all dairy ingredients are at room temperature to prevent lumps. In a medium saucepan or microwave-safe bowl, heat heavy cream until hot but not boiling, then pour over chocolate chips. Let sit for a few minutes before stirring until smooth. In a large mixing bowl or stand mixer with paddle attachment, beat cream cheese and sugar until creamy and smooth (about 2-3 minutes). Add eggs one at a time, mixing just until incorporated—avoid overmixing. Stir in vanilla extract, sour cream, and salt. Finally, fold in the melted chocolate mixture until completely combined.
4. Assemble the layers
Pour half the cheesecake batter over the cooled crust. Next, spoon about half of your cooled cherry compote over this layer. You can create beautiful swirls by gently dragging a knife through the mixture. Carefully add the remaining cheesecake batter on top, spreading it evenly. Reserve the remaining cherry compote for topping after baking.
5. Bake using a water bath
The water bath technique is crucial for preventing cracks and ensuring even baking. Wrap the outside of your springform pan thoroughly with heavy-duty aluminum foil to prevent water seepage. Place the wrapped pan inside a larger roasting pan. Put both pans on the middle rack of your preheated oven (325°F). Carefully pour boiling water into the outer pan until it reaches about 1-2 inches up the sides of the springform pan. Bake for 60-70 minutes until the edges are set but the center still has a slight wobble when gently shaken.
6. Cool and chill overnight
Once baked, turn off the oven but leave the cheesecake inside with the door cracked open for about an hour. This gradual cooling prevents the surface from cracking. After an hour, remove from the oven and run a thin knife around the edge to loosen it from the pan. Allow it to cool completely at room temperature for another 1-2 hours. Cover and refrigerate for at least 6-8 hours, preferably overnight. Patience during this step ensures the perfect texture and flavor development.
Decorating and Serving Tips
The visual presentation of your black forest cheesecake elevates it from merely delicious to truly spectacular. After your masterpiece has fully chilled, it’s time to transform it into a showstopper worthy of any bakery display case.
How to pipe whipped cream like a pro
For professional-looking results, make stabilized whipped cream by combining heavy cream, powdered sugar, and vanilla in a cold mixing bowl. Beat at high speed until stiff peaks form. First, transfer your whipped cream to a piping bag fitted with a decorative tip – many chefs prefer Wilton tips 1M, 4B, or 6B for classic swirls. Simply hold the bag perpendicular to the cheesecake edge and apply even pressure, creating large, consistent swirls around the perimeter. For better structure, some bakers add mascarpone cheese to their whipped cream, which holds shape longer without leaking.
Adding chocolate curls or shavings
Create elegant chocolate decorations using everyday kitchen tools. Place a chocolate bar in a warm place (~78°F) for about an hour or heat it in the microwave for 1-2 seconds. Next, use a vegetable peeler against the edge of the chocolate to create beautiful shavings or curls. Sprinkle these generously over your cheesecake for that classic Black Forest appearance.
Arranging cherries for visual appeal
Spoon your cherry topping into the center of the cheesecake, gently spreading it toward (but not touching) the whipped cream border. For maximum visual impact, mound the cherries slightly higher in the middle. Moreover, arranging halved cherries in a pattern can create an even more professional finish.
Serving suggestions for special occasions
For special events, consider these presentation ideas:
- Serve on a decorative cake stand with fresh whole cherries as garnish
- Add chocolate-dipped cherries around the plate perimeter
- Pre-slice using a thin, sharp knife (not a table knife), wiping between cuts
- Use a pie lifter to cleanly remove each slice without damaging the presentation
Keep your finished masterpiece refrigerated until serving time – the contrast between the cool creamy texture and rich flavors is part of what makes this dessert so special.
Storage, Freezing, and Make-Ahead Tips
Proper storage techniques ensure your black forest cheesecake maintains its delicious flavor and texture beyond serving day. Let’s explore how to keep this spectacular dessert fresh for both short-term enjoyment and future indulgence.
How to store in the fridge
After your cheesecake has set, proper refrigeration is essential for maintaining its quality. Place your black forest cheesecake in an airtight container or wrap it tightly with plastic wrap to prevent it from drying out or absorbing refrigerator odors. This magnificent dessert will stay fresh in the refrigerator for 3-4 days. For optimal results, if you haven’t served the cheesecake yet, consider storing it without the toppings. The whipped cream and cherry topping are best added just before serving to maintain their texture and appearance.
Freezing instructions for leftovers
Fortunately, black forest cheesecake freezes beautifully for longer storage. For whole cheesecakes, first chill completely in the refrigerator. Subsequently, either leave it in the springform pan with sides removed or transfer to a cardboard round. Wrap the cheesecake thoroughly with at least two layers of plastic wrap, followed by a layer of aluminum foil. Label and date your package—the cheesecake will maintain best quality for up to 1 month. For leftover slices, wrap each piece individually using the same method. When ready to enjoy, thaw the cheesecake overnight in the refrigerator. Never thaw at room temperature as this can lead to bacterial growth.
Make-ahead tips for holidays and events
Planning ahead for special occasions? This recipe is ideal! You can prepare the entire black forest cheesecake up to 2 days in advance. Alternatively, make individual components ahead: prepare the cheesecake layer up to 1 month before your event and freeze it, or make the cherry pie filling up to 3 months ahead and freeze it separately. This approach significantly reduces day-of stress. On the day of your gathering, simply thaw components overnight, then assemble with fresh whipped cream just before serving. This strategy ensures a freshly decorated presentation while taking advantage of advance preparation.
Conclusion
After mastering this black forest cheesecake recipe, you’ll have a showstopping dessert perfect for any special occasion. Though it requires some patience and attention to detail, the results are undoubtedly worth every minute spent. The magical combination of chocolate and cherry flavors, balanced with creamy richness, creates a truly unforgettable experience for your guests.
I’ve shared all my kitchen-tested secrets throughout this guide, from selecting the perfect ingredients to mastering the water bath technique. Additionally, you now have storage options that allow you to prepare this masterpiece days or even weeks ahead of your event.
Remember that baking is both a science and an art. Therefore, your first attempt might not be perfect, but each time you make this cheesecake, you’ll develop a better feel for the process. Most importantly, the printable PDF ensures you’ll always have this recipe at your fingertips whenever cherry-chocolate cravings strike.
Black forest cheesecake certainly requires more effort than a simple dessert, but the “oohs” and “aahs” from those who taste it will make you feel like a professional pastry chef. Whether for birthdays, holidays, or simply because you deserve something extraordinary, this recipe delivers remarkable results every time.
FAQs
Q1. What are the key ingredients for a Black Forest Cheesecake? The main ingredients include chocolate cookie crust, cream cheese, cocoa powder, eggs, cherries, whipped cream, and chocolate shavings. Some recipes also incorporate kirsch (cherry brandy) for an authentic flavor.
Q2. How long does it take to make a Black Forest Cheesecake? The total time is about 10-11 hours, including 25 minutes of prep, 70 minutes of baking, and at least 8 hours of chilling. However, most of this is inactive time while the cheesecake sets in the refrigerator.
Q3. Can I make Black Forest Cheesecake ahead of time? Yes, you can prepare the entire cheesecake up to 2 days in advance. You can also make individual components ahead of time – the cheesecake layer can be frozen for up to a month, and the cherry filling can be made and frozen for up to 3 months.
Q4. What’s the best way to prevent cracks in my cheesecake? Using a water bath technique is crucial for preventing cracks and ensuring even baking. Wrap the springform pan in foil, place it in a larger pan filled with hot water, and bake at a lower temperature. Also, allow the cheesecake to cool gradually in the oven with the door cracked open.
Q5. How should I store leftover Black Forest Cheesecake? Store the cheesecake in an airtight container or tightly wrapped in plastic wrap in the refrigerator for 3-4 days. For longer storage, you can freeze it for up to a month. Wrap it thoroughly in plastic wrap and foil before freezing, and thaw overnight in the refrigerator before serving.