
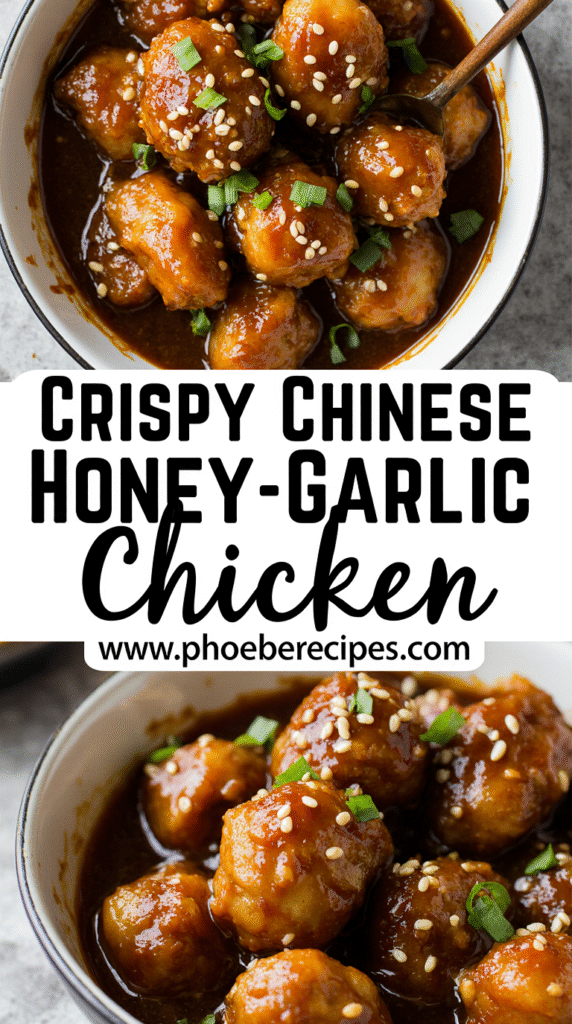
The Secret to Perfect Chinese Honey Garlic Chicken (Stays Crispy for Hours!)
Have you ever craved crispy honey garlic chicken Chinese takeout, only to find it disappointingly soggy by the time you get home? I’ve been there too. The good news is that with a few simple techniques, you can make restaurant-quality honey garlic chicken that stays crispy for hours, even after being tossed in sauce.
This crispy honey garlic chicken Chinese recipe is surprisingly quick to prepare. In fact, the entire dish comes together in just 20 minutes, taking less time to cook than it does to steam the rice that accompanies it. Furthermore, we’ll be using the traditional Chinese velveting technique to seal in the juices of the meat, resulting in tender, more flavorful chicken.
Throughout this guide, I’ll share all the secrets behind making perfect crispy honey garlic chicken that maintains its crunch factor long after cooking. From the cold batter method to double frying techniques, you’ll learn exactly how to achieve that satisfying crispiness that typically eludes home cooks. Additionally, with only about 10 minutes of actual frying time, this honey chicken Chinese food is perfect for a quick weeknight dinner or an impressive weekend fakeaway.
The key to long-lasting crispiness
Most of us have experienced the disappointment of biting into chicken that was once crispy but has turned soggy. Creating crispy honey garlic chicken Chinese food that stays crunchy, even after being coated in sauce, requires understanding some key culinary science.
Why most crispy chicken goes soggy
Moisture is the mortal enemy of crispiness. When you fry chicken, water from the meat escapes as steam and can get trapped between the crispy coating and the meat. This moisture then softens the coating, resulting in that disappointing soggy texture. Moreover, if your oil temperature drops below 340°F, the chicken absorbs more oil instead of repelling it, creating greasy, oil-logged chicken instead of crispy perfection.
Another common issue occurs when the coating contains too much water-based liquid. Traditional wheat flour can trap moisture that escapes during cooking, and when this moisture combines with the plant protein in the flour, its gluten develops, creating sogginess. Likewise, placing freshly fried chicken on paper towels presses moisture against the crust, causing steam to soften it.
The science behind cold batter and soda water
Cold batter creates a “shock effect” when it hits hot oil, resulting in a crispier chicken. The batter becomes cold by using refrigerated soda water and mixing it just before frying. This temperature contrast helps seal the exterior quickly, creating a protective barrier that prevents oil absorption.
Soda water serves another critical purpose – its carbonation creates tiny air bubbles in the batter, resulting in a lighter, airier texture. These bubbles expand during frying, creating microscopic pockets that make the coating crunchier and more resistant to moisture. Essentially, the colder your soda water, the crispier your honey garlic chicken Chinese dish will be.
Double frying: what it is and why it works
Double frying is a technique where chicken is fried twice – first at a lower temperature, then at a higher one after a rest period. During the first fry (about 90 seconds), the chicken is cooked through but not fully crisped. The brief rest period allows additional water to evaporate from the skin surface.
When the chicken returns to the oil for the second fry, the remaining moisture quickly evaporates, allowing the skin to brown and crisp rapidly before the meat overcooks. This method ensures your crispy honey garlic chicken maintains its crunch for significantly longer – up to 4 hours even after being tossed in sauce.
This technique also solves the batch-cooking cooling issue since you can crowd the pot during the second fry, ensuring all chicken pieces are hot and fresh simultaneously.
Building the perfect crispy coating
The perfect crispy coating is the cornerstone of authentic Chinese honey garlic chicken. Creating that satisfying crunch requires a specific combination of ingredients and techniques that work together to form a protective barrier around your chicken.
Choosing the right flour and starch ratio
The secret to a shatteringly crisp coating lies in the balance between flour and cornstarch. While flour provides structure, cornstarch creates lightness and crispiness because of its lower gluten content. The ideal ratio is 3:1 – about 225g of plain flour to 75g of cornstarch. This balance ensures your crispy honey garlic chicken has a coating thick enough to adhere well yet light enough to achieve that perfect golden crust.
Cornstarch serves a crucial function by preventing gluten development, which would otherwise make the coating dense and soggy. Although some recipes suggest using cornstarch alone, this isn’t ideal as cornstarch stays white when fried and becomes unworkably thick when used exclusively.
How to make a cold soda batter
To create the perfect batter, you’ll need cold soda water (not sparkling mineral water). The ratio should be roughly one part flour to one part soda water, resulting in a relatively runny consistency.
The carbonation in soda water releases small air pockets during frying that make the batter both lighter and crispier. Furthermore, the cold temperature creates that essential “shock effect” when hitting hot oil, forming an immediate crisp exterior.
Using baking powder for puffiness
Baking powder is the unsung hero of puffy, crispy coatings. It reacts with hot oil to create tiny air bubbles that increase the surface area of the coating. One tablespoon of baking powder for every 1½ cups of flour is sufficient to create that restaurant-quality texture.
The science behind this is fascinating – baking powder raises the skin’s pH levels, allowing proteins to break down more efficiently for better browning. Unlike baking soda, it won’t impart any metallic taste to your crispy honey garlic chicken.
Avoiding sogginess with no-water sauces
Traditional honey chicken sauces often contain water, which is kryptonite to crispiness. For honey garlic chicken Chinese food that stays crispy, eliminate water completely from your sauce.
Instead, use glucose or corn syrup which creates a “candy-like” coating that sits ON rather than soaks INTO the crust. These thickeners become thin when warm for easy tossing, yet thicken quickly as they cool, creating that sticky exterior coating that preserves crispiness for hours – even overnight in the refrigerator.
Marinating and prepping the chicken
Preparing the chicken properly is just as crucial as the coating when creating perfect crispy honey garlic chicken. The right techniques can make all the difference between mediocre and restaurant-quality results.
Velveting technique for tender meat
Velveting is a critical Chinese cooking technique that transforms ordinary chicken into silky, tender morsels. This method creates a protective layer around the meat, sealing in moisture and preventing overcooking in the hot wok or fryer. To velvet chicken:
- Slice your chicken into 1½- to 2-inch pieces, about ¼-inch thick, cutting across the grain
- Mix 2-3 tablespoons of water with soy sauce or oyster sauce and massage into the chicken
- Let sit for 5-10 minutes until liquid is absorbed
- Add cornstarch and vegetable oil, mixing until uniformly coated
- Allow to marinate for 15-20 minutes before cooking
For an alternative method, you can use ¾ teaspoon of baking soda per 250g/8oz of chicken breast, marinate for 20 minutes, then rinse thoroughly under running water.
Best cuts: thighs vs. breasts
For chinese honey garlic chicken, the cut you choose significantly impacts the final dish. Chicken thighs are generally more forgiving and flavorful than breasts. They contain more fat, making them juicier and less likely to dry out during cooking. Consequently, I don’t typically bother velveting thighs since they’re naturally tender.
Chicken breasts, however, are leaner and can easily become dry and tough. Accordingly, they benefit greatly from velveting. If using boneless, skinless chicken breasts for your crispy honey garlic chicken, the velveting process becomes even more important.
Both bone-in and boneless cuts work well, though boneless pieces cook faster. When using bone-in cuts, reduce searing time to three to four minutes and check internal temperature after 10 minutes of roasting.
How long to marinate for best results
For optimal results with honey garlic chicken chinese preparations, marinate your chicken for 1-4 hours in the refrigerator. This timeframe allows flavors to penetrate without breaking down the meat structure.
However, be cautious with acidic marinades containing citrus or vinegar—never exceed 1 hour as they can turn the chicken mushy and stringy. For non-acidic marinades, you can safely marinate up to 24 hours, though the USDA indicates 48 hours is technically safe.
Remember that even 15-30 minutes of marinating can impart flavor to smaller, thinner cuts. Finally, always marinate in the refrigerator, preferably on the bottom shelf to prevent cross-contamination.
Cooking and serving your honey garlic chicken
Now that your chicken is prepped, it’s time to transform it into that mouthwatering crispy honey garlic chicken that rivals any Chinese restaurant.
Step-by-step frying instructions
For perfect honey garlic chicken Chinese results, heat oil to 375°F in a Dutch oven (safer than a shallow skillet). Firstly, drop the battered chicken pieces in small batches, cooking for 3 minutes until light golden. Drain on a wire rack—never paper towels, as this traps moisture underneath. Allow the chicken to cool completely before the second fry.
Secondly, reheat oil to 350°F and fry again for 90 seconds. This double-fry technique specifically creates the shatteringly crisp coating that stays crunchy for hours even after saucing.
Making the sticky honey garlic sauce
Combine honey, soy sauce, a splash of rice vinegar, and minced garlic in a pan. Bring to a simmer for 3-5 minutes until it thickens to maple syrup consistency. The sauce should be thick enough to coat a spoon but still pourable. Remember—there’s no water in this sauce, which helps preserve crispiness.
Tossing without losing crispiness
Above all, timing is crucial! Wait until everyone is ready to eat before tossing chicken with sauce. For this purpose, work quickly and gently fold the chicken into the sauce rather than stirring vigorously. Alternatively, brush the sauce onto the chicken for maximum crispiness retention.
Serving ideas: rice, noodles, and sides
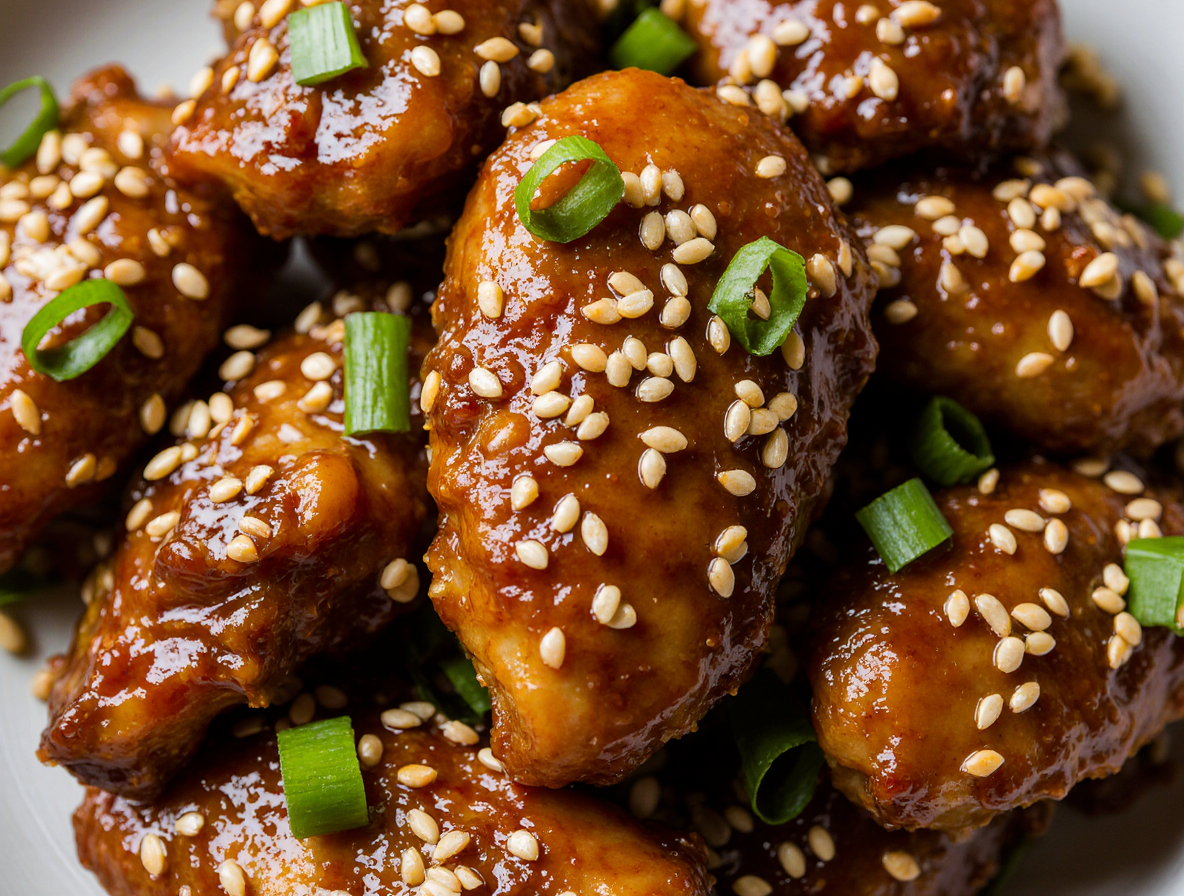
Crispy honey garlic chicken pairs beautifully with jasmine rice or rice noodles. For sides, consider quick-pickled cucumbers, blanched green beans, or stir-fried bok choy. Garnish with toasted sesame seeds and sliced green onions for authentic honey chicken Chinese food presentation.
Make-ahead and reheating tips
Undoubtedly, this dish can be prepared ahead. Store the fried chicken (unsauced) and sauce separately in the refrigerator for up to 3 days. To reheat, place chicken in a 350°F oven for 7-10 minutes, then increase to 400°F for 2-3 minutes to re-crisp. Heat sauce separately, then toss just before serving.
Conclusion
Making restaurant-quality crispy honey garlic chicken at home no longer needs to be a mystery. Throughout this guide, we’ve uncovered several game-changing techniques that ensure your chicken stays crispy for hours, even after being coated in that delicious sticky sauce.
The cold batter method, combined with soda water, creates that essential shock effect when hitting hot oil. Additionally, the double-frying technique gives you that professional-level crunch that lasts significantly longer than traditional methods. These approaches solve the age-old problem of soggy takeout chicken once and for all.
Remember that success lies in the details. The right flour-to-cornstarch ratio, properly velveted chicken, and water-free sauce all work together to create the perfect dish. Consequently, you’ll achieve results that not only rival your favorite Chinese restaurant but might actually surpass it.
Though this recipe requires some specific techniques, the actual cooking time remains surprisingly quick – just 20 minutes from start to finish. This makes our crispy honey garlic chicken perfect for busy weeknights when you crave something special without spending hours in the kitchen.
Why settle for disappointing takeout when you can master this dish at home? Give these techniques a try, and you’ll undoubtedly impress family and friends with chicken that stays remarkably crispy, tender on the inside, and coated with that perfect sticky-sweet honey garlic sauce. The days of soggy Chinese takeout are officially behind you!
FAQs
Q1. How can I keep my honey garlic chicken crispy for hours? The secret lies in using a cold soda water batter and double-frying technique. First, fry the chicken at a lower temperature, let it rest, then fry again at a higher temperature. This method ensures a crispy coating that can last up to 4 hours, even after being tossed in sauce.
Q2. What’s the ideal flour to cornstarch ratio for a crispy coating? The perfect ratio is 3:1 – use about 225g of plain flour to 75g of cornstarch. This combination provides structure from the flour and crispiness from the cornstarch, resulting in a golden, crunchy exterior.
Q3. Why is cold soda water important in the batter? Cold soda water creates a “shock effect” when it hits hot oil, quickly sealing the exterior. The carbonation also creates tiny air bubbles, resulting in a lighter, airier texture. The colder the soda water, the crispier your chicken will be.
Q4. How long should I marinate the chicken for best results? For optimal flavor, marinate your chicken for 1-4 hours in the refrigerator. This allows flavors to penetrate without breaking down the meat structure. However, even 15-30 minutes can impart flavor to smaller, thinner cuts.
Q5. Can I make honey garlic chicken ahead of time? Yes, you can prepare this dish in advance. Store the fried chicken (without sauce) and sauce separately in the refrigerator for up to 3 days. To reheat, place the chicken in a 350°F oven for 7-10 minutes, then increase to 400°F for 2-3 minutes to re-crisp. Heat the sauce separately and toss just before serving.