
The Secret to Perfect Chocolate Pancakes Recipe (Tested 50+ Times)
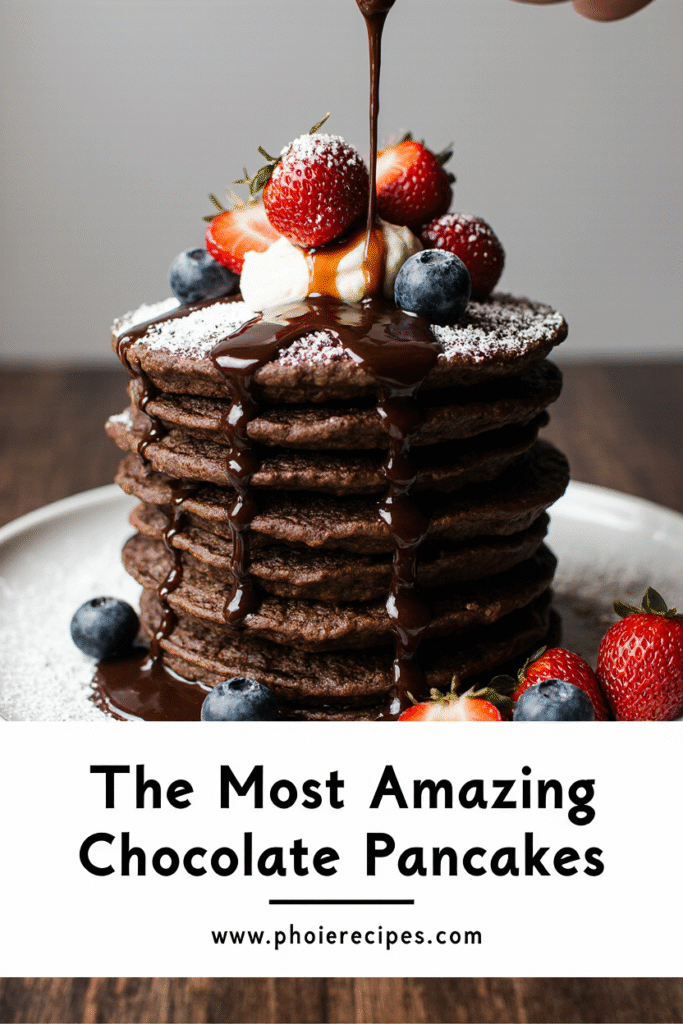
Chocolate pancakes recipe that tastes like chocolate cake but takes less than 30 minutes to make? Certainly, this has become our family’s favorite way to enjoy dessert for breakfast! After testing this recipe more than 50 times, I’ve perfected these indulgent pancakes that combine the comfort of breakfast with the decadence of dessert.
Initially, I thought making chocolate pancakes would be complicated, but with just a few pantry staples, you can create this easy chocolate pancake recipe that everyone will love. Whether you prefer using Dutch-processed cocoa powder or any unsweetened variety, these homemade chocolate pancakes deliver rich flavor in every bite. Additionally, adding chocolate chips takes these pancakes to another level of deliciousness, though they’re optional (but highly recommended). At 418 calories per serving with 17g fat, 59g carbs, and 12g protein, these pancakes are as nutritious as they are delicious.
In this guide, I’ll show you exactly how to make chocolate pancakes from scratch that stay fresh and moist for up to 2 days. I’ll also share my best tips for perfecting your pancake game and suggest exciting toppings to elevate your breakfast experience.
Choosing the right ingredients for chocolate pancakes
The perfect chocolate pancakes begin with selecting top-quality ingredients. Let’s explore what makes these morning treats truly special.
Cocoa powder vs melted chocolate
Most chocolate pancake recipes call for cocoa powder rather than melted chocolate—and for good reason. Cocoa powder creates lighter, fluffier pancakes since melted chocolate would weigh them down. When choosing cocoa powder, Dutch-processed varieties offer a smoother, more refined flavor profile, while regular unsweetened cocoa works perfectly well. Red cocoa powder provides an especially deep color and rich taste. Importantly, some recipes specifically recommend against using Dutch cocoa powder, so consider your desired flavor intensity when choosing.
Why flour type matters
While all-purpose flour remains the go-to option for most chocolate pancake recipes, your choice of flour significantly impacts texture and taste. For a healthier twist, whole wheat or oat flour can substitute nicely. The protein content in different flours affects how your pancakes rise and hold together. For those seeking a gluten-free alternative, some recipes effectively use ground oatmeal as a substitute. Regardless of which flour you choose, remember that proper measuring is crucial for achieving the right batter consistency.
The role of eggs and milk
Eggs provide essential binding and richness to chocolate pancakes. Most recipes call for one or two large eggs, preferably at room temperature. If you’re avoiding eggs, alternatives include mashed banana, applesauce, or a flaxseed mixture. For milk, whole or 2% varieties deliver the best results. Some recipes specifically call for buttermilk, which adds tanginess and helps activate leavening agents. The milk-to-flour ratio ultimately determines how thick your pancakes will be.
Optional add-ins: chocolate chips, vanilla, espresso
Taking your chocolate pancakes from good to exceptional happens with thoughtful add-ins. Chocolate chips create pockets of melted goodness—semi-sweet chips offer balanced sweetness, milk chocolate chips provide extra sweetness, while dark chocolate adds a bittersweet flavor. Vanilla extract (typically ½-1½ teaspoons) enhances chocolate’s depth. For coffee lovers, adding 1-2 tablespoons of espresso or 1 tablespoon of instant espresso powder creates a sophisticated mocha flavor. These additions transform basic chocolate pancakes into a truly memorable breakfast experience.
Step-by-step guide: how to make chocolate pancakes
Now that we’ve gathered our ingredients, it’s time to create your delicious chocolate pancakes recipe from scratch. Follow these steps carefully for perfect results every time.
1. Mix dry ingredients
Begin by sifting together your flour, cocoa powder, sugar, baking powder, salt, and baking soda (if using) in a large bowl. For best results, use a fine-mesh strainer to ensure no lumps remain. This step aerates the mixture, creating lighter pancakes. Some recipes recommend using a fork to evenly distribute the ingredients after sifting. This combination of dry ingredients forms the foundation of your homemade chocolate pancakes.
2. Combine wet ingredients
In a separate bowl, whisk together your milk, eggs, and vanilla extract until well combined. Several recipes suggest whisking until you see bubbles forming on the surface. Next, stir in your melted butter. For enhanced chocolate flavor, some recipes recommend mixing hot water with cocoa powder first. Room temperature ingredients blend more effectively and prevent lumps in your chocolate pancake batter.
3. Fold together gently
Create a well in the center of your dry ingredients, then pour your wet mixture into it. Using a rubber spatula or wooden spoon, fold the ingredients together with slow, gentle motions. Do not overmix – this is crucial! Stop when the batter is just combined and still contains small lumps. Overmixing activates too much gluten, resulting in tough, flat pancakes. If adding chocolate chips, fold them in at this point when the batter is about 50% combined.
4. Let the batter rest
Allow your batter to rest for 5-30 minutes before cooking. This essential step gives flour time to fully hydrate and dissolve any remaining lumps. Furthermore, resting allows leavening agents to distribute evenly throughout the batter. You’ll notice the batter thickening slightly during this period. Consequently, your pancakes will rise better and develop a more tender texture. Don’t rest longer than an hour, as leavening agents may lose their effectiveness.
5. Cook on medium heat
Heat a non-stick pan or griddle over medium heat. Lightly grease with butter or cooking oil. Pour approximately 1/4 cup of batter per pancake onto the hot surface. Cook until bubbles form on the surface and the edges begin to set (about 2-3 minutes). Flip once and cook the other side for approximately one minute until golden brown. The first pancake often serves as your test pancake, helping you adjust heat as needed.
Common mistakes and how to avoid them
Even after mastering the basics of how to make chocolate pancakes, several common pitfalls can turn your breakfast masterpiece into a disappointing dish. Let’s examine these mistakes and learn how to avoid them.
Overmixing the batter
Perhaps the most frequent mistake in pancake preparation is overmixing. When you vigorously stir your chocolate pancake batter, you develop gluten, which results in tough, flat disappointments instead of light, fluffy treats. Overmixing also deflates the air bubbles created by leavening agents, further reducing fluffiness.
In testing, pancakes from batter mixed for just 10 strokes were noticeably taller than those mixed for 2 minutes. Remember that small lumps in your batter are actually desirable—they’ll disappear during cooking without affecting the final product. Mix just until the ingredients are combined, resisting the urge to break up all the small lumps.
Using cold ingredients
For truly exceptional homemade chocolate pancakes, ingredient temperature matters significantly. Room-temperature eggs and milk make fluffier pancakes because they emulsify and trap air better than cold ingredients. This leads to a lighter texture in your final chocolate pancakes recipe.
Forgot to take your eggs out ahead of time? Here’s a quick tip: soak them in hot water for about 5 minutes before adding them to your recipe. Moreover, room temperature ingredients blend more effectively and prevent lumps, creating a more consistent batter.
Cooking on high heat
Finding the perfect temperature is crucial when making chocolate pancakes from scratch. Medium heat (about 325°F) represents the sweet spot. High heat causes two problems: the leavening activates too quickly, and the bottoms burn before the middles cook properly.
Conversely, cooking at too low a temperature prevents the baking powder from activating effectively, resulting in pancakes that won’t rise. Your first pancake often serves as a useful “test pancake” to help adjust your heat level appropriately.
Not greasing the pan properly
Even with a non-stick pan, proper greasing remains essential for perfect chocolate pancakes. Surprisingly, vegetable oil produces more evenly golden pancakes than butter, which can cause over-browning due to its milk solids.
Apply oil to your preheated pan immediately before adding the batter. As you make multiple batches, wipe out excess grease between rounds with a paper towel and add a fresh coating for each new set. Following this method ensures your easy chocolate pancake recipe turns out beautifully golden every time.
Toppings and serving ideas to elevate your pancakes
What’s a stack of freshly made chocolate pancakes without the perfect toppings? After mastering the perfect chocolate pancakes recipe, it’s time to explore delicious ways to serve them. These finishing touches can transform your breakfast into an unforgettable experience.
Chocolate ganache or syrup
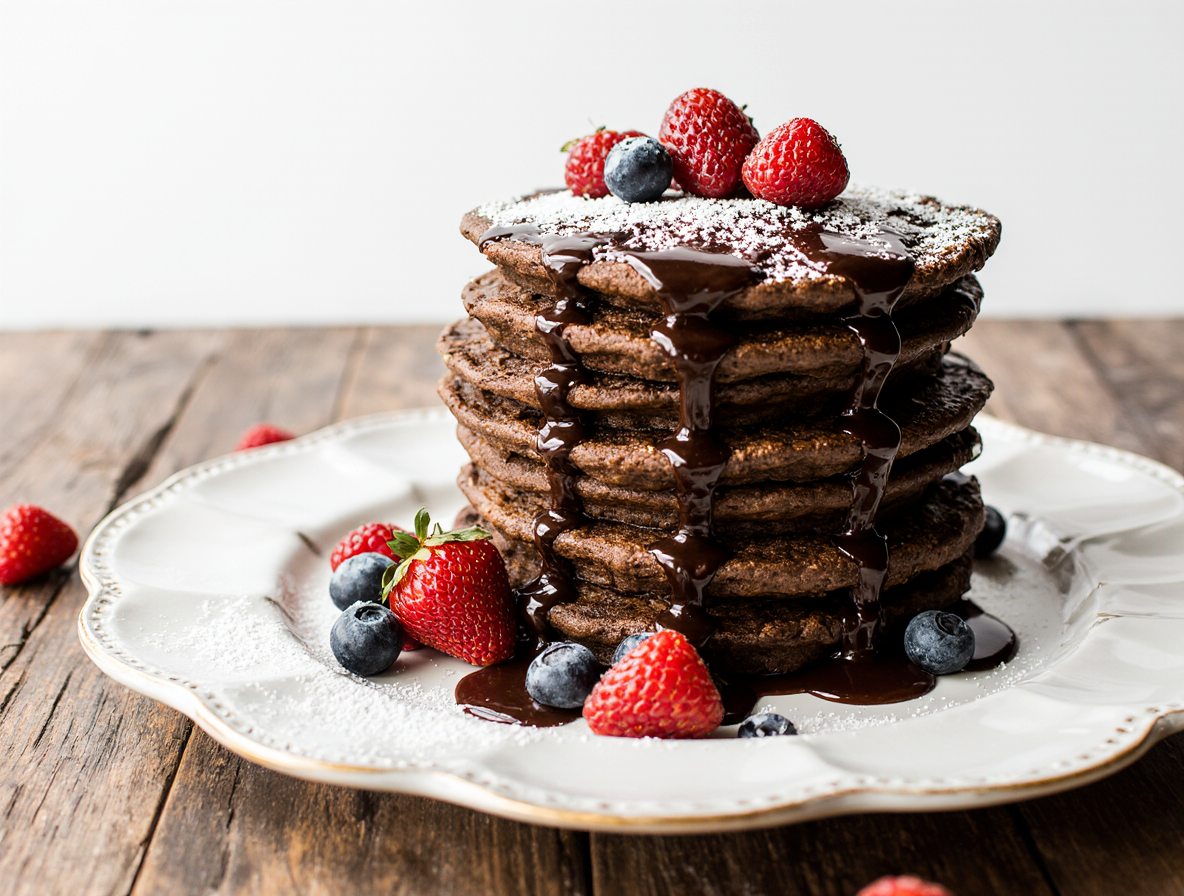
Nothing complements chocolate pancakes like more chocolate! A luxurious chocolate ganache made with just two ingredients—chocolate and heavy cream—creates a decadent topping that elevates homemade chocolate pancakes. For a lighter option, try making chocolate syrup by combining cocoa powder, sugar, water, and vanilla extract. This homemade version tastes significantly better than store-bought alternatives and thickens beautifully once chilled. Some recipes suggest adding a pinch of cinnamon or a few drops of espresso powder to enhance the chocolate flavor without overpowering it.
Fresh berries and whipped cream
Fresh berries provide a perfect contrast to the rich chocolate flavor. Strawberries are particularly popular, adding both vibrant color and natural sweetness. For an impressive presentation, pile your chocolate pancakes high and top with a generous dollop of whipped cream alongside juicy berries. Feeling creative? Try making blueberry whipped cream by incorporating mascarpone for a richer texture. This combination works wonderfully as a standalone topping or paired with a light drizzle of maple syrup.
Nutella or peanut butter
Hazelnut spread takes chocolate pancakes to new heights of indulgence. Serve with a small bowl of Nutella alongside your pancake stack, allowing everyone to add their preferred amount. For peanut butter lovers, warming it in the microwave for 30-40 seconds creates a pourable consistency perfect for drizzling. The combination of chocolate and peanut butter offers a classic flavor pairing that’s hard to resist—especially when topped with additional chocolate chips or a sprinkle of chopped peanuts.
Ice cream for a dessert twist
Transform your breakfast into dessert by topping warm chocolate pancakes with a scoop of vanilla ice cream. This unexpected combination works beautifully for special occasions or “breakfast for dinner” nights. Serve alongside complementary sides like fresh fruit, crispy bacon, or sausage for a sweet-savory contrast. For an extra-special presentation, try adding mini chocolate chips, sliced bananas, or a drizzle of chocolate syrup over the ice cream.
Conclusion
Chocolate pancakes certainly deserve a special place in your breakfast repertoire. Throughout this guide, we’ve explored everything from selecting quality ingredients to mastering the perfect cooking technique. After testing this recipe more than 50 times, I can confidently say these pancakes strike the perfect balance between breakfast comfort and dessert indulgence.
Remember, your choice of cocoa powder significantly affects the final flavor profile. Likewise, paying attention to proper mixing techniques prevents those disappointing, flat pancakes many home cooks struggle with. The secret truly lies in gentle folding and allowing your batter to rest before cooking.
Perhaps most importantly, those small details make all the difference – room temperature ingredients, medium heat cooking, and proper pan greasing all contribute to pancake perfection. These techniques might seem minor, but together they create chocolate pancakes that rise beautifully and develop that ideal texture.
Once you’ve mastered the basic recipe, you can experiment with different toppings depending on the occasion. Fresh berries and whipped cream offer a lighter option for everyday breakfasts, while chocolate ganache transforms these pancakes into a celebration-worthy treat. Alternatively, a scoop of vanilla ice cream turns them into an unforgettable dessert.
These homemade chocolate pancakes have become a weekend tradition in my family, bringing everyone to the table with smiles. The recipe remains forgiving enough for beginners yet produces results that will impress even the most discerning breakfast enthusiasts. Give these chocolate pancakes a try – they might just become your new favorite way to start the day!
FAQs
Q1. How can I make my chocolate pancakes fluffier? To achieve fluffier chocolate pancakes, avoid overmixing the batter, use room temperature ingredients, and let the batter rest for 5-30 minutes before cooking. Also, ensure you’re cooking on medium heat to allow proper rising.
Q2. What’s the best type of cocoa powder to use for chocolate pancakes? Dutch-processed cocoa powder offers a smoother, more refined flavor for chocolate pancakes. However, regular unsweetened cocoa powder works well too. Choose based on your desired flavor intensity.
Q3. Can I make chocolate pancakes without eggs? Yes, you can make eggless chocolate pancakes by substituting eggs with mashed banana, applesauce, or a flaxseed mixture. These alternatives provide the necessary binding properties for the pancake batter.
Q4. What are some delicious toppings for chocolate pancakes? Popular toppings for chocolate pancakes include chocolate ganache or syrup, fresh berries with whipped cream, Nutella or peanut butter, and even a scoop of ice cream for a dessert-like twist.
Q5. How long can I store leftover chocolate pancakes? Leftover chocolate pancakes can stay fresh and moist for up to 2 days when stored properly. Make sure they’re completely cooled before storing in an airtight container in the refrigerator.