
Why This No-Bake Strawberry Crunch Cheesecake Never Fails
Strawberry crunch cheesecake brings back those nostalgic ice cream bar memories while delivering a dessert that’s ridiculously delicious and decadent. I’ve perfected this no-bake version that’s become my go-to for everything from casual family dinners to holiday gatherings.
What makes this no-bake strawberry crunch cheesecake special? First, you can create it without ever turning on your oven. Additionally, the filling offers a creamy, lemony base with an intense strawberry flavor, enhanced by freeze-dried strawberries. The strawberry crunch recipe itself requires just three simple ingredients, making it incredibly approachable even for beginner bakers.
Whether you prefer to serve it in cones, jars, or as traditional cheesecake slices, this versatile dessert yields about 18 servings. The best part? You can prepare it ahead of time—it needs at least 4 hours to chill, but overnight chilling delivers the perfect texture. Throughout this guide, I’ll show you exactly how to make strawberry crunch cheesecake that impresses every time, with easy-to-follow steps that never fail.
What Makes This No-Bake Strawberry Crunch Cheesecake So Special
The magic of this strawberry crunch cheesecake lies in its perfect combination of simplicity and wow-factor. Unlike many desserts that require precise temperatures and timing, this recipe delivers exceptional results with minimal effort. Let me show you exactly what makes it stand out from other desserts.
No oven required
During sweltering summer days, the last thing I want is to heat up my kitchen with a hot oven. Fortunately, this no-bake strawberry crunch cheesecake completely eliminates that problem. You can create this impressive dessert without generating extra heat in your home. Instead of baking, the refrigerator does all the work—transforming the mixture into a firm, sliceable cheesecake that’s perfect for hot weather gatherings.
Moreover, skipping the oven means no worrying about water baths, cracked tops, or under-baking issues that often plague traditional cheesecakes. This makes the recipe remarkably forgiving, especially for those new to cheesecake-making. Simply mix, pour, and chill—no baking expertise needed.
Perfect texture every time
The secret to this cheesecake’s foolproof texture lies in two critical techniques. First, whipping heavy cream into stiff peaks before gently folding it into the cream cheese mixture creates that ideal airy-yet-stable consistency. Second, allowing proper refrigeration time (at least 6 hours, preferably overnight) ensures the filling sets to the perfect firmness.
Furthermore, freeze-dried strawberries play a crucial role in achieving consistent results. Unlike fresh berries or jam that add unwanted moisture, freeze-dried strawberries provide concentrated flavor without compromising the cheesecake’s stability. This results in a texture that’s simultaneously light and rich—velvety smooth when you take a bite.
Nostalgic strawberry crunch flavor
The true star of this dessert is undoubtedly its flavor profile that instantly transports you back to childhood. The crunchy topping—a simple yet brilliant combination of vanilla wafers, freeze-dried strawberries, and melted butter—recreates that iconic strawberry shortcake ice cream bar experience we all remember.
What makes this flavor combination truly special is how it balances nostalgia with sophistication. The freeze-dried strawberries deliver bright, authentic strawberry flavor rather than the artificial sweetness found in many strawberry desserts. This creates a treat that satisfies both your inner child and your adult palate—familiar enough to trigger happy memories yet refined enough for any special occasion.
Indeed, the contrast between the creamy cheesecake filling and the buttery, crunchy topping creates a multi-dimensional dessert experience that keeps you coming back for “just one more bite” every time.
Ingredients You’ll Need for Success
Gathering the right ingredients is the foundation of a foolproof strawberry crunch cheesecake. Each component plays a specific role in creating that perfect balance of creamy, crunchy, and sweet without ever needing to turn on your oven.
Golden Oreos or graham crackers
The crust forms the essential base of your no-bake strawberry crunch cheesecake. Golden Oreos create a sweeter, vanilla-forward foundation that complements the strawberry flavors beautifully. Specifically, you’ll want to pulse them into fine crumbs and combine with melted butter until the mixture resembles wet sand. Alternatively, graham crackers offer a more traditional, slightly less sweet option that still provides the necessary structure. Either choice creates that satisfying crunch when you cut through the cheesecake with your fork.
Full-fat cream cheese
Never compromise on this ingredient! Full-fat cream cheese provides the rich, velvety texture that defines a proper cheesecake. Certainly, light versions exist, but they contain more water and stabilizers that can prevent your cheesecake from setting properly. For best results, allow the cream cheese to reach room temperature before mixing—this prevents those frustrating lumps that can ruin your smooth filling. The slight tanginess of cream cheese also balances the sweetness from other ingredients.
Freeze-dried strawberries or strawberry gelatin
This ingredient delivers that distinctive strawberry crunch flavor. Freeze-dried strawberries offer pure, concentrated berry flavor without adding unwanted moisture. Grind them into powder for the filling and leave some chunkier for the topping. Meanwhile, strawberry gelatin (like Jell-O) provides both color and flavor if freeze-dried berries aren’t available. The gelatin also helps stabilize the no-bake filling, ensuring it sets perfectly in the refrigerator.
Heavy whipping cream
Essential for creating the light, mousse-like texture, heavy whipping cream transforms this dessert from dense to delightful. Chilled cream whips into stable peaks that, when folded into the cream cheese mixture, provide structure without density. Naturally, this ingredient must contain at least 36% milk fat to whip properly and maintain its volume throughout the setting process.
Fresh strawberries for topping
Fresh berries provide the perfect finishing touch, adding brightness to both the appearance and flavor. Choose ripe, fragrant strawberries with vibrant red color throughout. Notably, slicing them just before serving prevents them from releasing excess moisture onto your perfectly set cheesecake.
Step-by-Step: How to Make Strawberry Crunch Cheesecake
Let me walk you through the exact steps I follow to create this crowd-pleasing dessert every single time. Though it might seem complex, making this no-bake strawberry crunch cheesecake is actually quite straightforward once you break it down.
1. Make the crust and chill it
First, prepare your springform pan by lining it with parchment paper or spraying it lightly with cooking spray. Next, crush your Golden Oreos or graham crackers in a food processor until they become fine crumbs. Alternatively, place them in a ziplock bag and crush with a rolling pin. Then combine the crumbs with melted butter until the mixture resembles wet sand and is well saturated.
Press this mixture firmly into the bottom of your springform pan, creating an even layer. For extra stability, press about one inch up the sides of the pan as well. Subsequently, place the crust in the freezer while you prepare the filling. This chilling step is crucial as it helps the crust solidify without baking.
2. Whip the cream and prepare the filling
In a large bowl, beat your softened cream cheese with powdered sugar, vanilla extract, and a touch of lemon juice until completely smooth. The lemon juice adds that classic cheesecake tanginess. Be sure to scrape down the sides of the bowl as needed.
In a separate bowl, whip the heavy cream until stiff peaks form – the cream should stand straight up when you lift the beater. Accordingly, this whipped cream provides the structure that allows our cheesecake to set properly without baking.
Gently fold the whipped cream into your cream cheese mixture, taking care not to deflate the air you’ve incorporated. This folding technique, rather than mixing, maintains the light, airy texture.
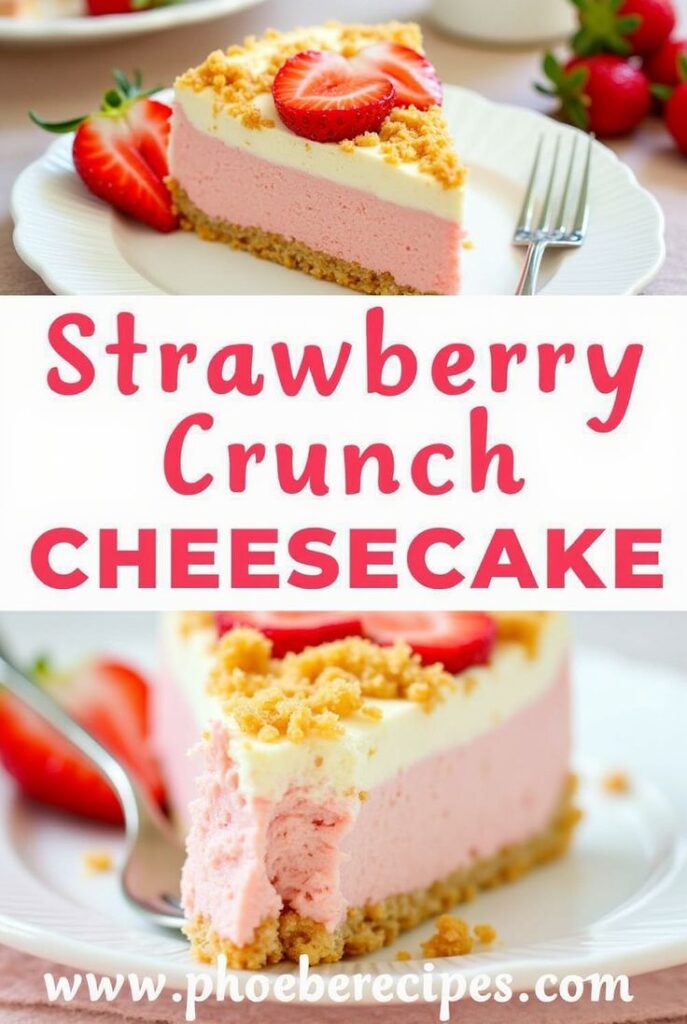
3. Create two-tone layers (vanilla and strawberry)
Once your base mixture is ready, divide it evenly between two bowls. For the strawberry layer, dissolve strawberry gelatin in hot water or fold in strawberry puree. Afterward, pour the vanilla layer into your prepared crust first, smoothing it into an even layer.
Following that, carefully add the strawberry layer on top, creating a beautiful two-tone effect. Use a spatula to smooth the surface. The contrast between these layers makes each slice visually stunning.
4. Let it set in the fridge overnight
Cover your cheesecake with plastic wrap and refrigerate for at least 4-6 hours, though overnight is ideal. Even more importantly, proper chilling time ensures your cheesecake sets completely. The filling needs this time to firm up enough for clean slices.
You’ll know it’s ready when the top appears slightly firm and glossy to the touch. Attempting to serve it too early will result in a runny center that doesn’t hold its shape. Therefore, patience truly pays off with this no-bake strawberry crunch cheesecake.
Topping, Serving, and Storing Tips
The crowning glory of any strawberry crunch cheesecake is its signature topping and presentation. Once you’ve mastered the basic recipe, these finishing touches will elevate your dessert from homemade to professional-looking.
How to make the strawberry crunch topping
For that nostalgic strawberry crunch, you’ll need three simple ingredients:
- Golden Oreos or vanilla shortbread cookies, crushed
- Freeze-dried strawberries (or strawberry gelatin as an alternative)
- Melted butter
Simply combine the crushed cookies with the freeze-dried strawberries and mix in melted butter until everything sticks together. As soon as the cheesecake is set, sprinkle this mixture generously over the top. For an authentic taste, consider adding a drop of strawberry emulsion or extract to the crumbles.
Decorating with whipped cream and berries
To create an eye-catching presentation, pipe whipped cream around the edge of your cheesecake and place halved fresh strawberries on every second swirl. Likewise, you can spread softly whipped cream across the entire surface, creating beautiful swirls before scattering mixed berries on top. In addition, a light dusting of powdered sugar adds an elegant finishing touch.
How to store leftovers for best texture
Cover your strawberry crunch cheesecake tightly with plastic wrap or place it in an airtight container in the refrigerator for up to 5 days. Nevertheless, for optimal freshness, I recommend consuming it within 3 days since the crust tends to soften after the fourth day. In case you’ve already sliced the cheesecake, store individual pieces in a container with parchment paper between layers to prevent sticking.
Make-ahead tips for parties
In fact, this no-bake strawberry crunch cheesecake is perfect for advance preparation. You can make the entire cheesecake up to two days before your event. For best results, prepare the crust and filling, let it set, yet wait to add the crunch topping until shortly before serving to maintain its texture. Given that the crunch topping can be made separately and stored in an airtight container for up to a week, your party prep becomes remarkably stress-free.
Conclusion
Ultimately, this no-bake strawberry crunch cheesecake stands as my most reliable dessert for any occasion. This recipe shines because of its perfect balance of simplicity and impressive results. Most importantly, you’ll never worry about dry or cracked cheesecake tops since the refrigerator does all the work instead of the oven.
The combination of creamy cheesecake filling and crunchy strawberry topping creates that nostalgic ice cream bar experience we all remember from childhood. My guests always ask for the recipe afterward, surprised at how something so delicious requires so few ingredients and steps.
Freeze-dried strawberries undoubtedly make the difference here, delivering concentrated flavor without excess moisture that could ruin the texture. Though preparation requires some patience during the chilling process, the actual hands-on time remains minimal compared to traditional baked desserts.
You might find yourself making this cheesecake repeatedly once you see how consistently it turns out. The make-ahead potential additionally makes it perfect for entertaining, allowing you to focus on your guests rather than last-minute dessert prep.
Give this no-bake strawberry crunch cheesecake a try the next time you need a foolproof dessert. Your family and friends will certainly think you spent hours in the kitchen, while you’ll appreciate how effortlessly it comes together every single time.
FAQs
Q1. How long does this no-bake strawberry crunch cheesecake need to chill? For the best results, chill the cheesecake for at least 4-6 hours, but preferably overnight. This allows the filling to set properly and achieve the perfect texture.
Q2. Can I use fresh strawberries instead of freeze-dried ones in the filling? It’s best to use freeze-dried strawberries or strawberry gelatin in the filling. Fresh strawberries can add too much moisture, potentially preventing the cheesecake from setting properly.
Q3. Why is full-fat cream cheese important for this recipe? Full-fat cream cheese provides the rich, velvety texture essential for a proper cheesecake. It also contains less water than low-fat versions, ensuring your cheesecake sets correctly.
Q4. How can I prevent my no-bake cheesecake from being too runny? To avoid a runny cheesecake, ensure all ingredients are at the correct temperature (cream cheese should be room temperature), don’t overmix the batter, and allow sufficient chilling time in the refrigerator.
Q5. How long can I store this no-bake strawberry crunch cheesecake? You can store the cheesecake in an airtight container in the refrigerator for up to 5 days. However, for the best taste and texture, it’s recommended to consume it within 3 days.